Run Vantage Express on VirtualBox
You can now get a hosted instance of Vantage for free at https://clearscape.teradata.com.
Overview
This how-to shows how to gain access to a Teradata database by running it on your local machine. Once you finish the steps you will have a working Teradata Vantage Express database on your computer.
Starting with version 17.20, Vantage Express includes the following analytics packages: Vantage Analytics Library, Bring Your Own Model (BYOM), API Integration with AWS SageMaker.
Prerequisites
-
A computer using one of the following operating systems: Windows 10, Linux or Intel-based MacOS.
RemarqueFor M1/M2 MacOS systems, see Run Vantage Express on UTM.
-
30GB of disk space and enough CPU and RAM to be able to dedicate at least one core and 6GB RAM to the virtual machine.
-
Admin rights to be able to install and run the software.
Installation
Download required software
-
The latest version of Vantage Express VirtualBox Open Virtual Appliance (OVA).
RemarqueIf you have not used the Teradata Downloads website before, you will need to register first.
-
VirtualBox, version 6.1.
RemarqueYou can also install VirtualBox using
brewand other package managers.
Run installers
-
Install VirtualBox by running the installer and accepting the default values.
RemarqueVirtualBox includes functionality that requires elevated privileges. When you start VirtualBox for the first time, you will be asked to confirm this elevated access. You may also need to reboot your machine to activate the VirtualBox kernel plugin.
Run Vantage Express
-
Start VirtualBox.
-
Go to
File -> Import Appliance...menu. -
In
Filefield, select the downloaded OVA file. -
On the next screen, accept the defaults and click on
Import. -
Back in the main VirtualBox panel, start the Vantage Express appliance double clicking on VM
Vantage 17.20.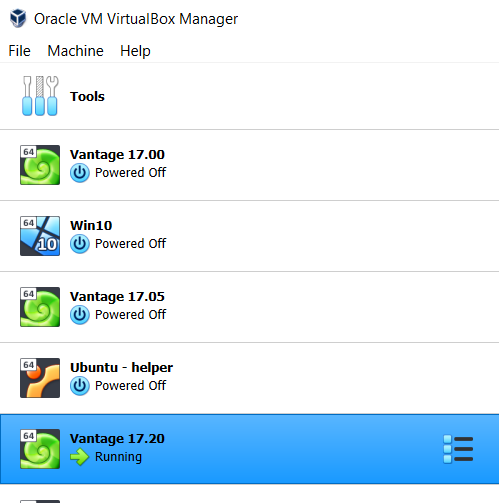
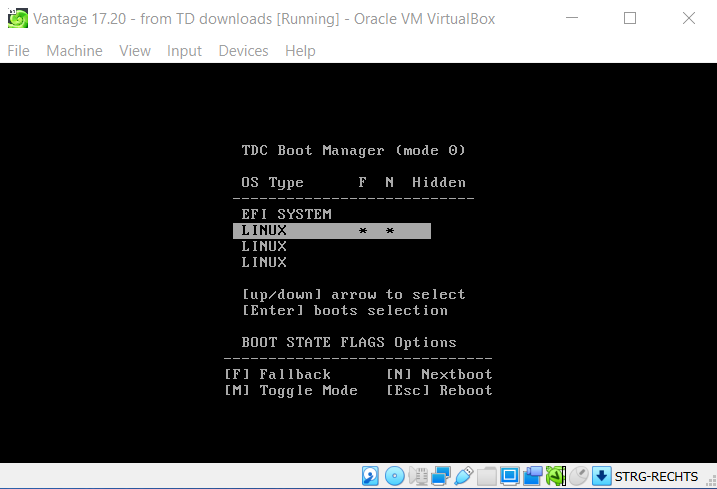
- Press [ENTER] to select the highlighted
LINUXboot partition.
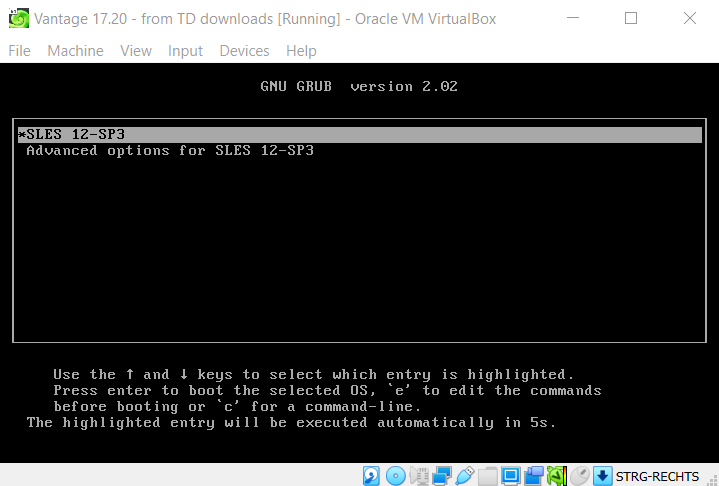
- On the next screen, press ENTER again to select the default SUSE Linux kernel.
- After completing the bootup sequence a terminal login prompt as shown in the screenshot below will appear. Don't enter anything in the terminal. Wait till the system starts the GUI.

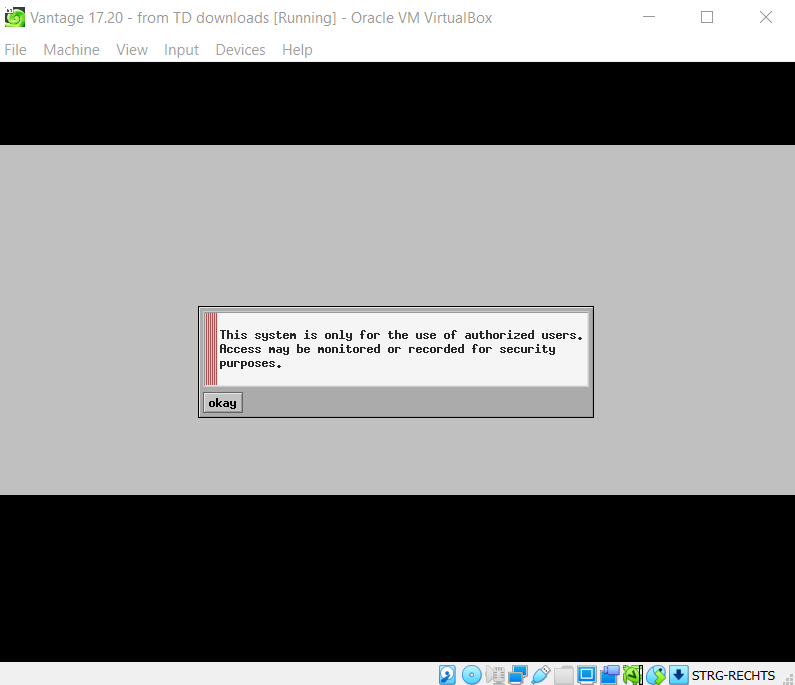
- After a while the following prompt will appear - assuming that you did not enter anything after the command login prompt above. Press
okaybutton in the screen below.
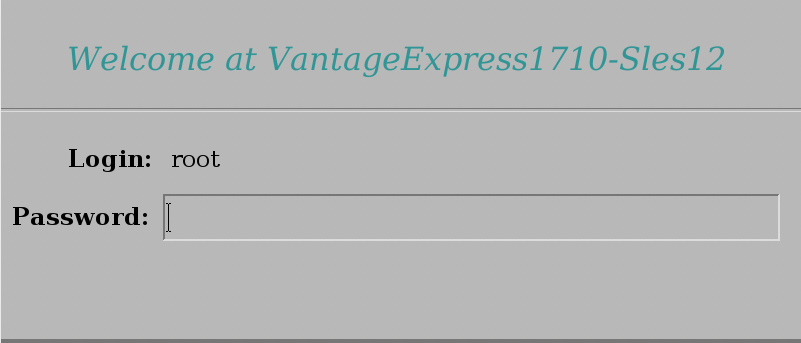
- Once the VM is up, you will see its desktop environment. When prompted for username/password enter
rootfor both.
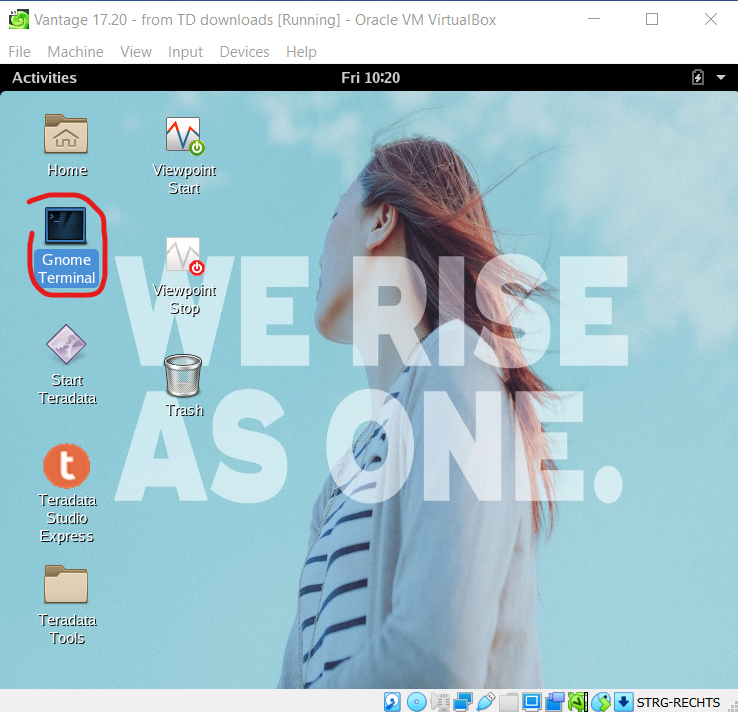
- The database is configured to autostart with the VM. To confirm that the database has started go to the virtual desktop and start
Gnome Terminal.
- In the terminal execute
pdestatecommand that will inform you if Vantage has already started:
To paste into Gnome Terminal press SHIFT+CTRL+V.
You want to wait till you see the following message:
See examples of messages that pdestate returns when the database is still initializing.
PDE state is DOWN/HARDSTOP.
PDE state is START/NETCONFIG.
PDE state is START/GDOSYNC.
PDE state is START/TVSASTART.
PDE state is START/READY. PDE state is RUN/STARTED.
DBS state is 1/1: DBS Startup - Initializing DBS Vprocs PDE state is RUN/STARTED.
DBS state is 1/5: DBS Startup - Voting for Transaction Recovery PDE state is RUN/STARTED.
DBS state is 1/4: DBS Startup - Starting PE Partitions PDE state is RUN/STARTED.
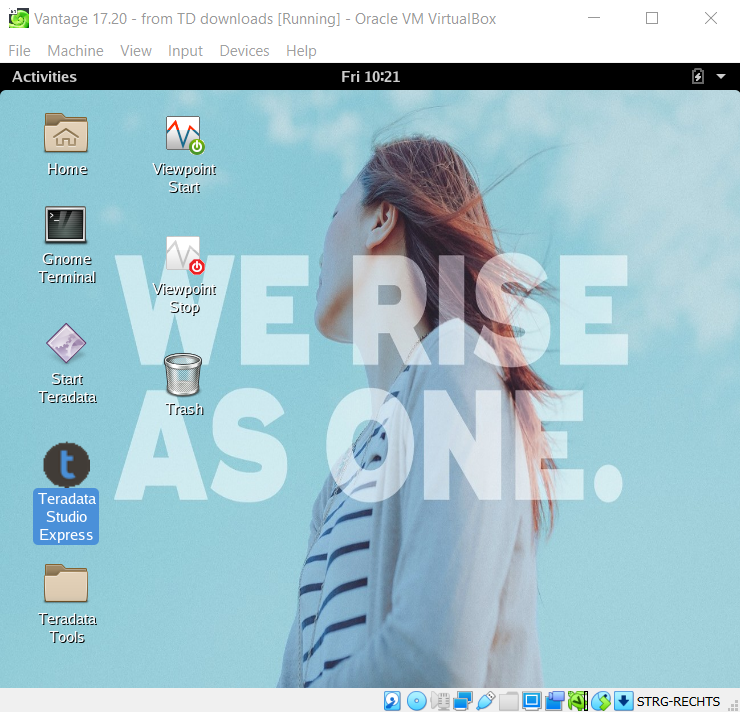
- Now that the database is up, go back to the virtual desktop and launch
Teradata Studio Express
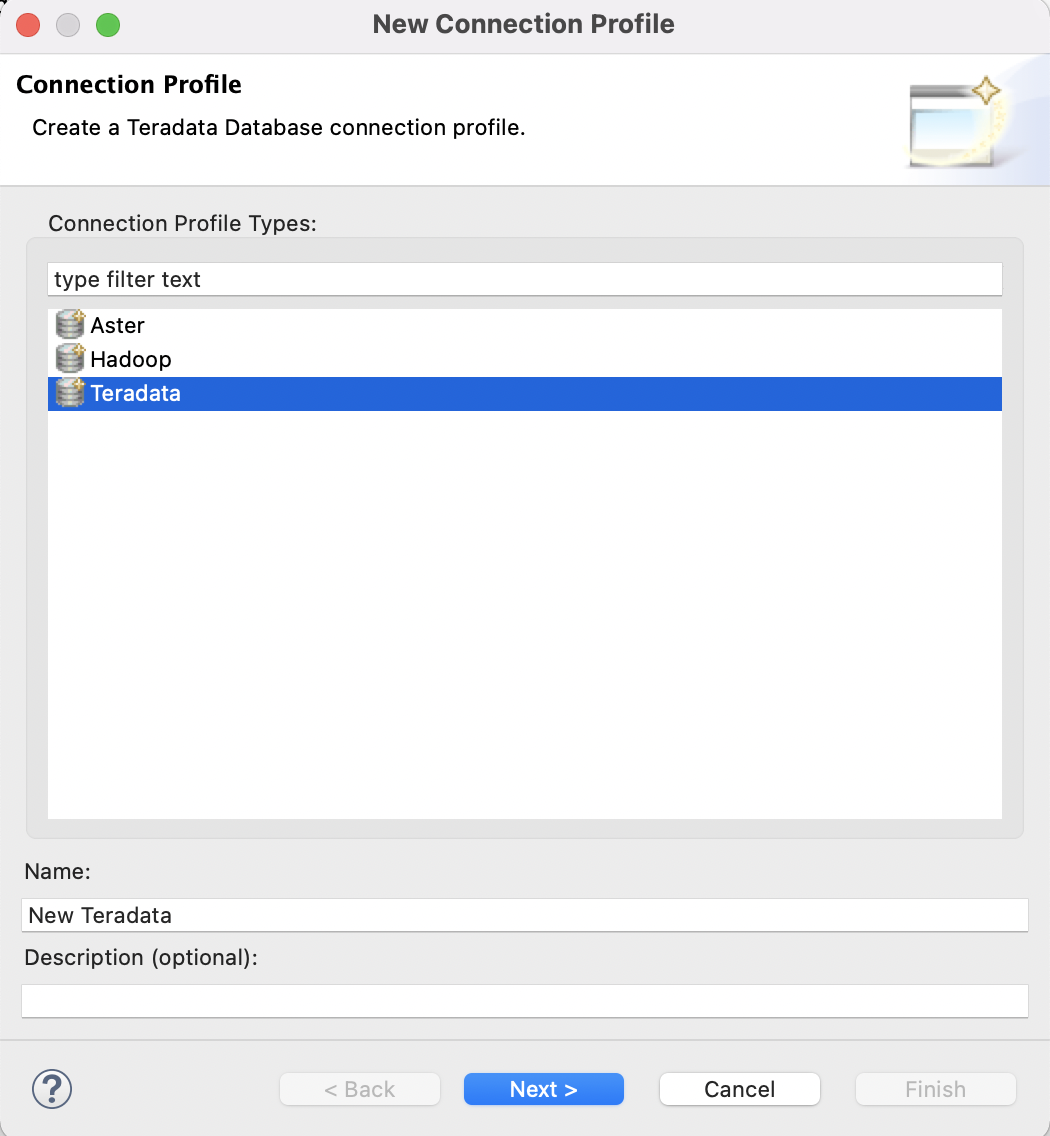
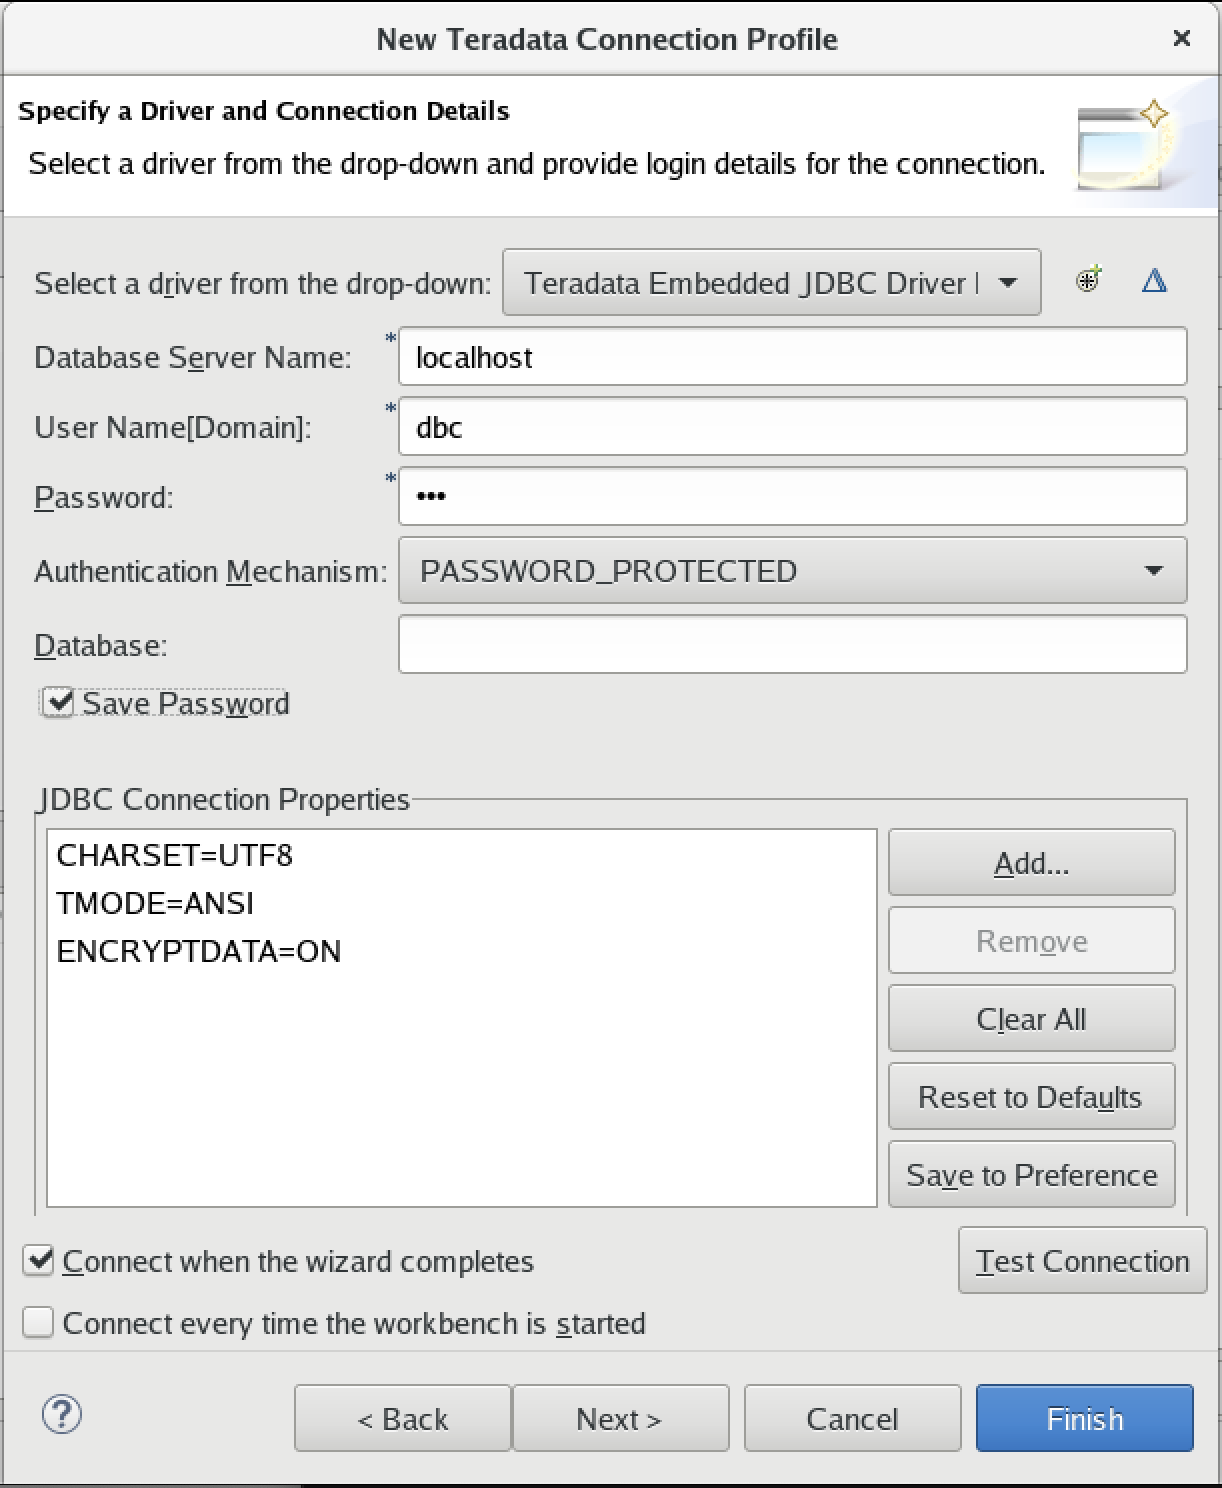
- When you first start it you will be offered a tour. Once you close the tour, you will see a wizard window to add a new connection. Select
Teradata:
- On the next screen, connect to the database on your localhost using
dbcfor the username and password:
Run sample queries
- We will now run some queries in the VM. To avoid copy/paste issues between the host and the VM, we will open this quick start in the VM. Go to the virtual desktop, start Firefox and point it to this quick start.
- Once in Teradata Studio Express, go to
Query Developmentperspective (go to the top menu and selectWindow->Query Development). - Connect using the previously created connection profile by double-clicking on
Database Connections->New Teradata. - Using
dbcuser, we will create a new database calledHR. Copy/paste this query and run it by hitting the run query button ( ) or pressing [F5] key:
- Let’s create a sample table and insert some data and query it. We will first create a table to hold employee information:
- Now, let's insert a record:
- Finally, let's see if we can retrieve the data:
You should get the following results:
Updating VirtualBox Guest Extensions
VirtualBox Guest Extensions is a piece of software that runs in a VM. It makes the VM run faster on VirtualBox. It also improves the resolution of the VM screen and its responsiveness to resizing. It implements two-way clipboard, and drag and drop between the host and the guest. VirtualBox Guest Extensions in the VM needs to match the version of your VirtualBox install. You will likely have to update VirtualBox Guest Extensions for optimal performance.
To update VirtualBox Guest Extensions:
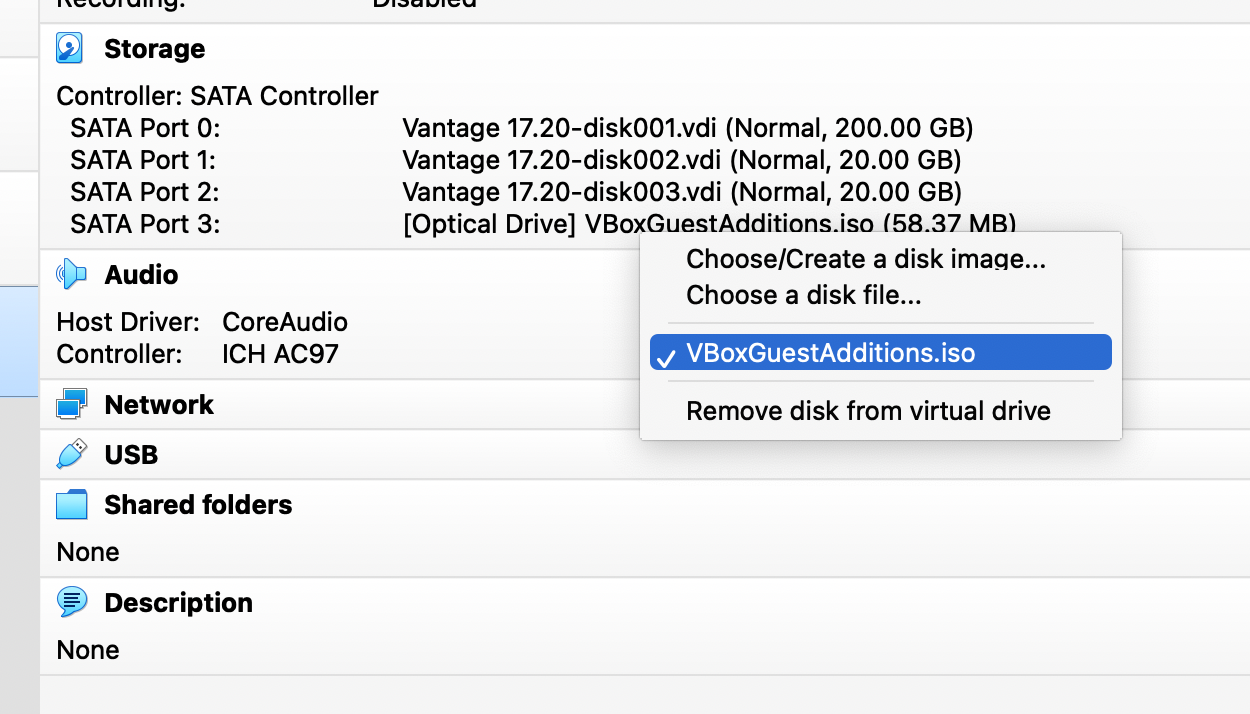
- Insert the VirtualBox Guest Extensions DVD by clicking on
SATA Port 3: [Optical Drive]inStoragesection:
- Back in the VM window, start the
Gnome Terminalapplication. - Run the following command in the terminal:
Summary
In this guide we have covered how to quickly create a working Teradata environment. We used Teradata Vantage Express in a VM running on VMware. In the same VM, we ran Teradata Studio Express to issue queries. We installed all software locally and didn't have to pay for cloud resources.
Next steps
Further reading
If you have any questions or need further assistance, please visit our community forum where you can get support and interact with other community members.