Data Transfer from Azure Blob to Teradata Vantage Using dagster-teradata
Overview
This document provides instructions and guidance for transferring data in CSV, JSON and Parquet formats from Microsoft Azure Blob Storage to Teradata Vantage using dagster-teradata. It outlines the setup, configuration and execution steps required to establish a seamless data transfer pipeline between these platforms.
Prerequisites
-
Access to a Teradata Vantage instance.
RemarqueIf you need a test instance of Vantage, you can provision one for free at https://clearscape.teradata.com
-
Python 3.9 or higher, Python 3.12 is recommended.
-
pip
Setting Up a Virtual Enviroment
A virtual environment is recommended to isolate project dependencies and avoid conflicts with system-wide Python packages. Here’s how to set it up:
- Windows
- MacOS
- Linux
Run in Powershell:
Install dagster and dagster-teradata
With your virtual environment active, the next step is to install dagster and the Teradata provider package (dagster-teradata) to interact with Teradata Vantage.
-
Install the Required Packages:
-
Verify the Installation:
To confirm that Dagster is correctly installed, run:
If installed correctly, it should show the version of Dagster.
Initialize a Dagster Project
Now that you have the necessary packages installed, the next step is to create a new Dagster project.
Scaffold a New Dagster Project
Run the following command:
This command will create a new project named dagster-teradata-azure. It will automatically generate the following directory structure:
Refer here to know more above this directory structure
You need to modify the definitions.py file inside the jaffle_dagster/jaffle_dagster directory.
Step 1: Open definitions.py in dagster-teradata-azure/dagster-teradata-azure Directory
Locate and open the file where Dagster job definitions are configured.
This file manages resources, jobs, and assets needed for the Dagster project.
Step 2: Implement Azure to Teradata Transfer in Dagster
Explanation of the Code
-
Resource Setup:
- The code sets up two resources: one for Azure Data Lake Storage (ADLS2) and one for Teradata.
- Azure Blob Storage:
- For a public bucket, the
storage_accountandcredential(SAS token) are left empty. - For a private bucket, the
storage_account(Azure Storage account name) and a valid SAScredentialare required for access.
- For a public bucket, the
- Teradata resource: The
teradata_resourceis configured using credentials pulled from environment variables (TERADATA_HOST,TERADATA_USER,TERADATA_PASSWORD,TERADATA_DATABASE).
- Azure Blob Storage:
- The code sets up two resources: one for Azure Data Lake Storage (ADLS2) and one for Teradata.
-
Operations:
drop_existing_table: This operation drops the "people" table in Teradata using theteradata_resource.ingest_azure_to_teradata: This operation checks if the "people" table was successfully dropped. If the table is dropped successfully, it loads data from Azure Blob Storage into Teradata. The data is ingested using theazure_blob_to_teradatamethod, which fetches data from the specified Azure Blob Storage path.
-
Job Execution:
- The
example_jobruns the operations in sequence. First, it drops the table, and if successful, it transfers data from the Azure Blob Storage (either public or private) to Teradata.
- The
This setup allows for dynamic handling of both public and private Azure Blob Storage configurations while transferring data into Teradata.
Running the Pipeline
After setting up the project, you can now run your Dagster pipeline:
-
Start the Dagster Dev Server: In your terminal, navigate to the root directory of your project and run: dagster dev After executing the command dagster dev, the Dagster logs will be displayed directly in the terminal. Any errors encountered during startup will also be logged here. Once you see a message similar to:
It indicates that the Dagster web server is running successfully. At this point, you can proceed to the next step.
-
Access the Dagster UI: Open a web browser and navigate to http://127.0.0.1:3000. This will open the Dagster UI where you can manage and monitor your pipelines.
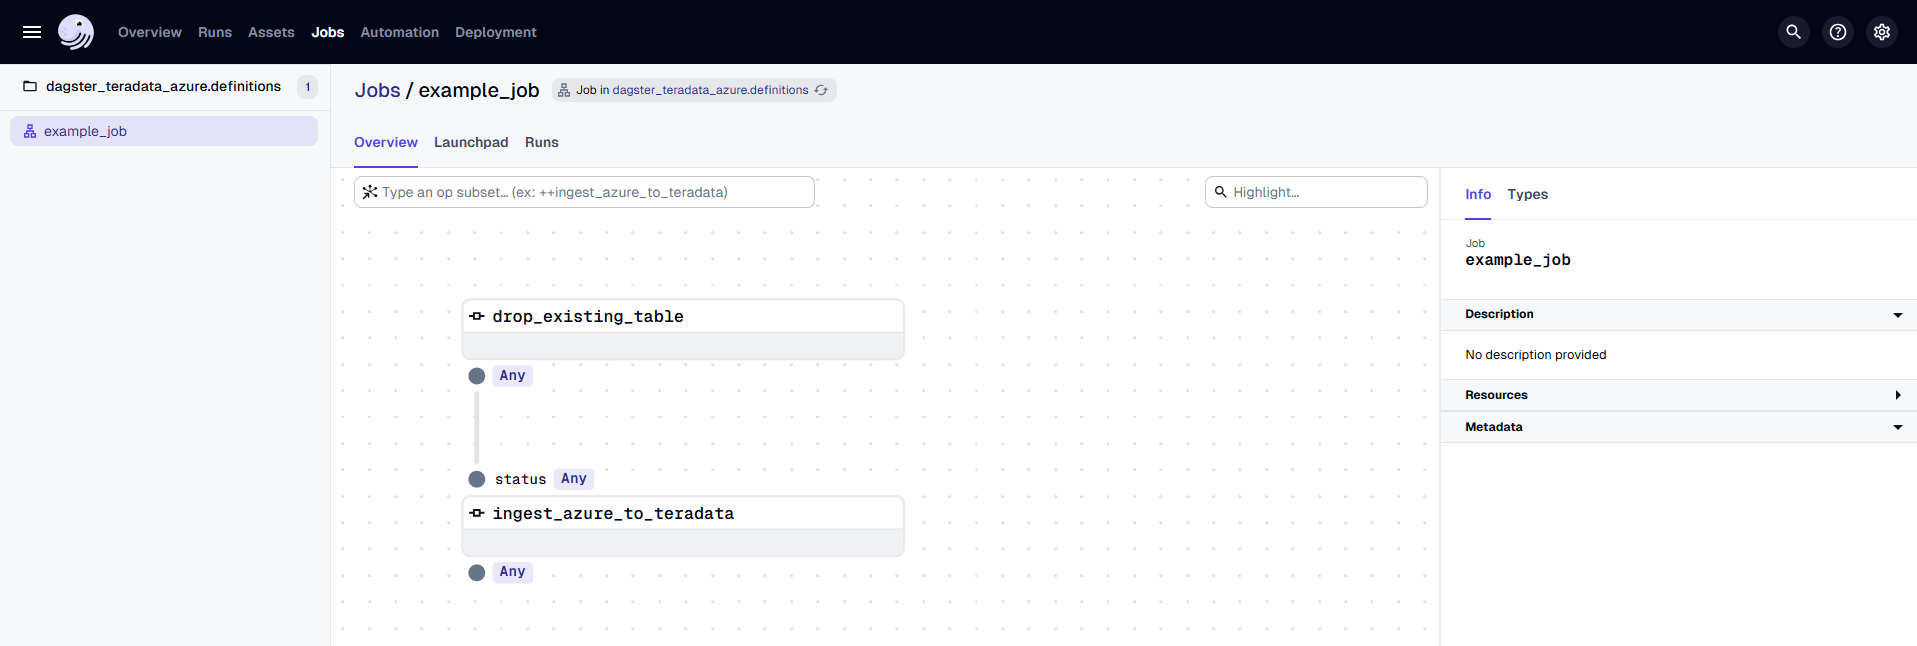
In the Dagster UI, you will see the following:
- The job
example_jobis displayed, along with the associated dbt asset. - The dbt asset is organized under the "default" asset group.
- In the middle, you can view the lineage of each
@op, showing its dependencies and how each operation is related to others.
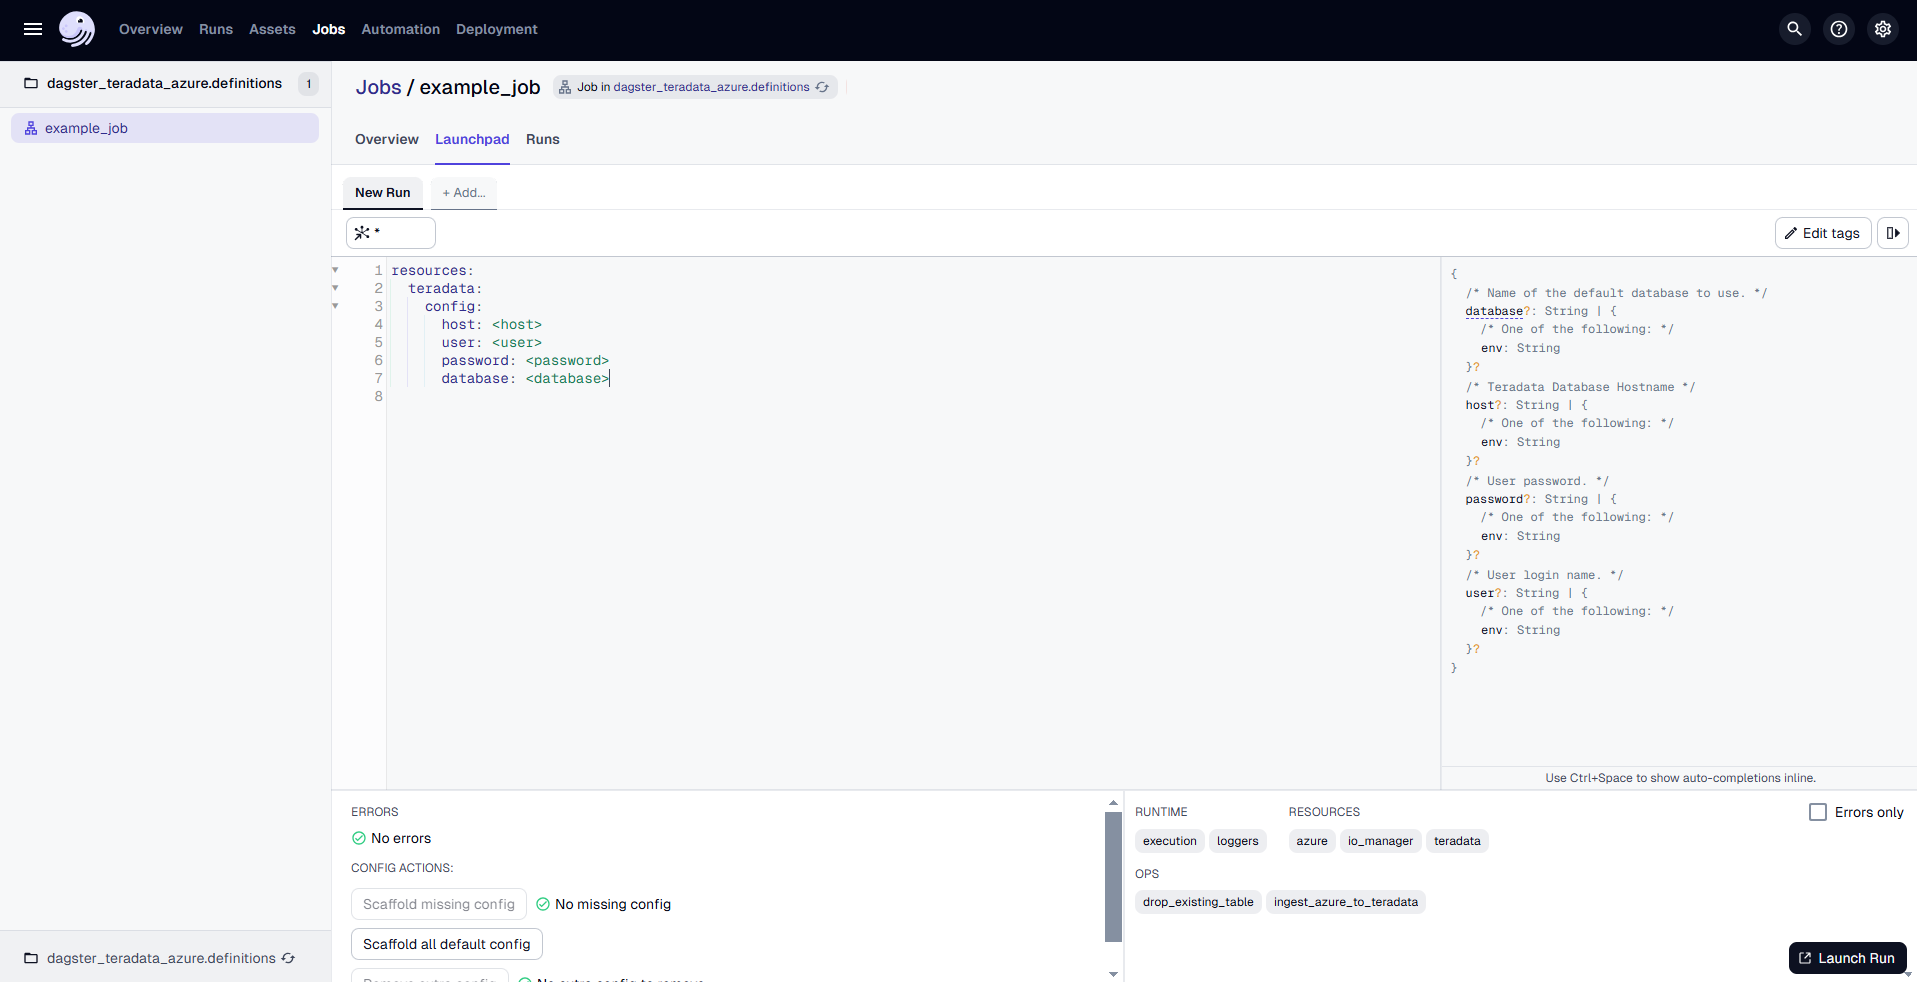
Go to the "Launchpad" and provide the configuration for the TeradataResource as follows:
Replace <host>, <user>, <password> and <database> with the actual hostname and credentials of the Teradata VantageCloud Lake instance.
Once the configuration is done, click on "Launch Run" to start the process.
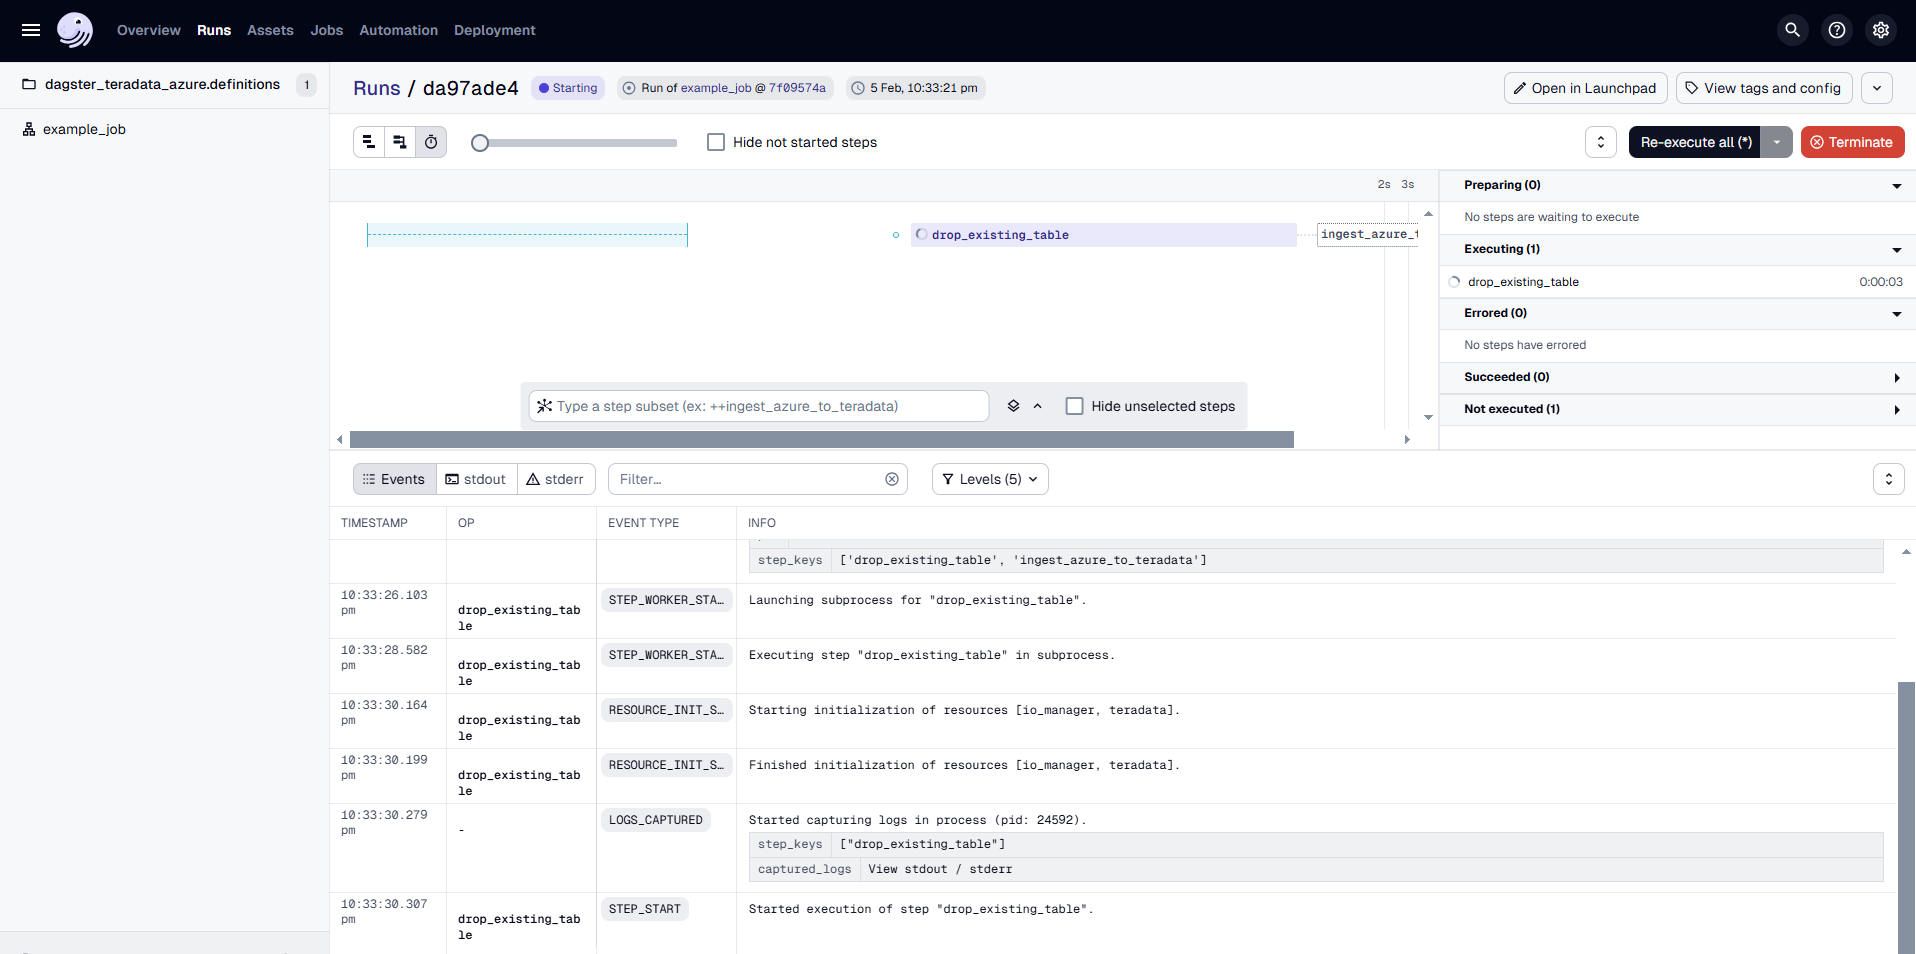
The Dagster UI allows you to visualize the pipeline's progress, view logs, and inspect the status of each step.
Arguments Supported by azure_blob_to_teradata
-
azure (ADLS2Resource):
TheADLS2Resourceobject used to interact with the Azure Blob Storage. -
blob_source_key (str):
The URI specifying the location of the Azure Blob object. The format is:
/az/YOUR-STORAGE-ACCOUNT.blob.core.windows.net/YOUR-CONTAINER/YOUR-BLOB-LOCATION
For more details, refer to the Teradata documentation:
Teradata Documentation - Native Object Store -
teradata_table (str):
The name of the Teradata table where the data will be loaded. -
public_bucket (bool, optional):
Indicates whether the Azure Blob container is public. IfTrue, the objects in the container can be accessed without authentication.
Defaults toFalse. -
teradata_authorization_name (str, optional):
The name of the Teradata Authorization Database Object used to control access to the Azure Blob object store. This is required for secure access to private containers.
Defaults to an empty string.
For more details, refer to the documentation:
Teradata Vantage Native Object Store - Setting Up Access
Transfer data from Private Blob Storage Container to Teradata instance
To successfully transfer data from a Private Blob Storage Container to a Teradata instance, the following prerequisites are necessary.
-
An Azure account. You can start with a free account.
-
Create an Azure storage account
-
Create a blob container under Azure storage account
-
Upload CSV/JSON/Parquest format files to blob container
-
Create a Teradata Authorization object with the Azure Blob Storage Account and the Account Secret Key
RemarqueReplace
AZURE_BLOB_ACCOUNT_SECRET_KEYwith Azure storage accountazuretestquickstartaccess key
Summary
This guide details the utilization of the dagster-teradata to seamlessly transfer CSV, JSON, and Parquet data from Microsoft Azure Blob Storage to Teradata Vantage, facilitating streamlined data operations between these platforms.