Using Anypoint Studio to Configure Teradata Connector - Mule 4
Anypoint Studio (Studio) editors help you design and update your Mule applications, properties, and configuration files.
To add and configure a connector in Studio:
- Create a Mule Project.
- Add the connector to your Mule project.
- Configure a source for the connector’s flow.
- Add a connector operation to the flow.
- Configure a global element for the connector.
When you run the connector, you can view the app log to check for problems, as described in View the App Log.
If you are new to configuring connectors in Studio, see Using Anypoint Studio to Configure a Connector. If, after reading this topic, you need additional information about the connector fields, see the Teradata Connector Reference.
Create a Mule Project
In Studio, create a new Mule project in which to add and configure the connector:
- In Studio, select File > New > Mule Project.
- Enter a name for your Mule project and click Finish.
Add the Connector to Your Mule Project
Add Teradata Connector to your Mule project to automatically populate the XML code with the connector's namespace and schema location and to add the required dependencies to the project's pom.xml file:
- In the Mule Palette view, click (X) Search in Exchange.
- In the Add Dependencies to Project window, type
teradatain the search field. - Click Teradata Connector in Available modules.
- Click Add.
- Click Finish.
Adding a connector to a Mule project in Studio does not make that connector available to other projects in your Studio workspace.
Configure a Source
A source initiates a flow when a specified condition is met. You can configure one of these input sources to use with Teradata Connector:
- Teradata > On Table Row + Initiates a flow by selecting from a table at a regular interval and generates one message per obtained row
- HTTP > Listener + Initiates a flow each time it receives a request on the configured host and port
- Scheduler + Initiates a flow when a time-based condition is met
For example, to configure an On Table Row source, follow these steps:
In the Mule Palette view, select Teradata > On Table Row.
- Drag On Table Row to the Studio canvas.
- In the On Table Row configuration screen, optionally change the value of the Display Name field.
- Click the plus sign (+) next to the Connector configuration field to configure a global element that can be used by all instances of the source in the app.
- In the Teradata Config window, on the General tab, specify the database connection information for the connector.
- On the Transactions tab, optionally specify the transaction isolation, or XA transactions, when connecting to the database.
- On the Advanced tab, optionally specify connection pooling and reconnection information, including a reconnection strategy.
- Click Test Connection to confirm that Mule can connect with the specified database.
- Click OK to close the window.
- In the On Table Row configuration screen, in Table, specify the name of the table to select from.
Add a Connector Operation to the Flow
When you add a connector operation to your flow, you immediately define a specific operation for that connector to perform.
To add an operation for Teradata Connector, follow these steps:
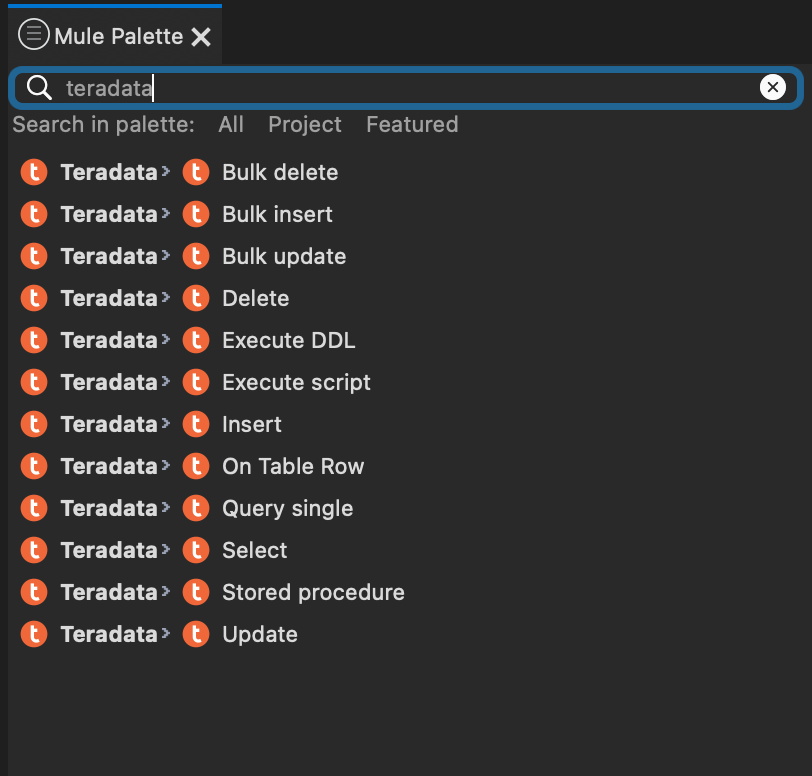
- In the Mule Palette view, select Teradata Connector and then select the desired operation.
- Drag the operation onto the Studio canvas and to the right of the input source.
The following screenshot shows the Teradata Connector operations in the Mule Palette view of Anypoint Studio:
- Teradata Connector Operations

Configure a Global Element for the Connector
When you configure a connector, it’s best to configure a global element that all instances of that connector in the app can use.
To configure the global element for Teradata Connector, follow these steps:
- Select the operation in the Studio canvas.
- In the configuration screen for the operation, click the plus sign (+) next to the Connector configuration field to access the global element configuration fields.
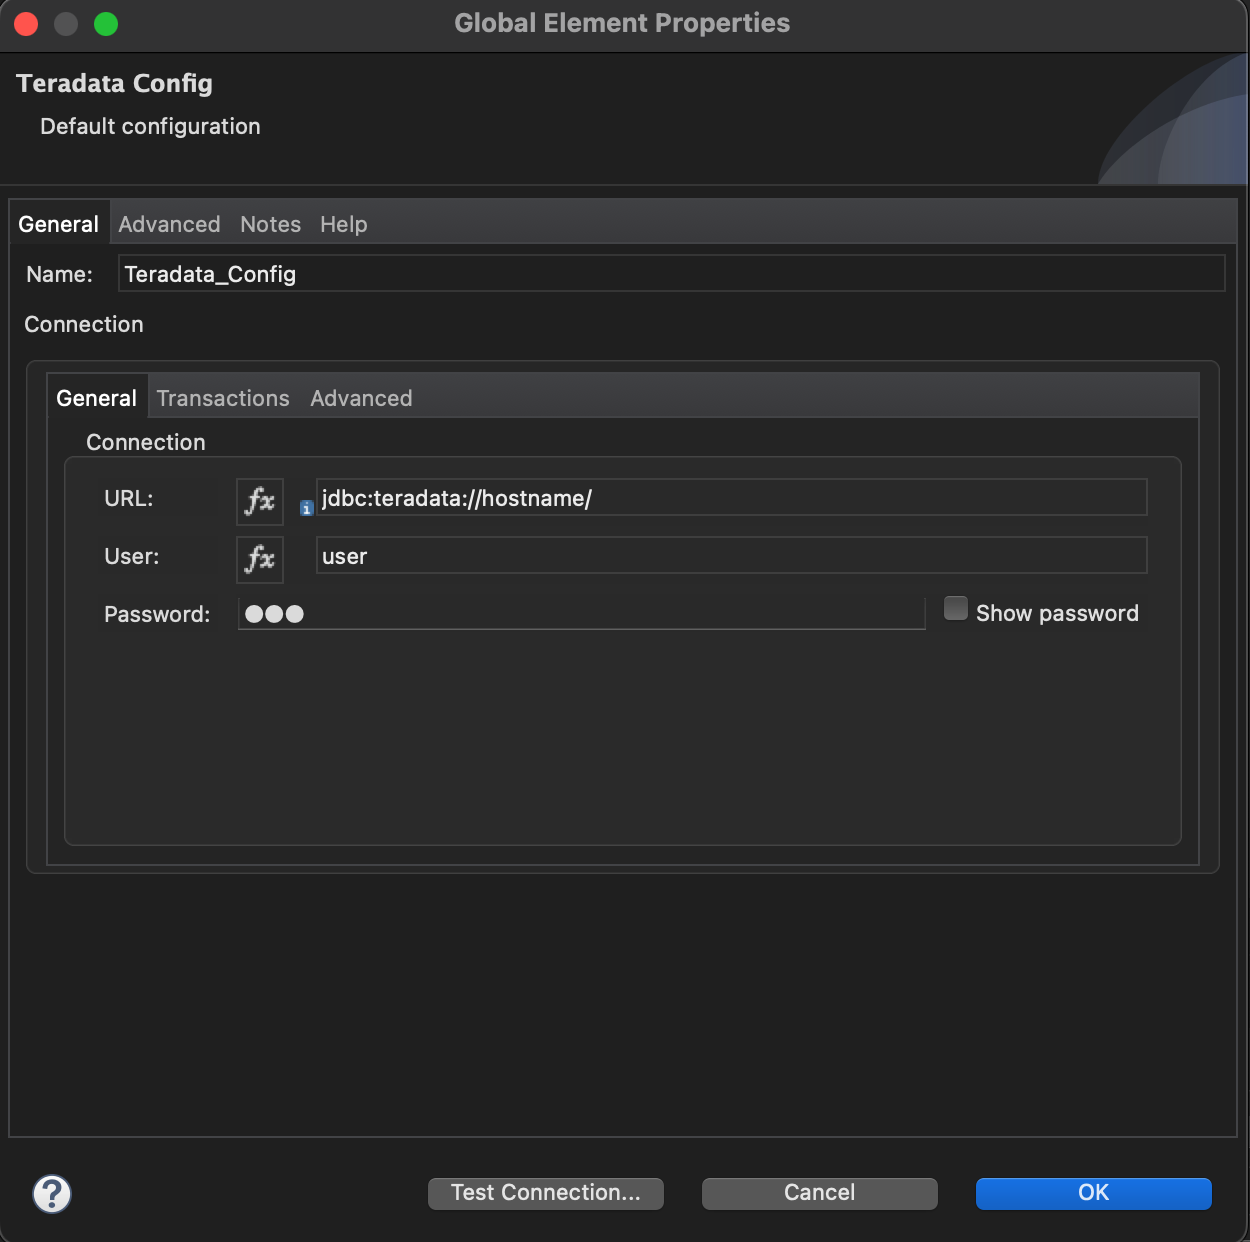
- In the Teradata Config window, on the General tab, specify the database connection information for the connector.
- On the Transactions tab, optionally specify the transaction isolation, or XA transactions, when connecting to the database.
- On the Advanced tab, optionally specify connection pooling and reconnection information, including a reconnection strategy.
- Click Test Connection to confirm that Mule can connect with the specified database.
- Click OK.
The following screenshot shows the Teradata Connector Global Element Configuration window in Anypoint Studio:
- Teradata Connector Global Element Configuration

View the App Log
To check for problems, you can view the app log as follows:
- If you’re running the app from Anypoint Platform, the output is visible in the Anypoint Studio console window.
- If you’re running the app using Mule from the command line, the app log is visible in your OS console.
Unless the log file path is customized in the app’s log file (log4j2.xml), you can also view the app log in the default location MULE_HOME/logs/<app-name>.log.
See Also
If you have any questions or need further assistance, please visit our community forum where you can get support and interact with other community members.