Execute Airflow workflows that use dbt with Teradata Vantage
Overview
This tutorial demonstrates how to install Airflow on an AWS EC2 VM, configure the workflow to use dbt, and run it against a Teradata Vantage database. Airflow is a task scheduling tool that is typically used to build data pipelines to process and load data. In this example, we go through the Airflow installation process, which creates a Docker-based Airflow environment. Once Airflow is installed, we run several Airflow DAG (Direct Acyclic Graph, or simply workflow) examples that load data into a Teradata Vantage database.
Prerequsites
- Access to AWS (Amazon Web Services) with permissions to create a VM.
This tutorial can be adjusted to other compute platforms or even on a bare metal machine as long as it has a computing and storage capacity comparable to the machine mentioned in this document (t2.2xlarge EC2 on AWS with approximately 100GB of storage) and is connected to the internet. If you decide to use a different compute platform, some steps in the tutorial will have to be altered.
- An SSH client.
- Access to a Teradata Vantage database. If you don't have access to Teradata Vantage, explore Vantage Express - a free edition for developers.
Install and execute Airflow
Create a VM
- Go to the AWS EC2 console and click on
Launch instance. - Select
Red Hatfor OS image. - Select
t2.2xlargefor instance type. - Create a new key pair or use an existing one.
- Apply network settings that will allow you ssh to the server and the server will have outbound connectivity to the Internet. Usually, applying the default settings will do.
- Assign 100GB of storage.
Install Python
-
ssh to the machine using
ec2-useruser. -
Check if python is installed (should be Python 3.7 or higher). Type
pythonorpython3on the command line. -
If python is not installed (you are getting
command not foundmessage) run the commands below to install it. The commands may require you to confirm the installation by typingyand enter.
Create an Airflow environment
- Create the Airflow directory structure (from the ec2-user home directory /home/ec2-user)
- Use your preferred file transfer tool (
scp,PuTTY,MobaXterm, or similar) to upload airflow.cfg file toairflow/configdirectory.
Install Docker
Docker is a containerization tool that allows us to install Airflow in a containerized environment.
The steps must be executed in airflow directory.
- Uninstall podman (RHEL containerization tool)
- Install yum utilities
- Add docker to yum repository.
- Install docker.
- Start docker as a service. The first command runs the docker service automatically when the system starts up next time. The second command starts Docker now.
- Check if Docker is installed correctly. This command should return an empty list of containers (since we have not started any container yet):
Install docker-compose and docker environment configuration files
- Upload Dockerfile and Dockerfile files to the VM and save them in
airflowdirectory.
What docker-compose.yaml and Dockerfile do
docker-compose.yaml and Dockerfile files are necessary to build the environment during the installation. The docker-compose.yaml file downloads and installs the Airflow docker container. The container includes the web ui, a Postgres database for metadata, the scheduler, 3 workers (so 3 tasks can be run in parallel), the trigger and the nginx web server to show the docs produced by dbt. In addition host directories are mounted on containers and various other install processes are performed. Dockerfile will additionally install needed packages in each container.
If you would like to learn more what docker-compose.yaml and Dockerfile files do, examine these files. There are comments which clarify what is installed and why.
- Install docker-compose (necessary to run the yaml file).
The instructions are based on version 1.29.2. Check out https://github.com/docker/compose/releases site for the latest release and update the command below as needed.
- Test your docker-compose installation. The command should return the docker-compose version, for example
docker-compose version 1.29.2, build 5becea4c:
Install a test dbt project
These steps set up a sample dbt project. dbt tool itself will be installed on the containers later by docker-compose.
- Install git:
- Get the sample jaffle shop dbt project:
The dbt directories will be created under the home directory (not under airflow). The home directory in our example is /home/ec2-user.
- Create the
airflowtestandjaffle_shopusers/databases on your Teradata database by using your preferred database tool (Teradata Studio Express,bteqor similar). Log into the database asdbc, then execute the commands (change the passwords if needed):
- Create the dbt configuration directory:
-
Copy profiles.yml into the
.dbtdirectory. -
Edit the file so it corresponds to your Teradata database setup. At a minium, you will need to change the host, user and password. Use
jaffle_shopuser credentials you set up in step 3.
Create the Airflow environment in Docker
- Run the docker environment creation script in the
airflowdirectory whereDockerfileanddocker-compose.yaml:
This can take 5-10 minutes, when the installation is complete you should see on the screen a message similar to this:
This means the Airflow webserver is ready to accept calls.
- Now Airflow should be up. The terminal session that we were using during the installation will be used to display log messages, so it is recommended to open another terminal session for subsequent steps. To check the Airflow installation type:
The result should be something like:
- OPTIONAL: If you want to delete the docker installation (for example to update the docker-compose.yaml and the Dockerfile files and recreate a different environment), the command is (from the airflow directory where these files are located):
Once the stack is down, update the configuration files and restart by running the command in step 1.
- To test if the Airflow web UI works, type the following urls on your browser. Replace
<VM_IP_ADDRESS>with the external IP address of the VM:
- DAG UI:
http://<YOUR_IP_ADDRESS>:8080/home- username: airflow / password: airflow - Flower Airflow UI (worker control):
http://<YOUR_IP_ADDRESS>:5555/
Run an Airflow DAG
- Copy airflow_dbt_integration.py, db_test_example_dag.py, discover_dag.py, variables.json files to
/home/ec2-user/airflow/dags. - Examine the files:
airflow_dbt_integration.py- a simple Teradata sql example that creates a few tables and runs queries.db_test_example_dag.py- runs a dbt example [i.e. integration of dbt and airflow with a Teradata database). In this example a fictitious jaffle_shop data model is created, loaded and the documentation for this project is produced (you can view it by pointing your browser tohttp://<VM_IP_ADDRESS>:4000/)
[Adjust db_test_example_dag.py]
db_test_example_dag.py needs to be updated so that the Teradata database IP address points to your database.
discover_dag.py- an example on how to load various types of data files (CSV, Parquet, JSON). The source code file contains comments that explain what the program does and how to use it. This example relies onvariables.jsonfile. The file needs to be imported into Airflow. It will happen in subsequent steps.
-
Wait for a few minutes until these dag files are picked up by the airflow tool. Once they are picked up they will appear on the list of dags on the Airflow home page.
-
Import
variables.jsonfile as a variable file into Airflow:
- Click on
Admin -> Variablesmenu item to go to the Variables page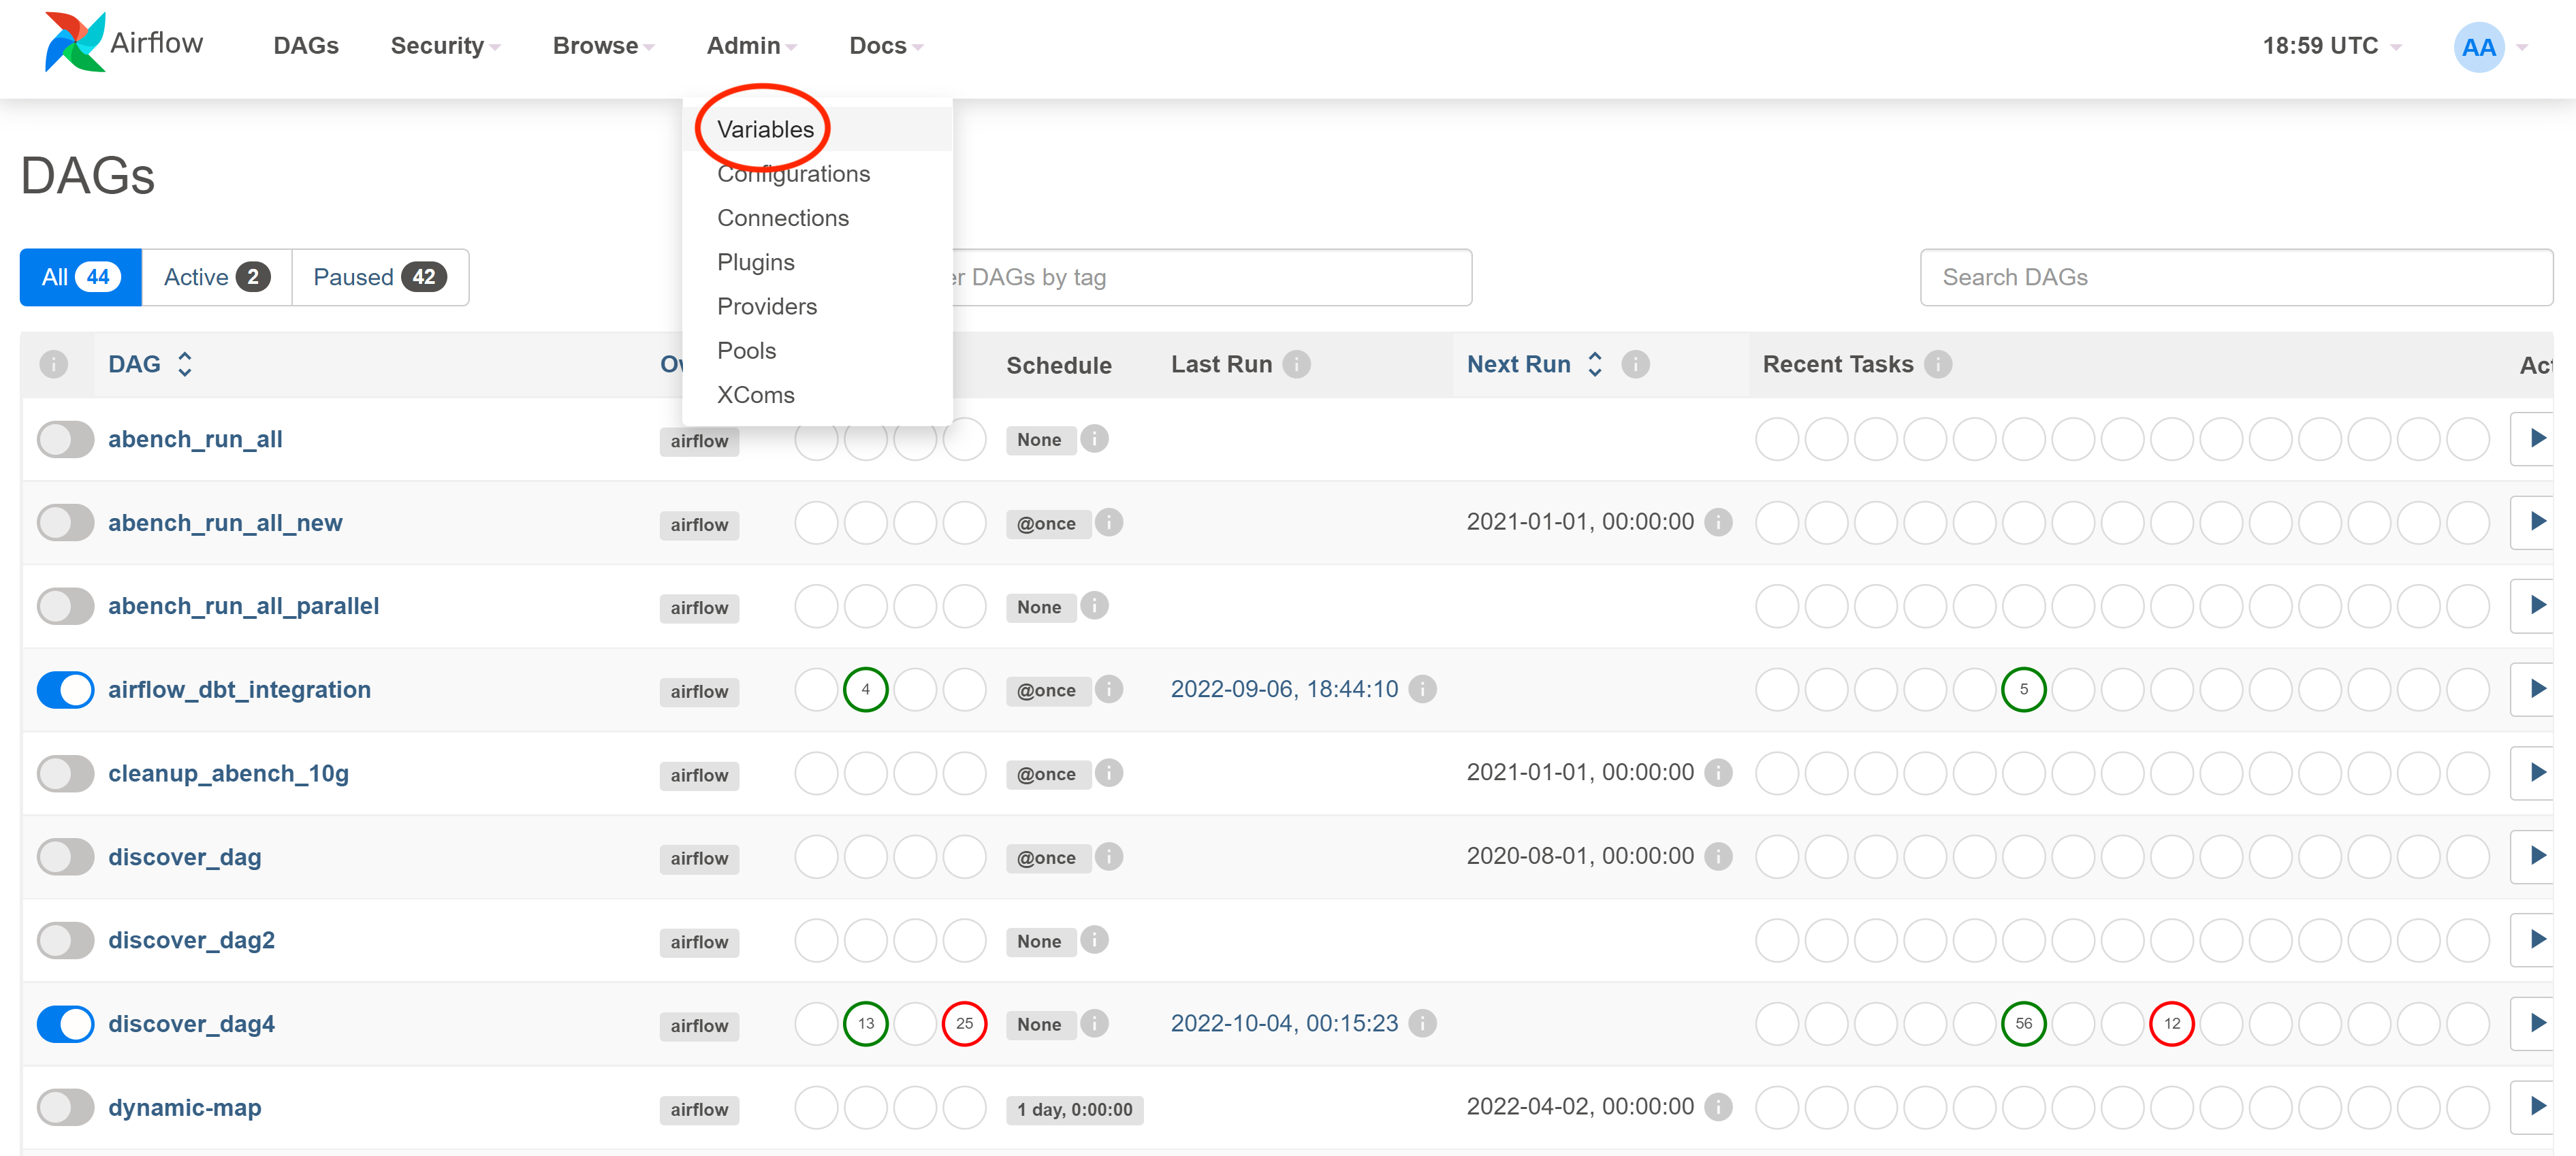
- Click on
Choose File, then selectvariable.jsonin your file explorer and click onImport Variables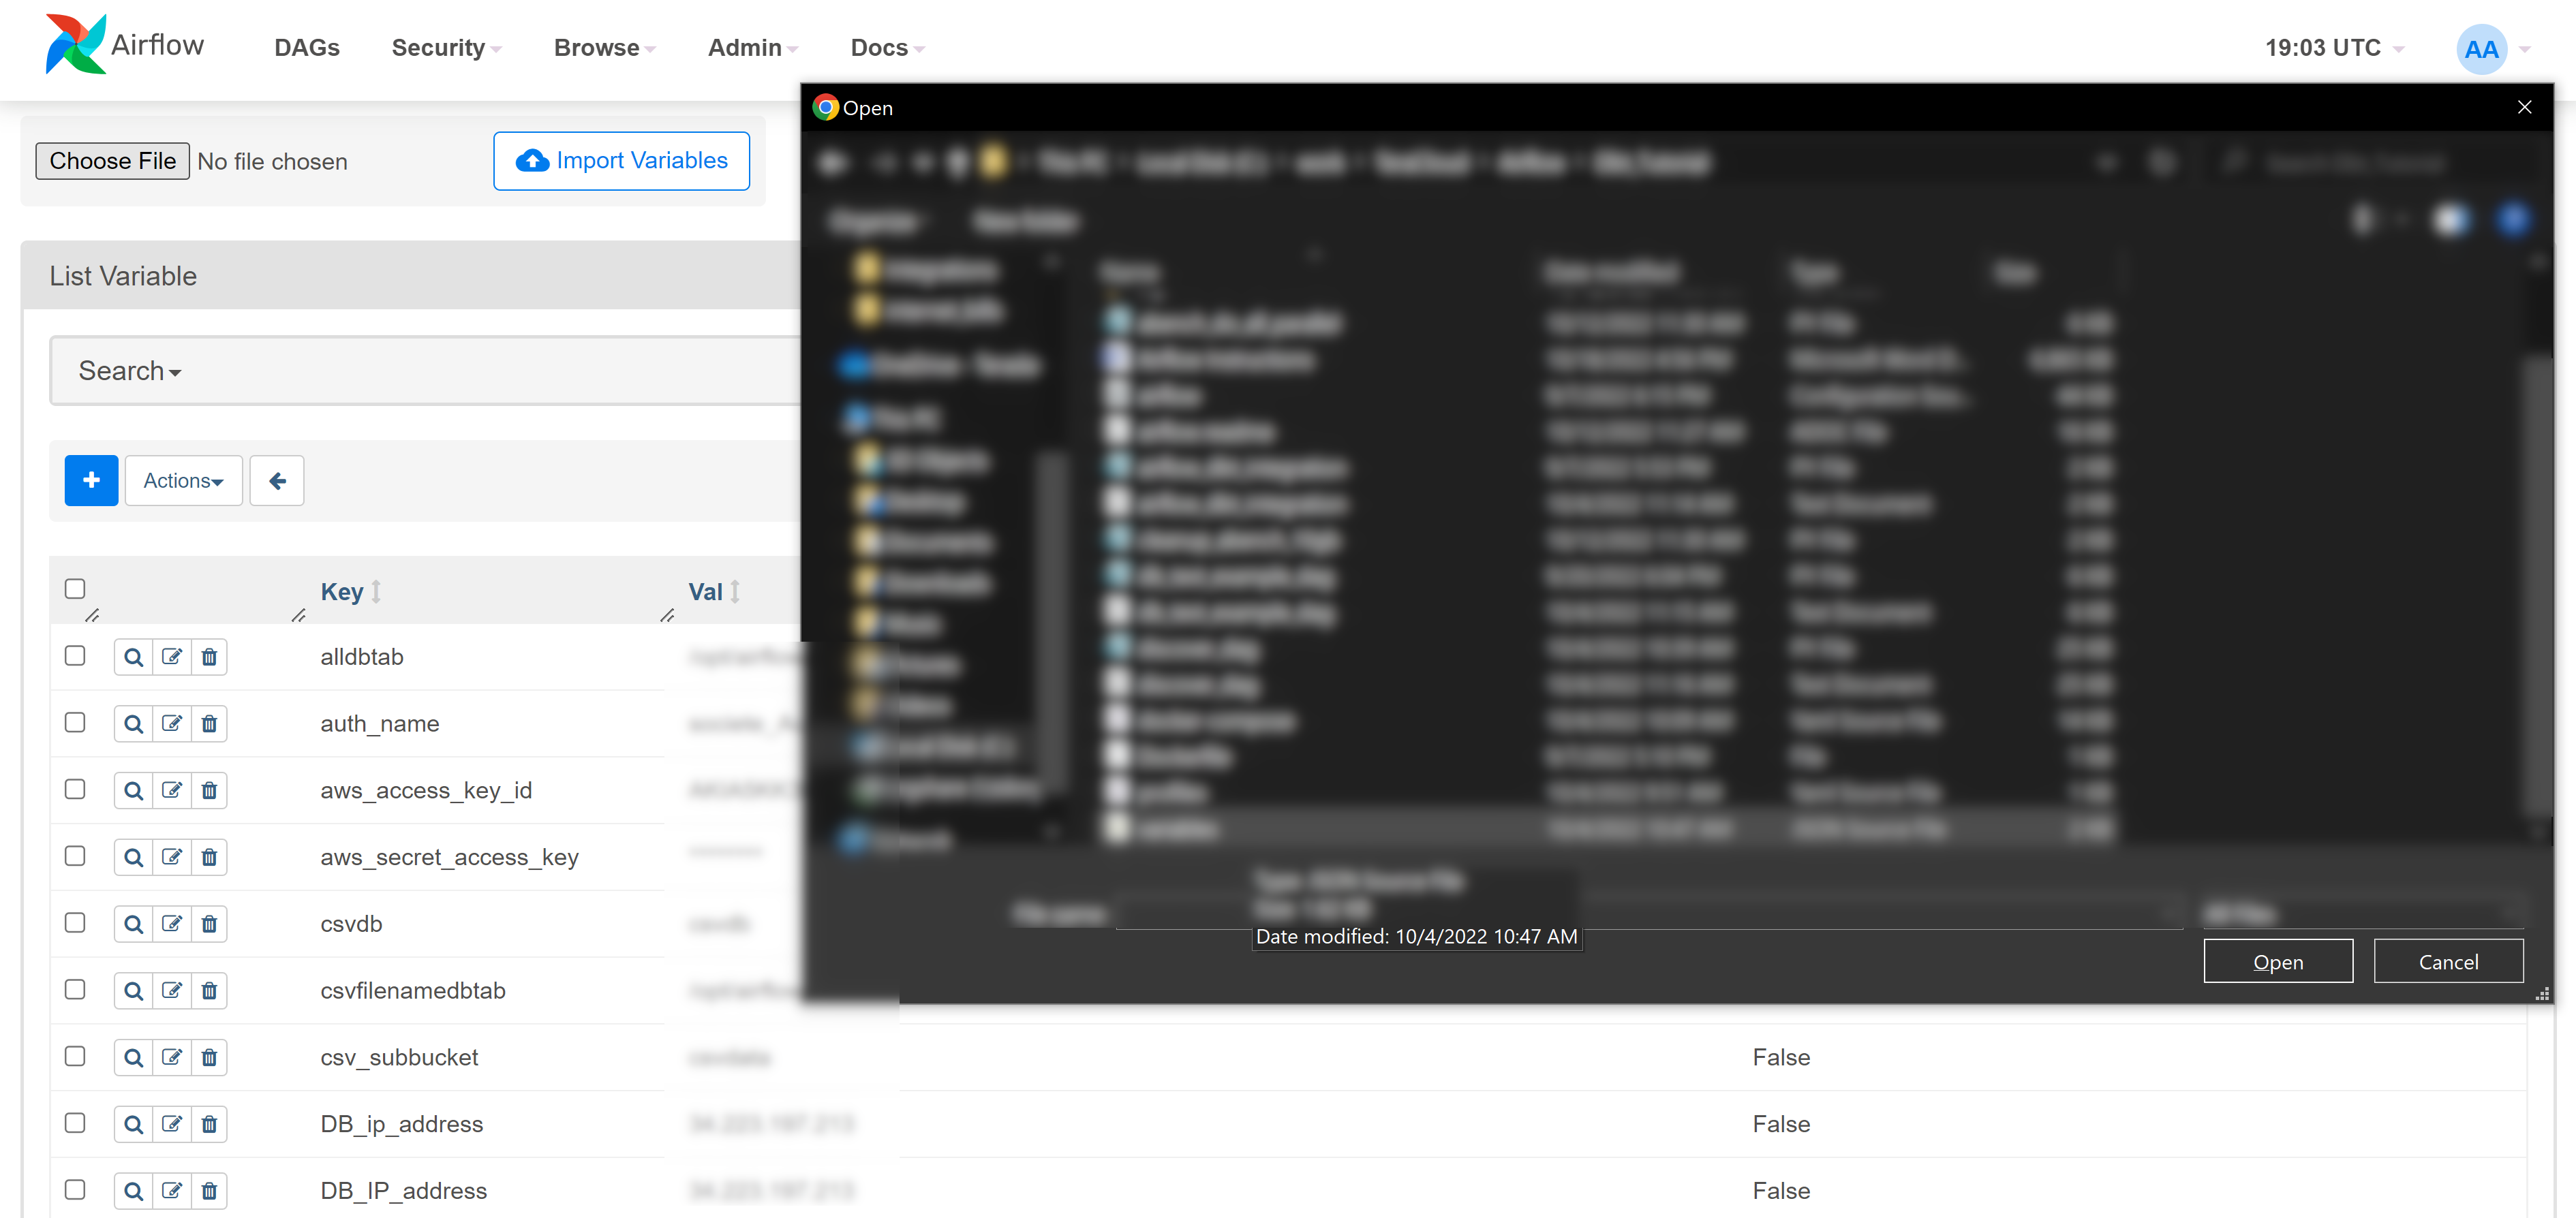
- Edit the variables to match your environment
- Run the dags from the UI and check the logs.
Summary
This tutorial aimed at providing a hands on exercise on how to install an Airflow environment on a Linux server and how to use Airflow to interact with a Teradata Vantage database. An additional example is provided on how to integrate Airflow and the data modelling and maintenance tool dbt to create and load a Teradata Vantage database.
Further reading
If you have any questions or need further assistance, please visit our community forum where you can get support and interact with other community members.