Connect Teradata Vantage to Salesforce using Amazon Appflow
Overview
This how-to describes the process to migrate data between Salesforce and Teradata Vantage. It contains two use cases:
- Retrieve customer information from Salesforce, and combine it with order and shipping information from Vantage to derive analytical insights.
- Update
newleadstable on Vantage with the Salesforce data, then add the new lead(s) back to Salesforce using AppFlow.

Amazon AppFlow transfers the customer account data from Salesforce to Amazon S3. Vantage then uses Native Object Store (NOS) read functionality to join the data in Amazon S3 with data in Vantage with a single query.
The account information is used to update the newleads table on Vantage. Once the table is updated, Vantage writes it back to the Amazon S3 bucket with NOS Write. A Lambda function is triggered upon arrival of the new lead data file to convert the data file from Parquet format to CSV format, and AppFlow then inserts the new lead(s) back into Salesforce.
About Amazon AppFlow
Amazon AppFlow is a fully managed integration service that enables users to securely transfer data between Software-as-a-Service (SaaS) applications like Salesforce, Marketo, Slack, and ServiceNow, and AWS services like Amazon S3 and Amazon Redshift. AppFlow automatically encrypts data in motion, and allows users to restrict data from flowing over the public internet for SaaS applications that are integrated with AWS PrivateLink, reducing exposure to security threats.
As of today, Amazon AppFlow has 16 sources to choose from, and can send the data to four destinations.
About Teradata Vantage
Teradata Vantage is the connected multi-cloud data platform for enterprise analytics, solving data challenges from start to scale.
Vantage enables companies to start small and elastically scale compute or storage, paying only for what they use, harnessing low-cost object stores and integrating their analytic workloads. Vantage supports R, Python, Teradata Studio, and any other SQL-based tools.
Vantage combines descriptive, predictive, prescriptive analytics, autonomous decision-making, ML functions, and visualization tools into a unified, integrated platform that uncovers real-time business intelligence at scale, no matter where the data resides.
Teradata Vantage Native Object Store (NOS) can be used to explore data in external object stores, like Amazon S3, using standard SQL. No special object storage-side compute infrastructure is required to use NOS. Users can explore data located in an Amazon S3 bucket by simply creating a NOS table definition that points to your bucket. With NOS, you can quickly import data from Amazon S3 or even join it with other tables in the Vantage database.
Prerequisites
You are expected to be familiar with Amazon AppFlow service and Teradata Vantage.
You will need the following accounts, and systems:
- Access to a Teradata Vantage instance.
노트
If you need a test instance of Vantage, you can provision one for free at https://clearscape.teradata.com
- An AWS account with the role that can create and run flows.
- An Amazon S3 bucket to store Salesforce data (i.e., ptctsoutput)
- An Amazon S3 bucket to store raw Vantage data (Parquet file) (i.e., vantageparquet). This bucket needs to have policy to allow Amazon AppFlow access
- An Amazon S3 bucket to store converted Vantage data (CSV file) (i.e., vantagecsv)
- A Salesforce account that satisfies the following requirements:
- Your Salesforce account must be enabled for API access. API access is enabled by default for Enterprise, Unlimited, Developer, and Performance editions.
- Your Salesforce account must allow you to install connected apps. If this is disabled, contact your Salesforce administrator. After you create a Salesforce connection in Amazon AppFlow, verify that the connected app named "Amazon AppFlow Embedded Login App" is installed in your Salesforce account.
- The refresh token policy for the "Amazon AppFlow Embedded Login App" must be set to "Refresh token is valid until revoked". Otherwise, your flows will fail when your refresh token expires.
- You must enable Change Data Capture in Salesforce to use event-driven flow triggers. From Setup, enter "Change Data Capture" in Quick Find.
- If your Salesforce app enforces IP address restrictions, you must whitelist the addresses used by Amazon AppFlow. For more information, see AWS IP address ranges in the Amazon Web Services General Reference.
- If you are transferring over 1 million Salesforce records, you cannot choose any Salesforce compound field. Amazon AppFlow uses Salesforce Bulk APIs for the transfer, which does not allow transfer of compound fields.
- To create private connections using AWS PrivateLink, you must enable both "Manager Metadata" and "Manage External Connections" user permissions in your Salesforce account. Private connections are currently available in the us-east-1 and us-west-2 AWS Regions.
- Some Salesforce objects can't be updated, such as history objects. For these objects, Amazon AppFlow does not support incremental export (the "Transfer new data only" option) for schedule-triggered flows. Instead, you can choose the "Transfer all data" option and then select the appropriate filter to limit the records you transfer.
Procedure
Once you have met the prerequisites, follow these steps:
- Create a Salesforce to Amazon S3 Flow
- Exploring Data using NOS
- Export Vantage Data to Amazon S3 using NOS
- Create an Amazon S3 to Salesforce Flow
Create a Salesforce to Amazon S3 Flow
This step creates a flow using Amazon AppFlow. For this example, we're using a Salesforce developer account to connect to Salesforce.
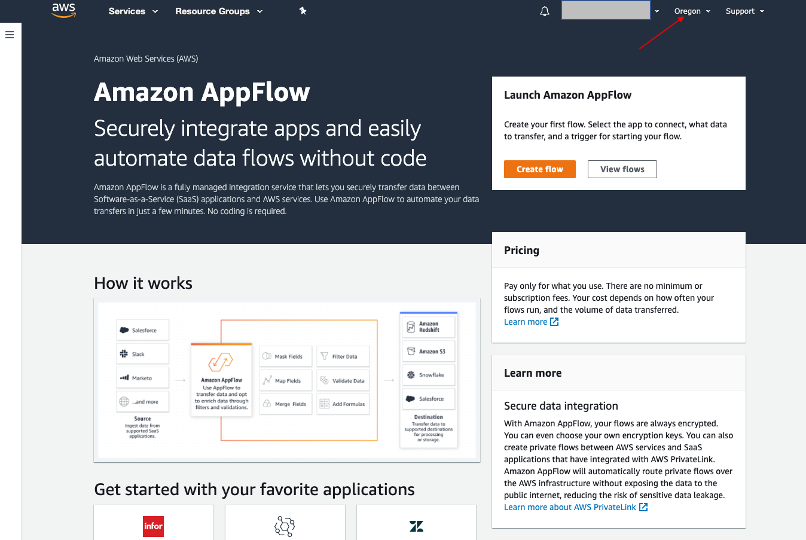
Go to AppFlow console, sign in with your AWS login credentials and click Create flow. Make sure you are in the right region, and the bucket is created to store Salesforce data.
Step 1: Specify flow details
This step provides basic information for your flow.
Fill in Flow name (i.e. salesforce) and Flow description (optional), leave Customize encryption settings (advanced) unchecked. Click Next.
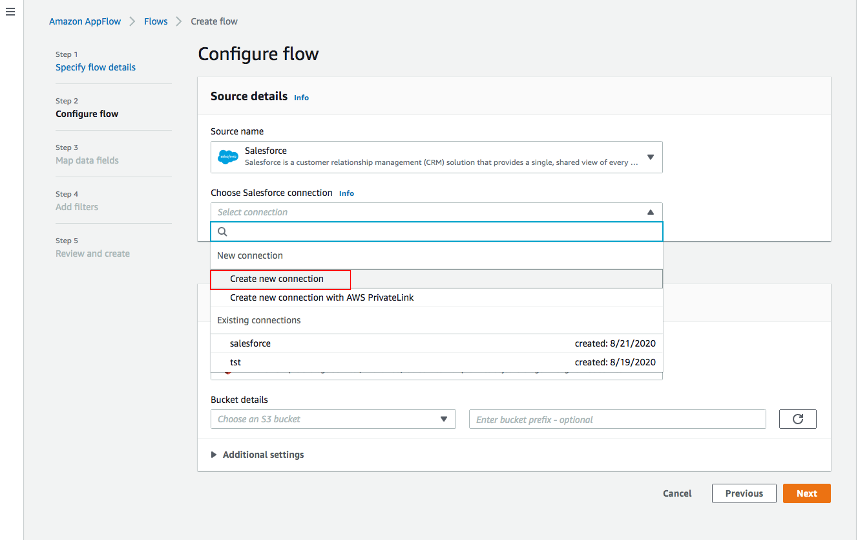
Step 2: Configure flow
This step provides information about the source and destination for your flow. For this example, we will be using Salesforce as the source, and Amazon S3 as the destination.
-
For Source name, choose Salesforce, then Create new connection for Choose Salesforce connection.
-
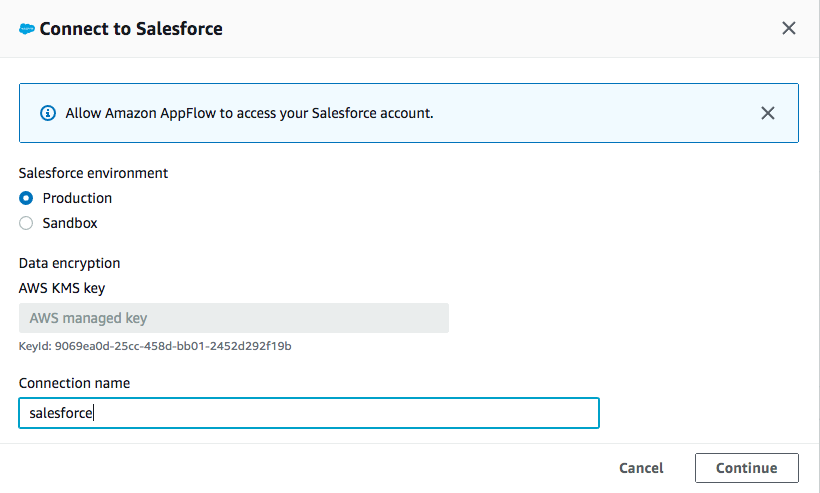
Use default for Salesforce environment and Data encryption. Give your connection a name (i.e. salesforce) and click Continue.
-
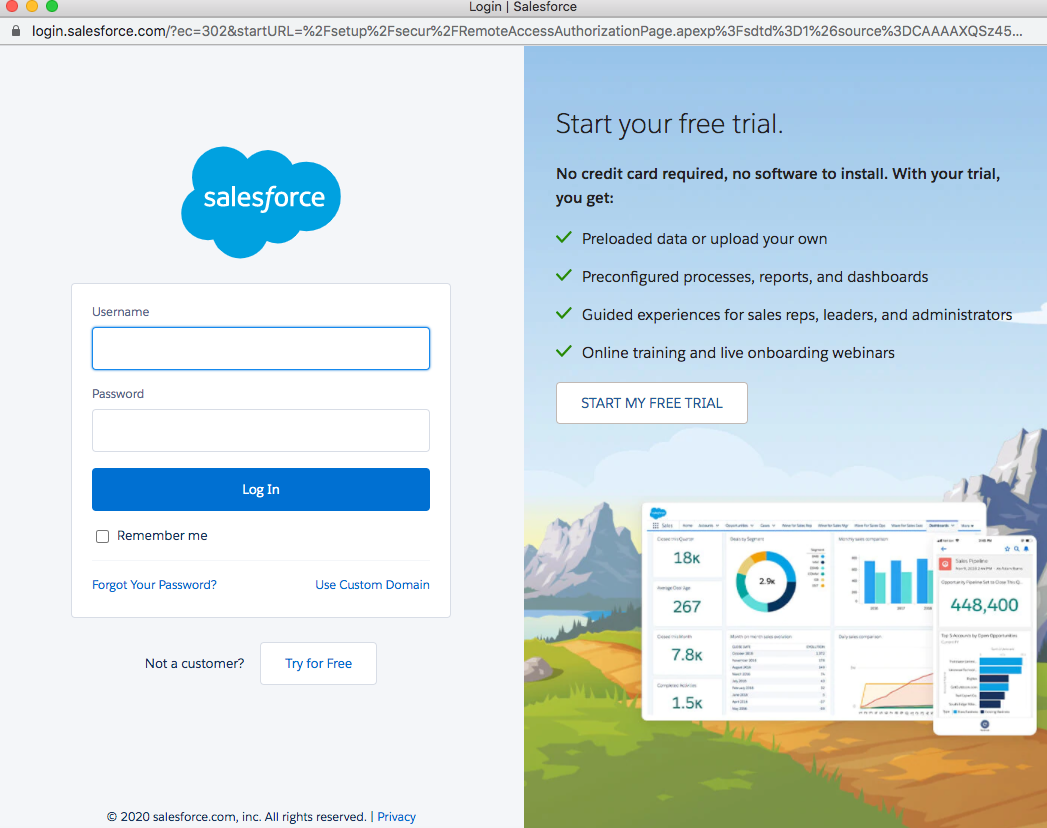
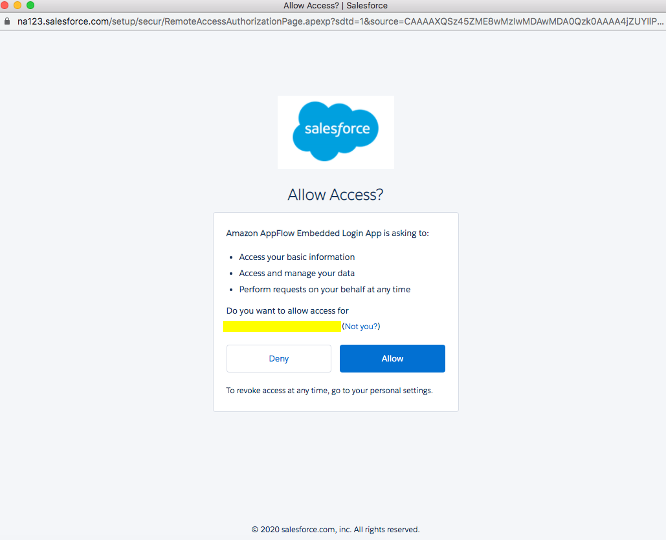
At the salesforce login window, enter your Username and Password. Click Log In
-
Click Allow to allow AppFlow to access your salesforce data and information.
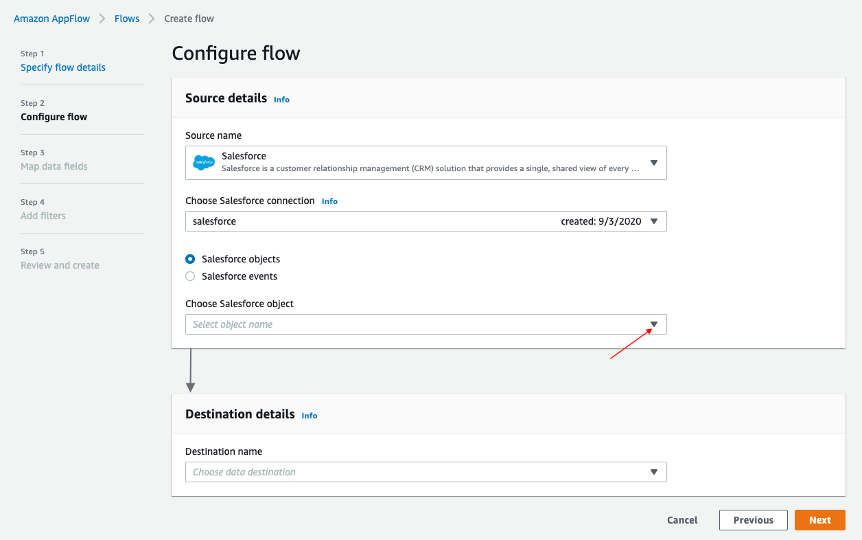
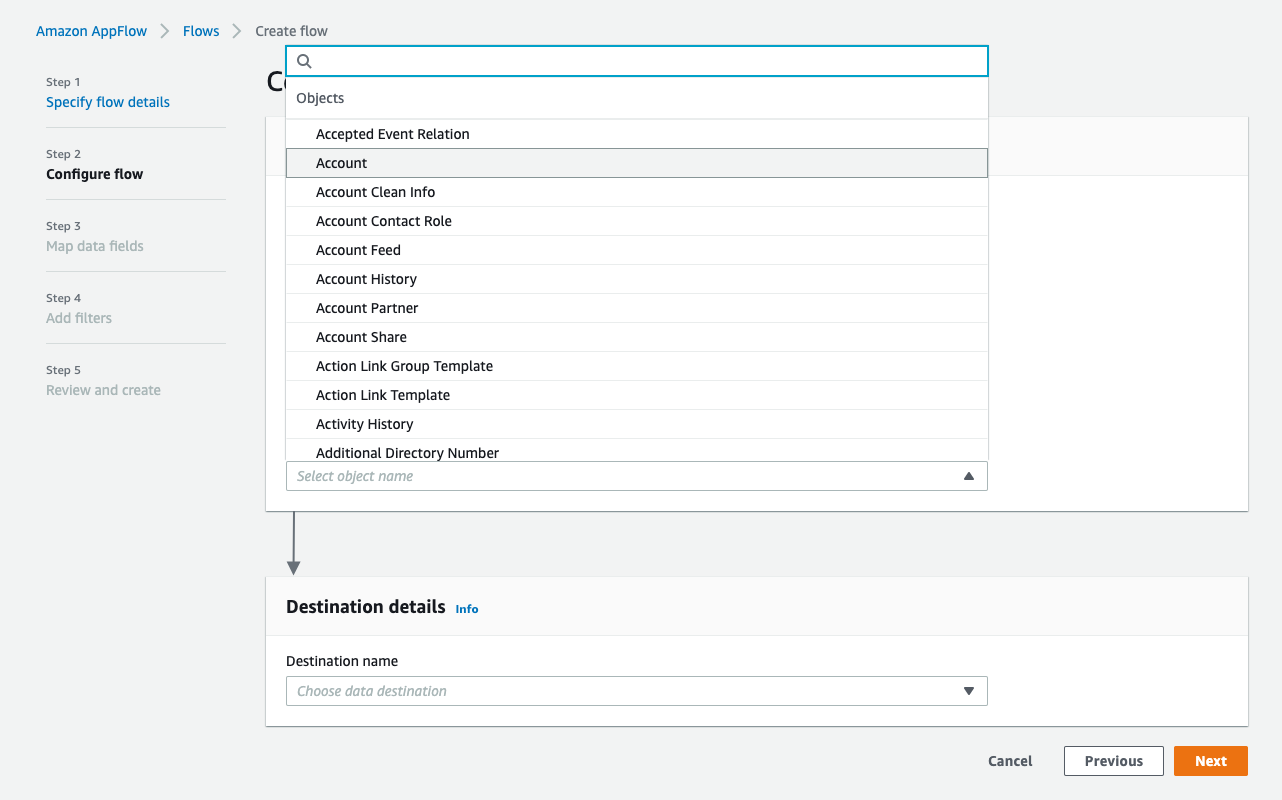
-
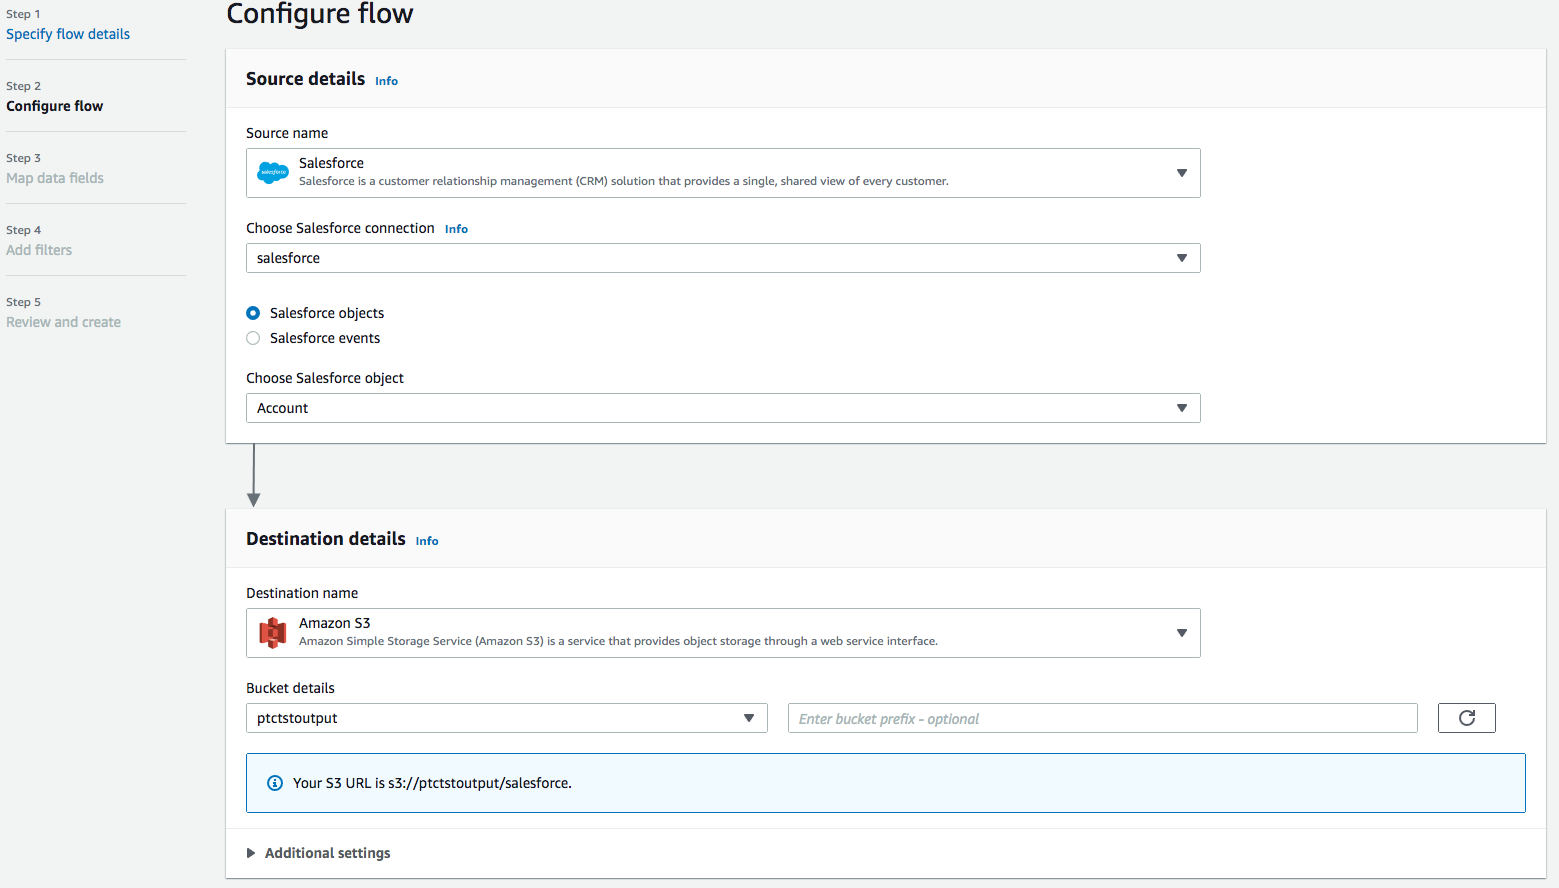
Back at the AppFlow Configure flow window, use Salesforce objects, and choose Account to be the Salesforce object.
-
Use Amazon S3 as Destination name. Pick the bucket you created earlier where you want the data to be stored (i.e., ptctsoutput).
-
Flow trigger is Run on demand. Click Next.

Step 3: Map data fields
This step determines how data is transferred from the source to the destination.
- Use Manually map fields as Mapping method
- For simplicity, choose Map all fields directly for Source to destination filed mapping.
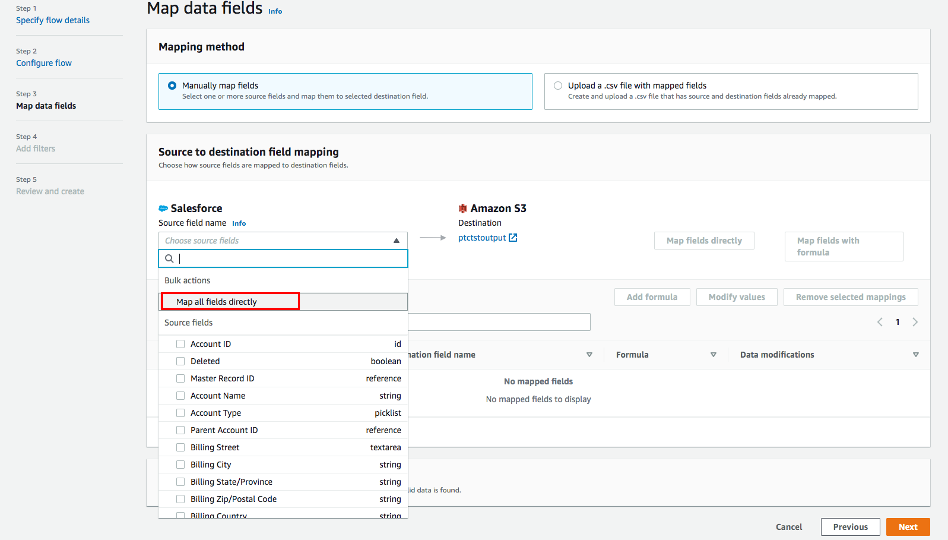
Once you click on "Map all fields directly", all the fields will show under Mapped fields. Click on the checkbox for the field(s) you want to Add formula (concatenates), Modify values (mask or truncate field values), or Remove selected mappings.
For this example, no checkbox will be ticked.
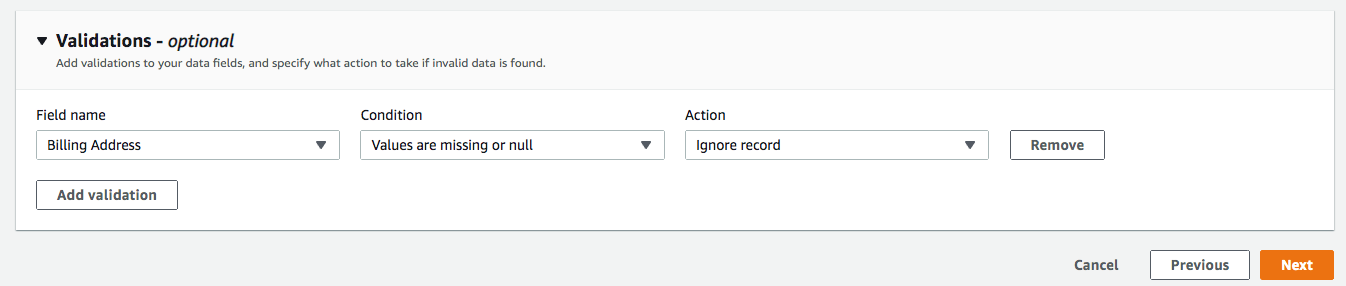
- For Validations, add in a condition to ignore the record that contains no "Billing Address" (optional). Click Next.
Step 4: Add filters
You can specify a filter to determine which records to transfer. For this example, add a condition to filter out the records that are deleted (optional). Click Next.

Step 5. Review and create
Review all the information you just entered. Modify if necessary. Click Create flow.
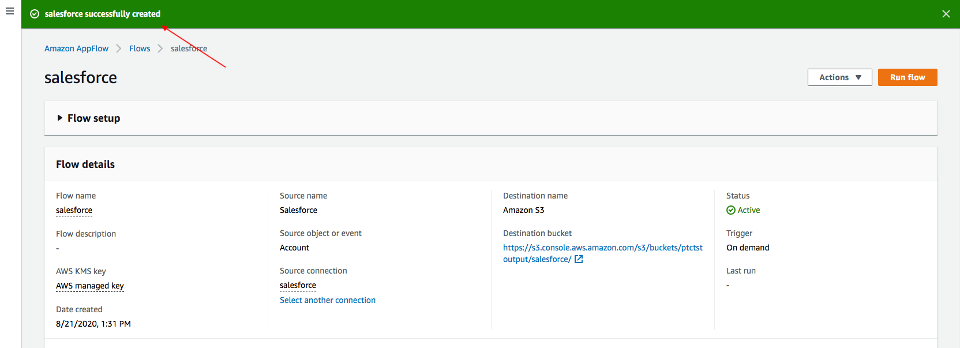
A message of successful flow creation will be displayed with the flow information once the flow is created,
Run flow
Click Run flow on the upper right corner.
Upon completion of the flow run, message will be displayed to indicate a successful run.
Message example:

Click the link to the bucket to view data. Salesforce data will be in JSON format.
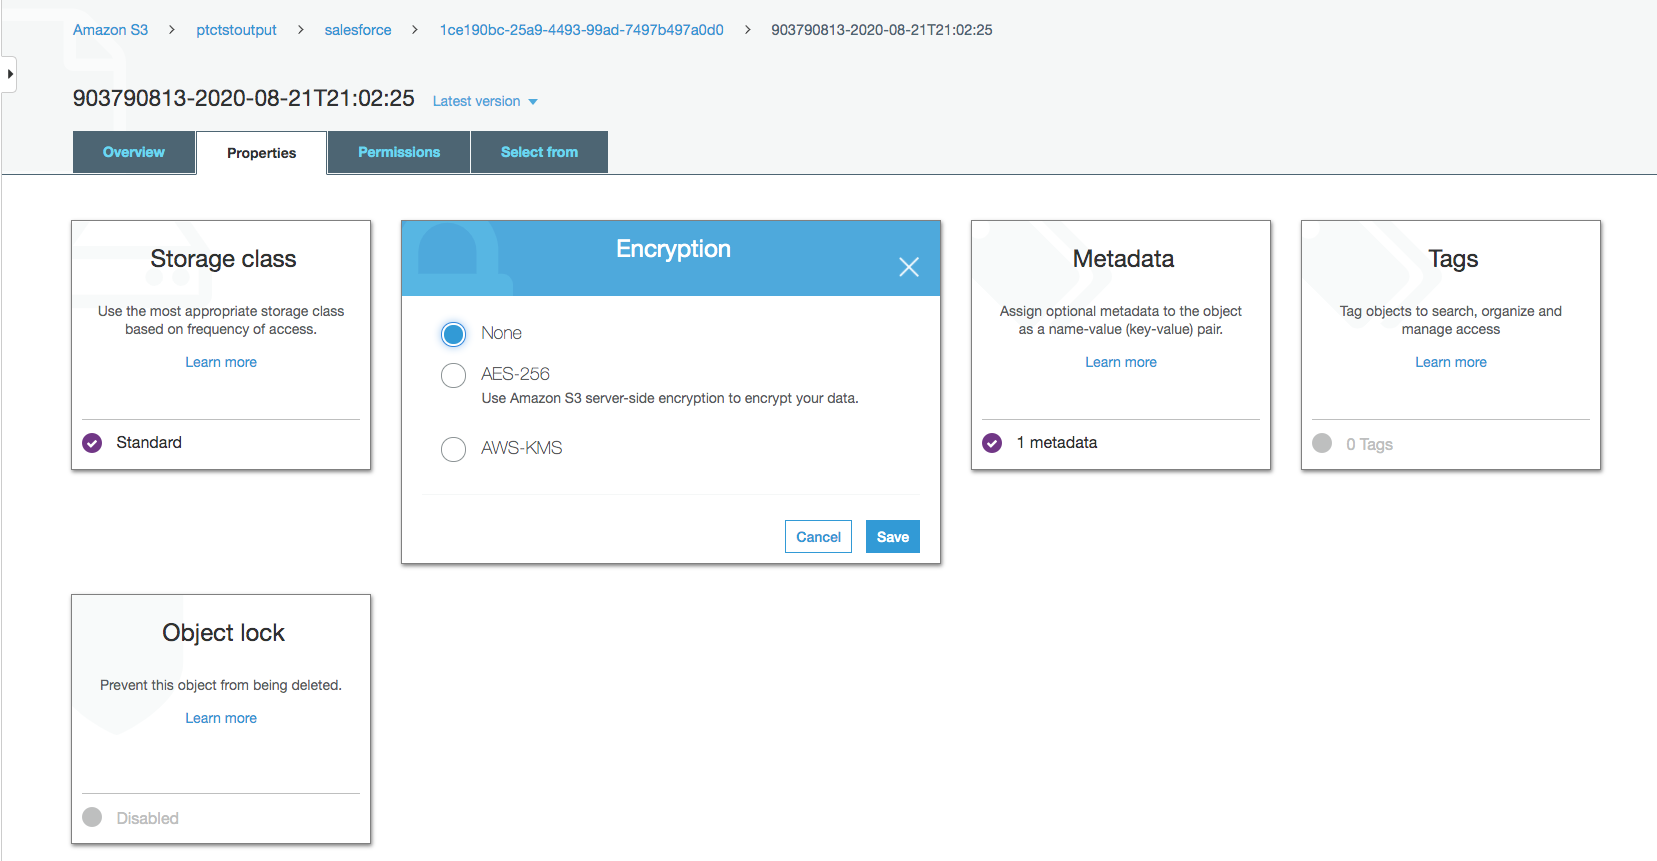
Change data file properties
By default, Salesforce data is encrypted. We need to remove the encryption for NOS to access it.
Click on the data file in your Amazon S3 bucket, then click the Properties tab.
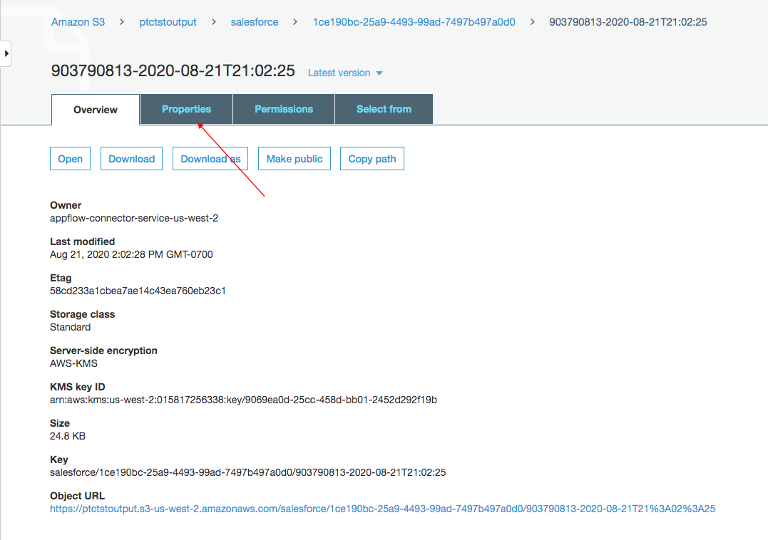
Click on the AWS-KMS from Encryption and change it from AWS-KMS encryption to None. Click Save.
Exploring Data Using NOS
Native Object Store has built in functionalities to explore and analyze data in Amazon S3. This section lists a few commonly used functions of NOS.
Create Foreign Table
Foreign table allows the external data to be easily referenced within the Vantage Advanced SQL Engine and makes the data available in a structured relational format.
To create a foreign table, first login to Teradata Vantage system with your credentials. Create AUTHORIZATION object with access keys for Amazon S3 bucket access. Authorization object enhances security by establishing control over who is allowed to use a foreign table to access Amazon S3 data.
"USER" is the AccessKeyId for your AWS account, and "PASSWORD" is the SecretAccessKey.
Create a foreign table against the JSON file on Amazon S3 using following command.
At a minimum, the foreign table definition must include a table name and location clause (highlighted in yellow) which points to the object store data. The Location requires a top-level single name, referred to as a "bucket" in Amazon.
If the file name doesn't have standard extension (.json, .csv, .parquet) at the end, the Location and Payload columns definition is also required (highlighted in turquoise) to indicate the type of the data file.
Foreign tables are always defined as No Primary Index (NoPI) tables.
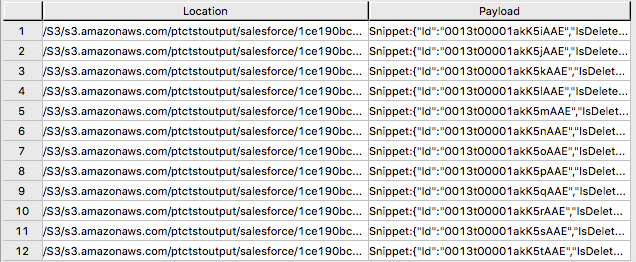
Once foreign table's created, you can query the content of the Amazon S3 data set by doing "Select" on the foreign table.
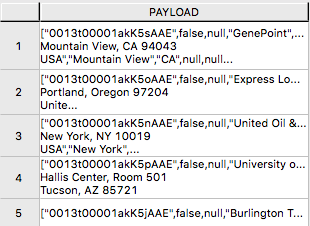
The foreign table only contains two columns: Location and Payload. Location is the address in the object store system. The data itself is represented in the payload column, with the payload value within each record in the foreign table representing a single JSON object and all its name-value pairs.
Sample output from "SELECT * FROM salesforce;".
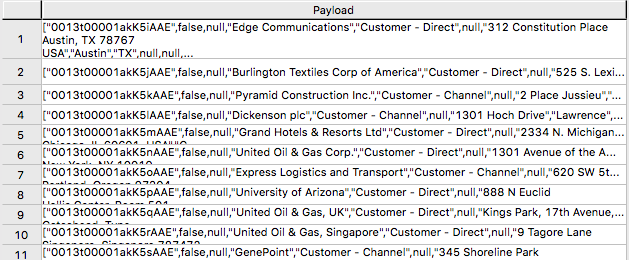
Sample output form "SELECT payload.* FROM salesforce;".
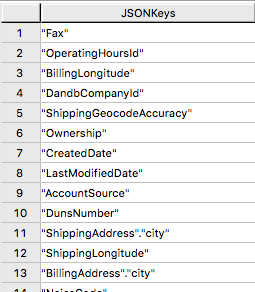
JSON_KEYS Table Operator
JSON data may contain different attributes in different records. To determine the full list of possible attributes in a data store, use JSON_KEYS:
Partial Output:
Create View
Views can simplify the names associated with the payload attributes, make it easier to code executable SQL against object store data, and hide the Location references in the foreign table to make it look like normal columns.
Following is a sample create view statement with the attributes discovered from the JSON_KEYS table operator above.
Partial output:

READ_NOS Table Operator
READ_NOS table operator can be used to sample and explore a percent of the data without having first defined a foreign table, or to view a list of the keys associated with all the objects specified by a Location clause.
Output:
Join Amazon S3 Data to In-Database Tables
Foreign table can be joined with a table(s) in Vantage for further analysis. For example, ordering and shipping information are in Vantage in these three tables – Orders, Order_Items and Shipping_Address.
DDL for Orders:
DDL for Order_Items:
DDL for Shipping_Address:
And the tables have following data:
Orders:

Order_Items:

Shipping_Address:

By joining the salesforce foreign table to the established database table Orders, Order_Items and Shipping_Address, we can retrieve customer's order information with customer's shipping information.
Results:

Import Amazon S3 Data to Vantage
Having a persistent copy of the Amazon S3 data can be useful when repetitive access of the same data is expected. NOS foreign table does not automatically make a persistent copy of the Amazon S3 data. A few approaches to capture the data in the database are described below:
A "CREATE TABLE AS … WITH DATA" statement can be used with the foreign table definition acting as the source table. Use this approach you can selectively choose which attributes within the foreign table payload that you want to include in the target table, and what the relational table columns will be named.
SELECT* * *FROM* salesforceVantage;partial results:

An alternative to using foreign table is to use the READ_NOS table operator. This table operator allows you to access data directly from an object store without first building a foreign table. Combining READ_NOS with a CREATE TABLE AS clause to build a persistent version of the data in the database.
Results from the salesforceReadNOS table:

Another way of placing Amazon S3 data into a relational table is by "INSERT SELECT". Using this approach, the foreign table is the source table, while a newly created permanent table is the table to be inserted into. Contrary to the READ_NOS example above, this approach does require the permanent table be created beforehand.
One advantage of the INSERT SELECT method is that you can change the target table's attributes. For example, you can specify that the target table be MULTISET or not, or you can choose a different primary index.
Sample results:

Export Vantage Data to Amazon S3 Using NOS
I have a newleads table with 1 row in it on Vantage system.

Note there's no address information for this lead. Let's use the account information retrieved from Salesforce to update newleads table
Now the new lead has address information.

Write the new lead information into S3 bucket using WRITE_NOS.
Where Access_ID is the AccessKeyID, and Access_Key is the SecretAccessKey to the bucket.
Create an Amazon S3 to Salesforce Flow
Repeat Step 1 to create a flow using Amazon S3 as source and Salesforce as destination.
Step 1. Specify flow details
This step provides basic information for your flow.
Fill in Flow name (i.e., vantage2sf) and Flow description (optional), leave Customize encryption settings (advanced) unchecked. Click Next.
Step 2. Configure flow
This step provides information about the source and destination for your flow. For this example, we will be using Amazon S3 as the source, and Salesforce as the destination.
- For Source details, choose Amazon S3, then choose the bucket where you wrote your CSV file to (i.e. vantagecsv)
- For Destination details, choose Salesforce, use the connection you created in Step 1 from the drop-down list for Choose Salesforce connection, and Lead as Choose Salesforce object.
- For Error handling, use the default Stop the current flow run.
- Flow trigger is Run on demand. Click Next.
Step 3. Map data fields
This step determines how data is transferred from the source to the destination.
-
Use Manually map fields as Mapping method
-
Use Insert new records (default) as Destination record preference
-
For Source to destination filed mapping, use the following mapping
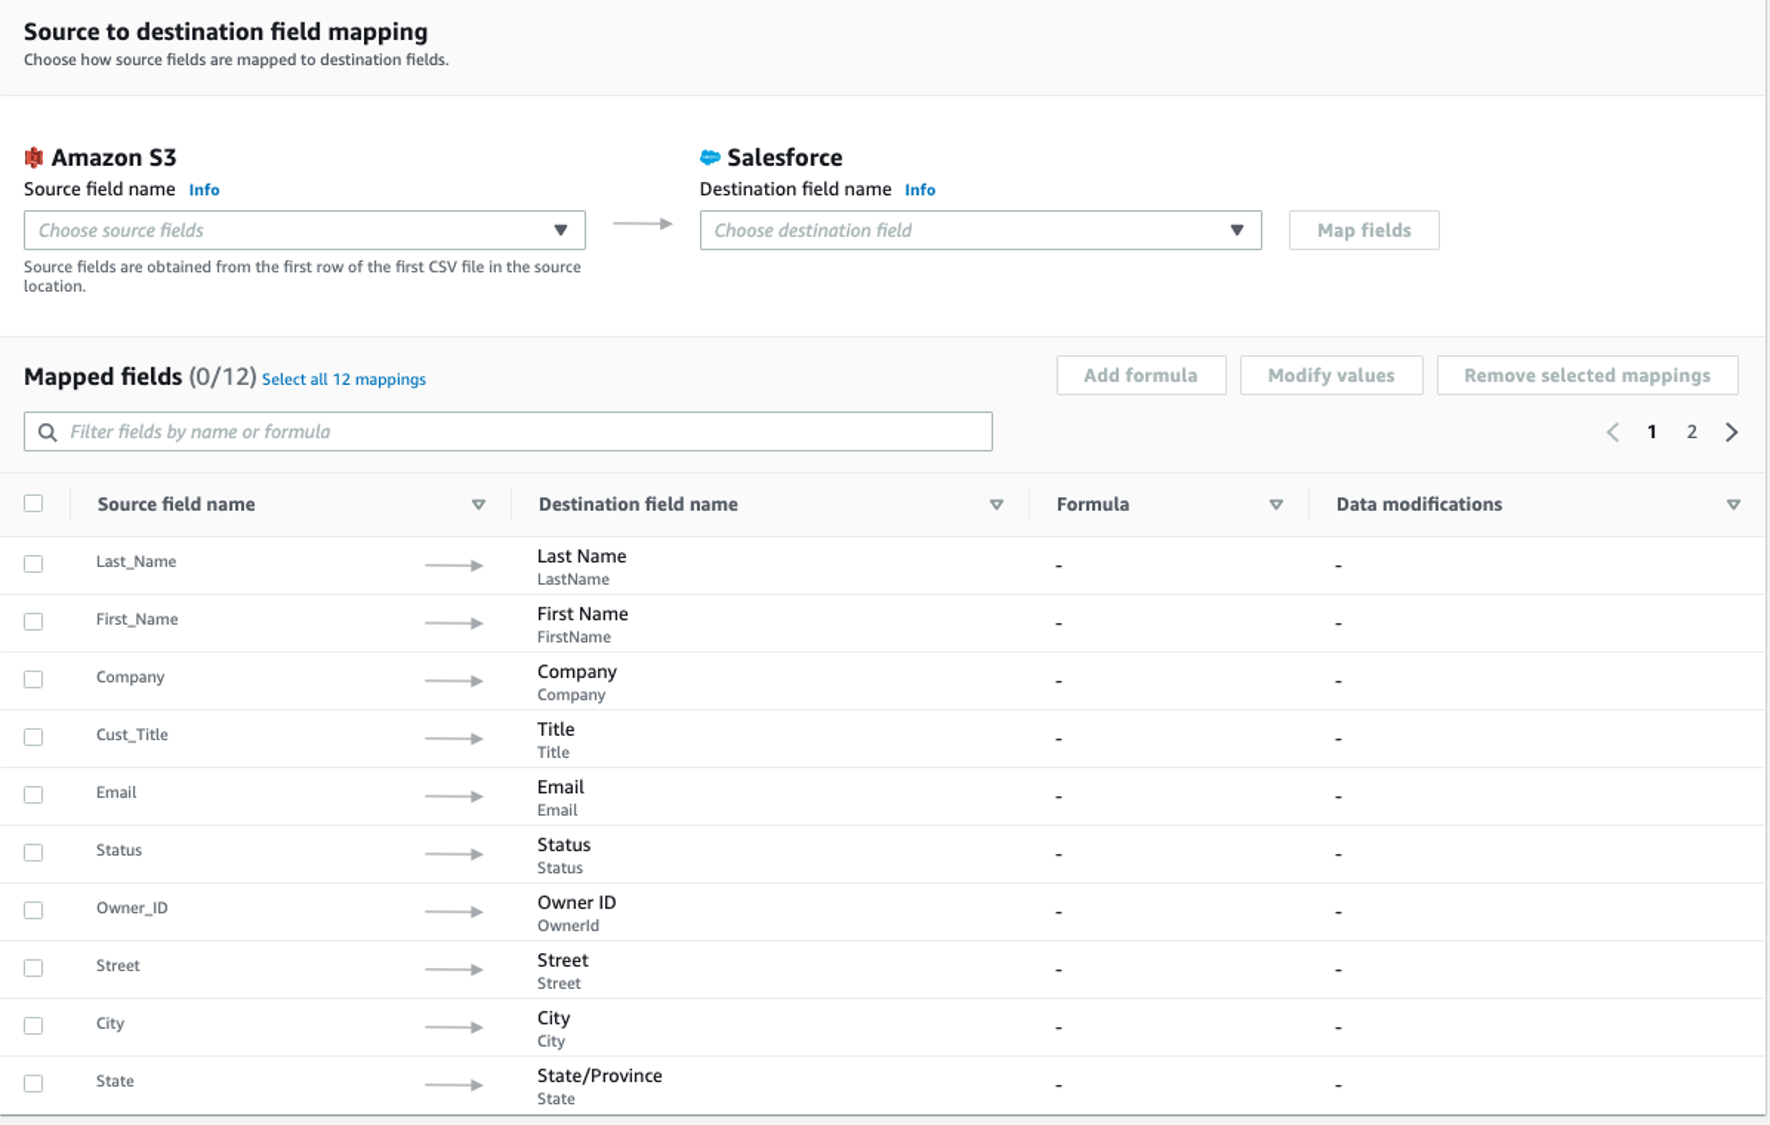

-
Click Next.
Step 4. Add filters
You can specify a filter to determine which records to transfer. For this example, no filter is added. Click Next.
Step 5. Review and create
Review all the information you just entered. Modify if necessary. Click Create flow.
A message of successful flow creation will be displayed with the flow information once the flow is created,
Run flow
Click Run flow on the upper right corner.
Upon completion of the flow run, message will be displayed to indicate a successful run.
Message example:

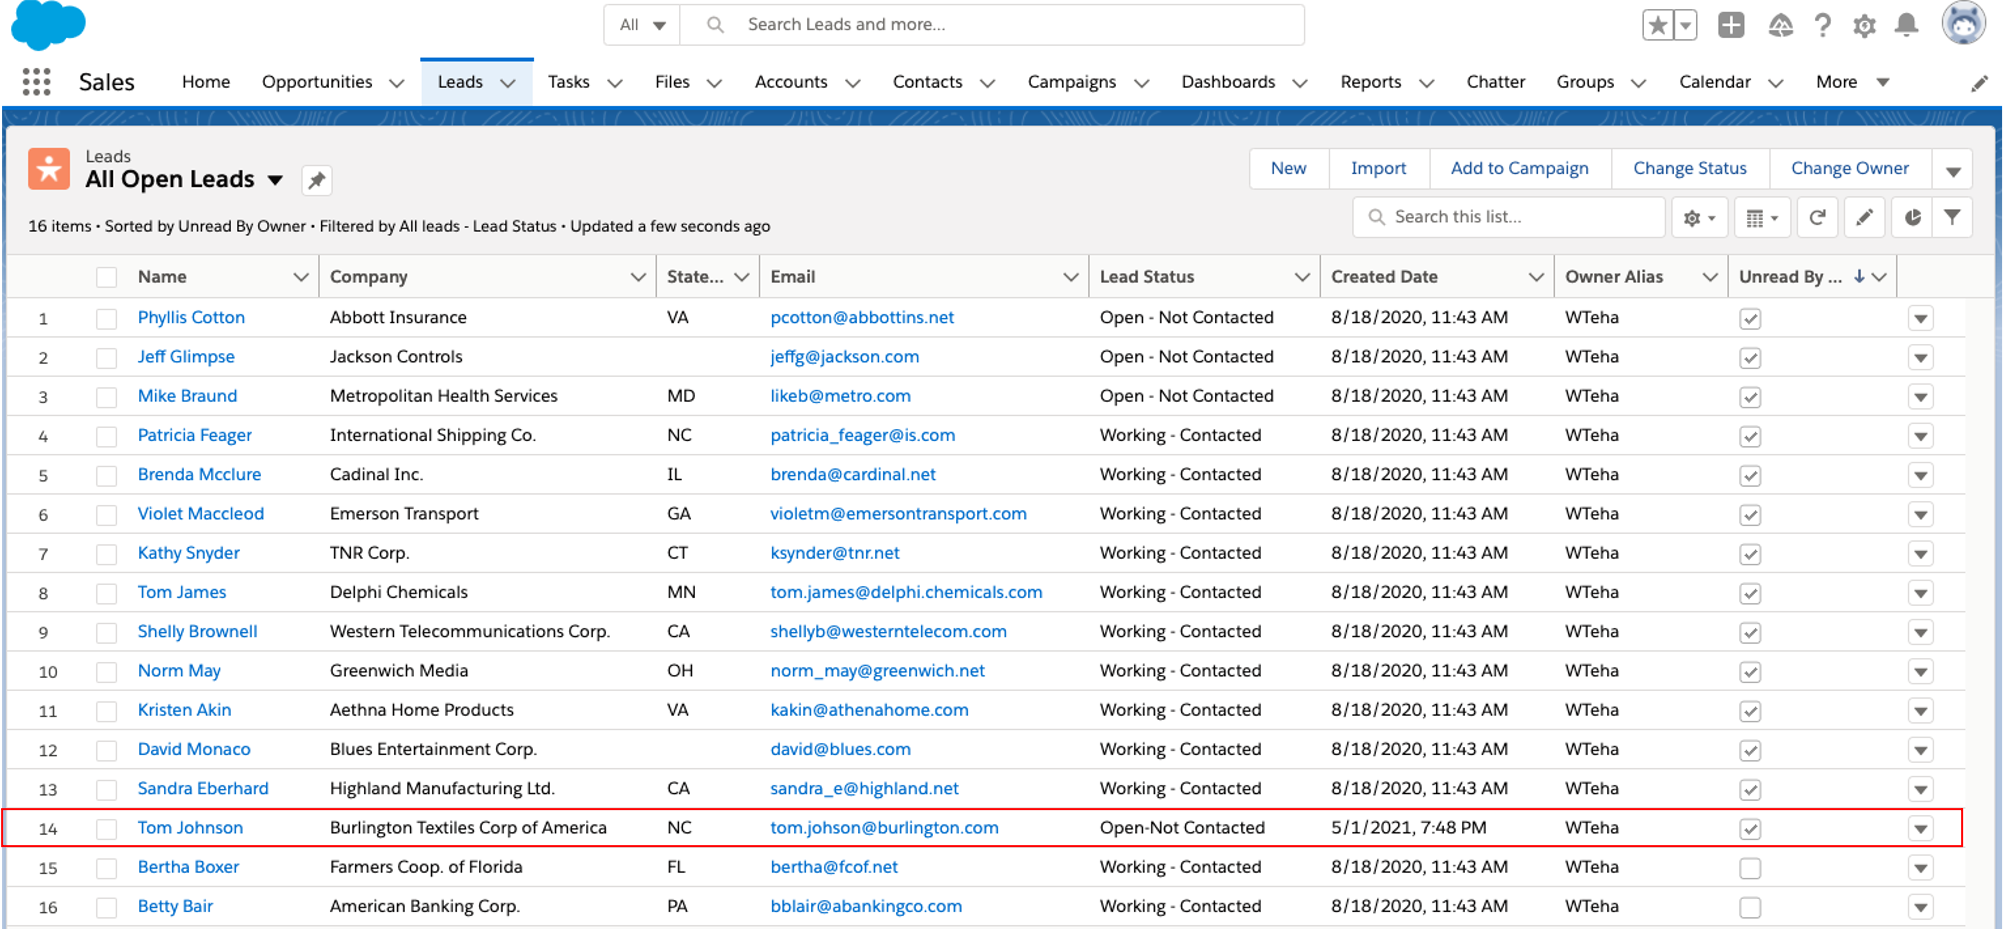
Browse to the Salesforce page, new lead Tom Johnson has been added.
Cleanup (Optional)
Once you are done with the Salesforce data, to avoid incurring charges to your AWS account (i.e., AppFlow, Amazon S3, Vantage and VM) for the resources used, follow these steps:
-
AppFlow:
- Delete the "Connections" you created for the flow
- Delete the flows
-
Amazon S3 bucket and file:
- Go to the Amazon S3 buckets where the Vantage data file is stored, and delete the file(s)
- If there are no need to keep the buckets, delete the buckets
-
Teradata Vantage Instance
- Stop/Terminate the instance if no longer needed
If you have any questions or need further assistance, please visit our community forum where you can get support and interact with other community members.