Run Teradata Jupyter Notebook Demos for VantageCloud Lake in Microsoft Azure
Overview
This quickstart details the process for running the Teradata Jupyter Notebook Demos for VantageCloud Lake, on Microsoft Azure.
Prerequisites
- Access to a Microsoft Azure account
- Access to a VantageCloud Lake environment
Microsoft Azure setup
In this section we will cover in detail each of the steps below:
- Create a Microsoft Azure Web App based on Teradata Jupyter Lab extensions Docker image
- Configure Jupyter Lab extensions Azure Web App
- Load Vantagecloud Lake demos to Jupyter Lab extensions Azure Web App
- Find the IP of the Jupyter Lab extensions Azure Web App
Create a Microsoft Azure Web App based on Teradata Jupyter Lab extensions Docker image
-
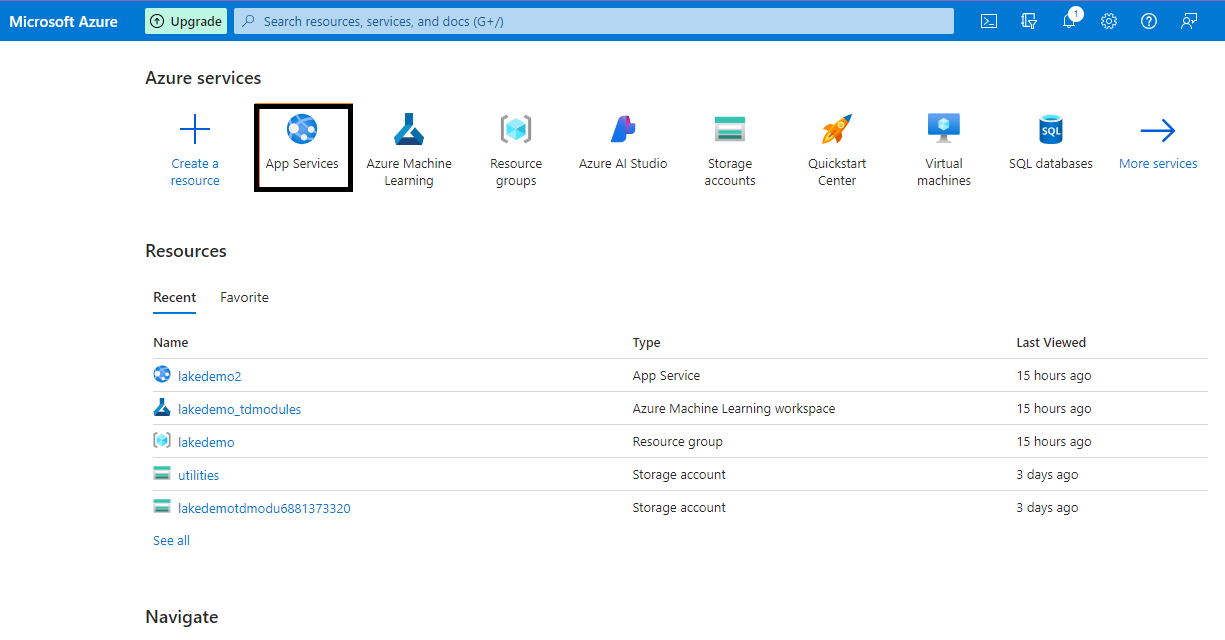
Login to Microsoft Azure and click on "APP Services"
-
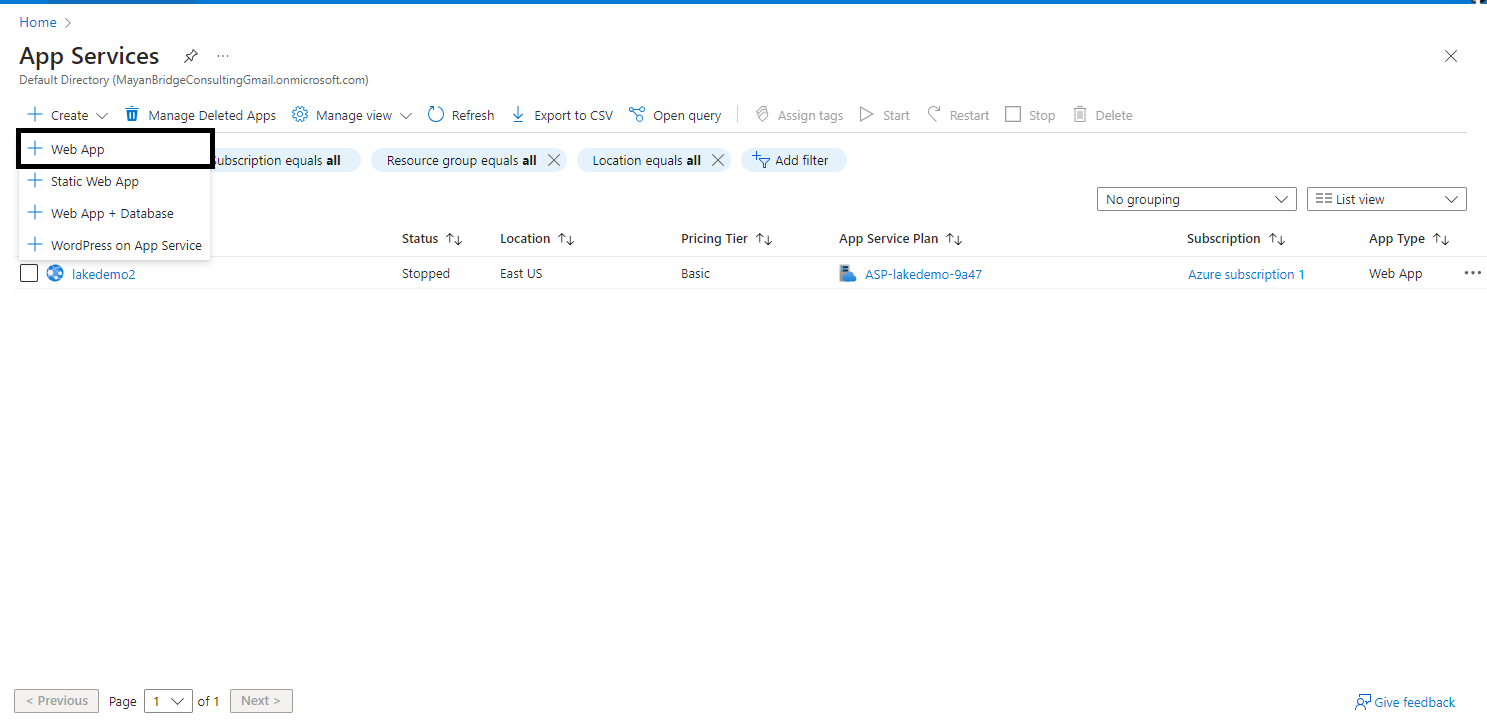
In "App Services" click Web App
-
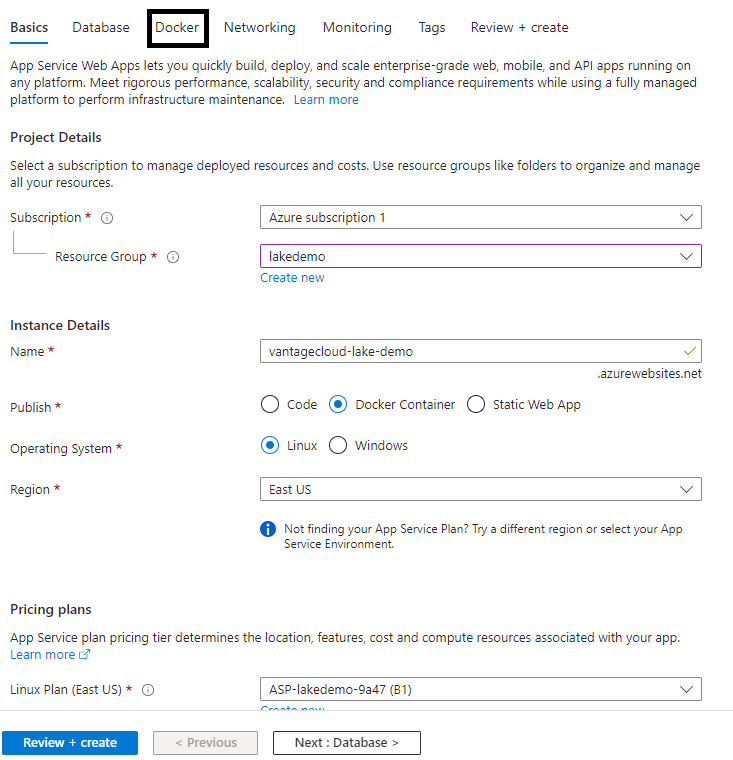
On the "Basics" tab:
- Select the appropriate resource group from the dropdown, or create a new one
- Enter a name for your web app.
- Select "Docker Container" in the "Publish" radio button options
- Select "Linux" as the operating system
- Select the appropriate region from the dropdown
- Select the appropriate App Service plan. If you don't have one, a new one will be created with default configurations
팁For purposes of the VantageCloud Lake demo redundancy is not needed
- After completing this tab, click the "Docker" tab to continue
-
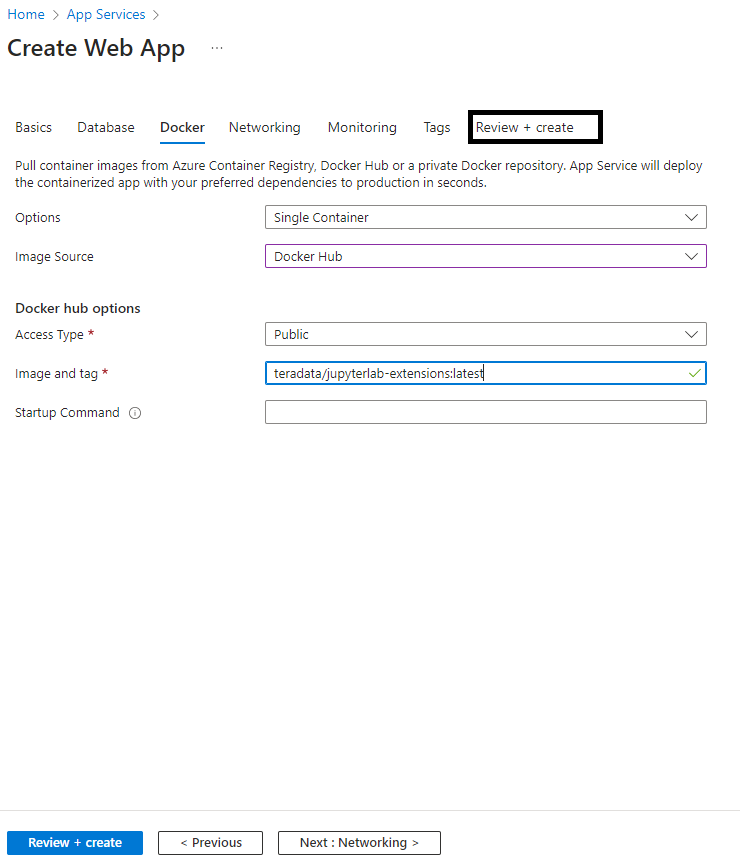
On the "Docker" tab:
- Select "Single Container" from the dropdown
- In the "Image Source" dropdown select "Docker Hub"
- In the "Access Type" dropdown select "Public"
- In "Image and tag" type
teradata/jupyterlab-extensions:latest
팁A startup command is not needed for this App Service
- Select the "Review + Create" tab to continue
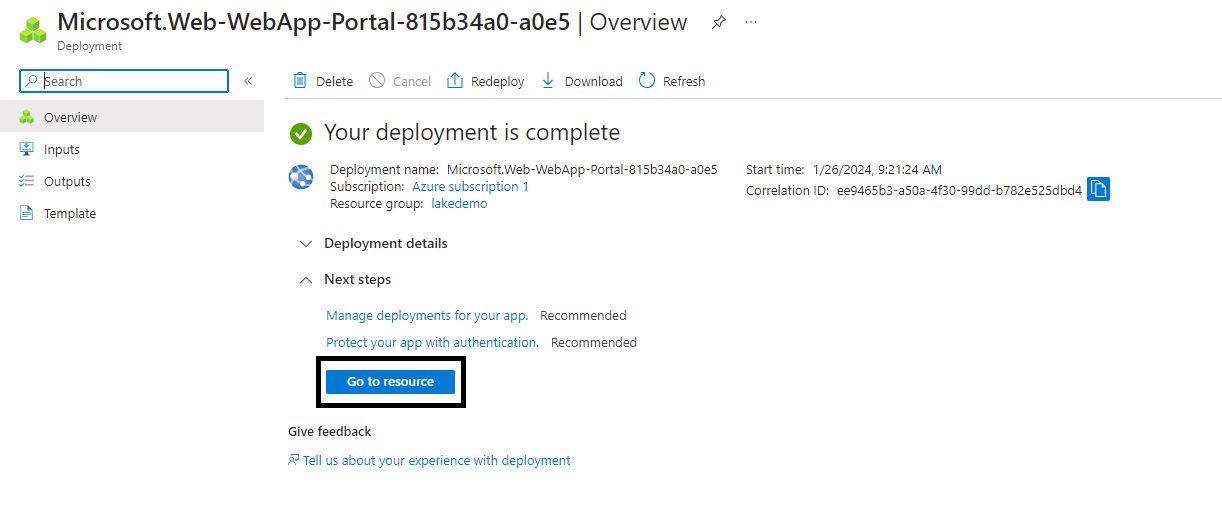
- In the "Review + Create" tab click the "Create" button
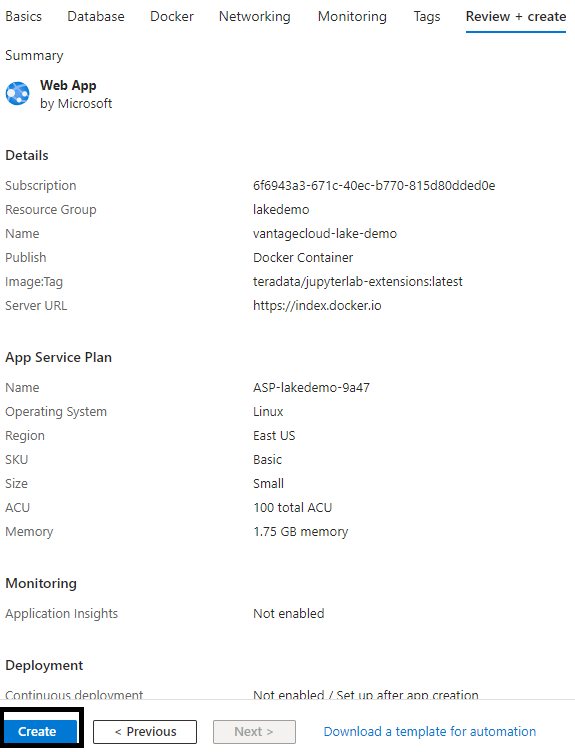
- When the deployment is complete click the "Go to Resource" button
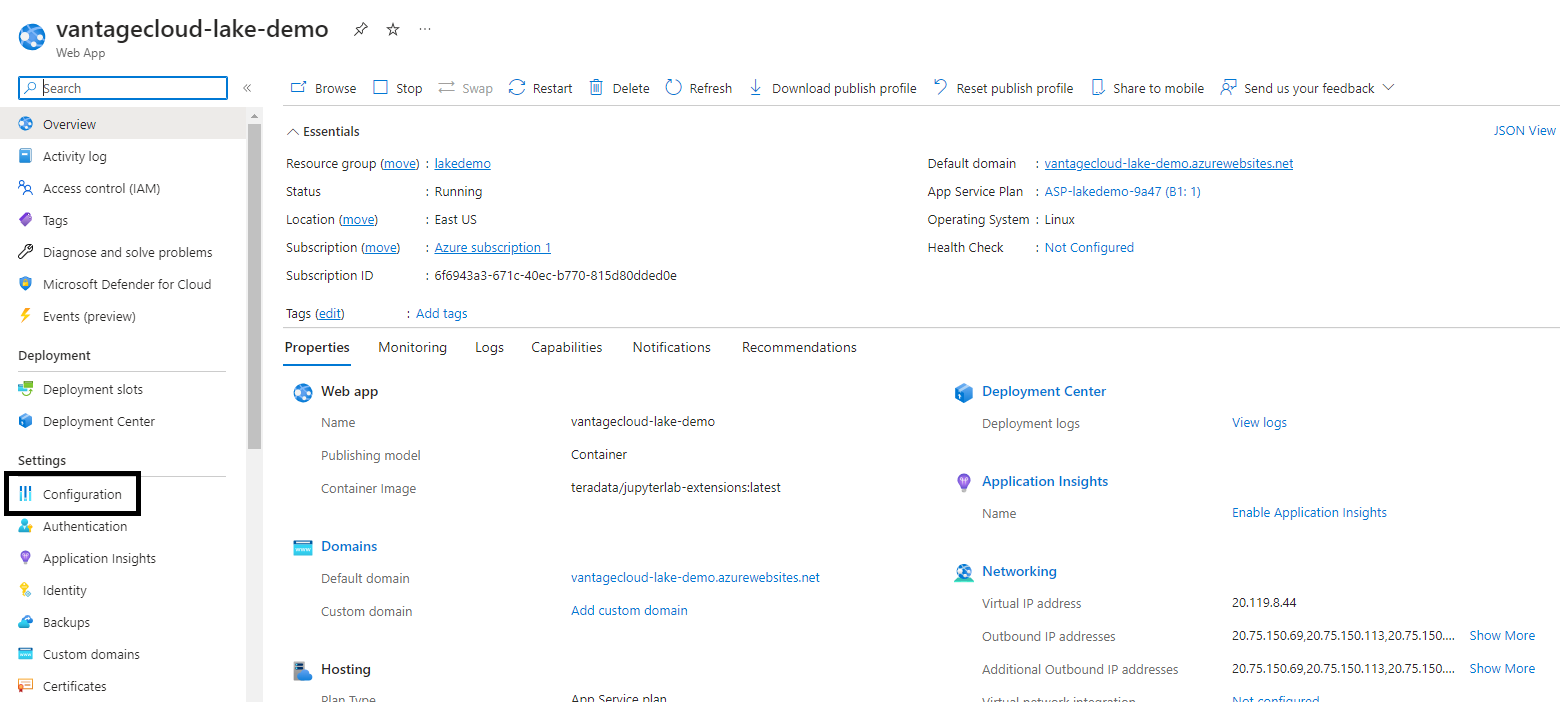
Configure Jupyter Lab extensions Azure Web App
-
Select Configuration on the right panel
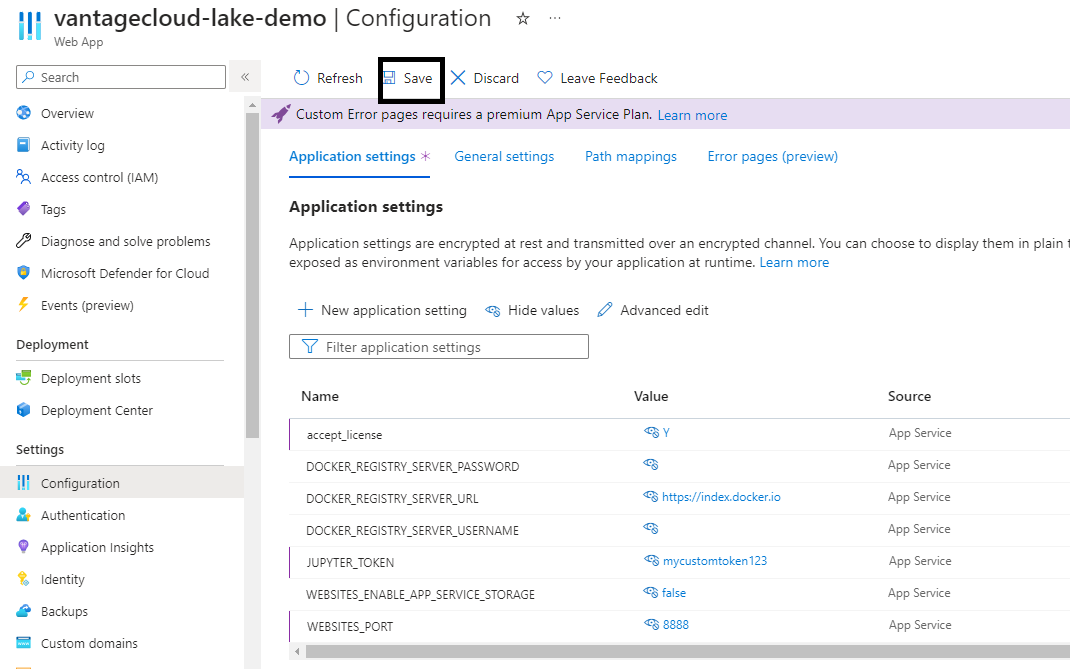
-
Add the following Application Settings
Application Setting Value "accept_license" Y "WEBSITES_PORT" 8888 "JUPYTER_TOKEN" Define the Jupyter Lab access token that you would like to use. 정보If you don't include the "JUPYTER_TOKEN" configuration, the container will generate a new token and log it to the console. You will need to retrieve it from the application logs. If you include the "JUPYTER_TOKEN" configuration key but leave the value blank, the system will set the token as an empty string, resulting in an unprotected Jupyter Lab environment without any token security. :::
-
Click on save, your app will be restarted
-
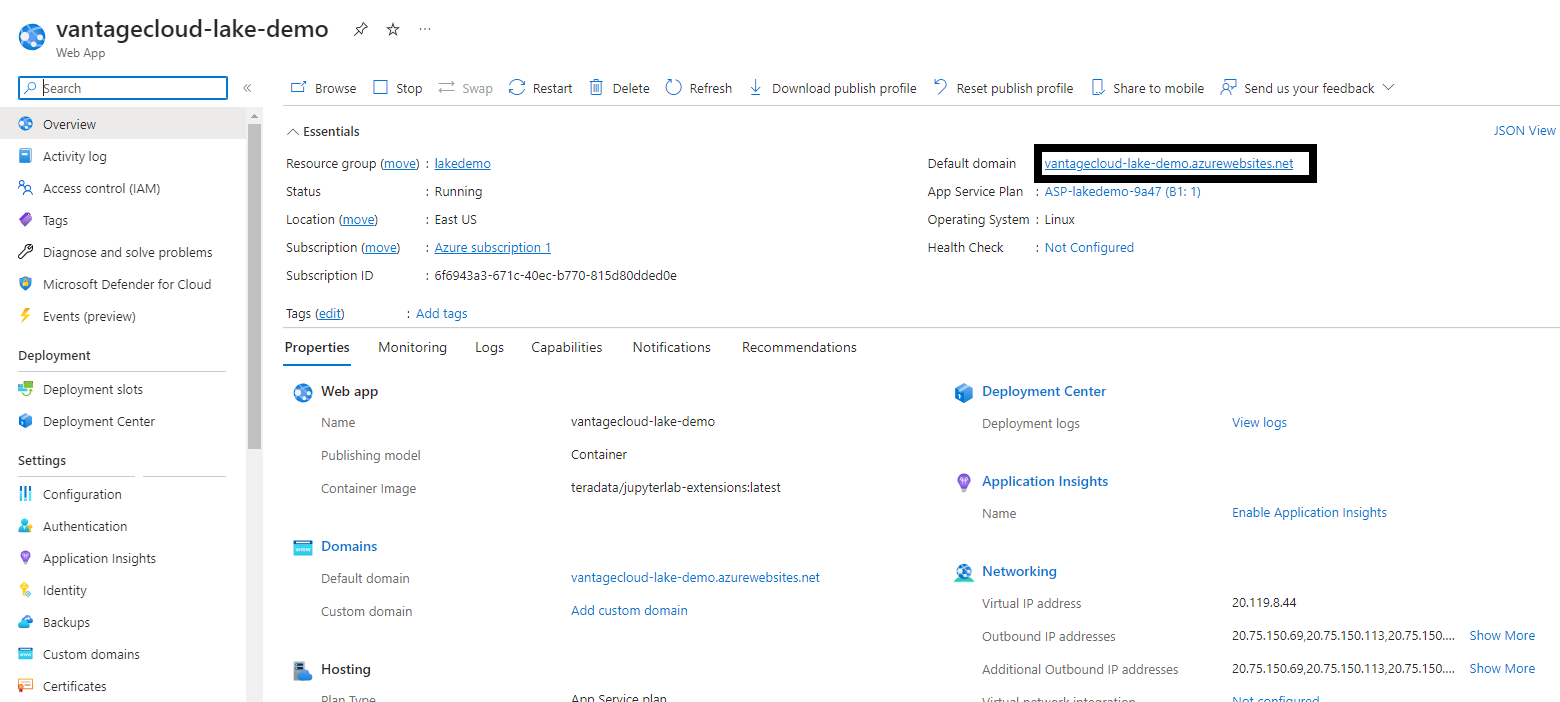
Return to the Overview tab on the right panel
Load Vantagecloud Lake demos to Jupyter Lab extensions Azure Web App
-
Click on Default domain
-
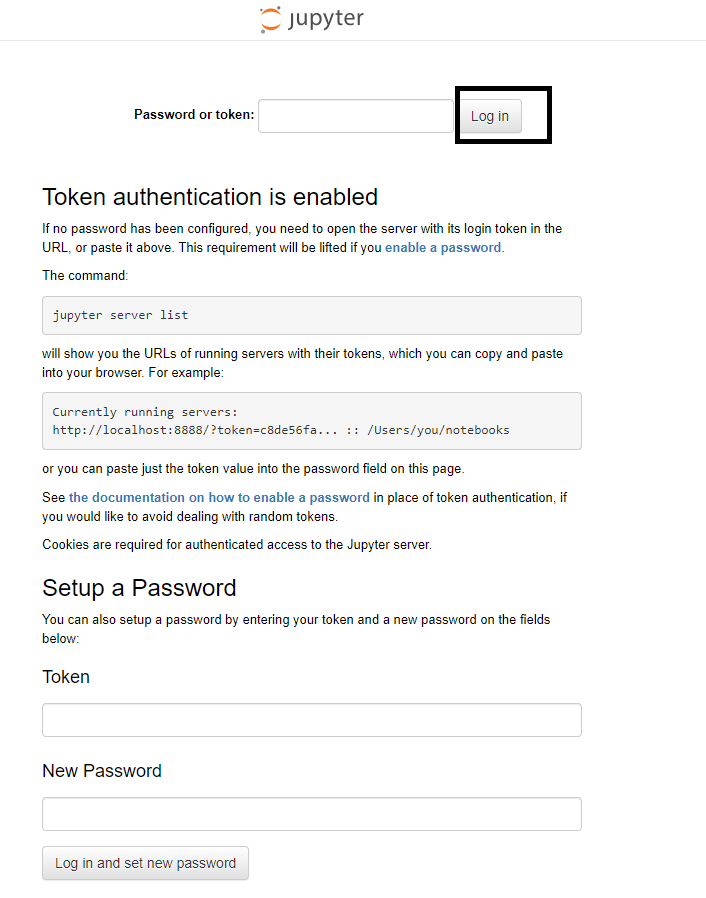
On the Jupyter Lab start dialogue enter the defined Jupyter token and click Log in
-
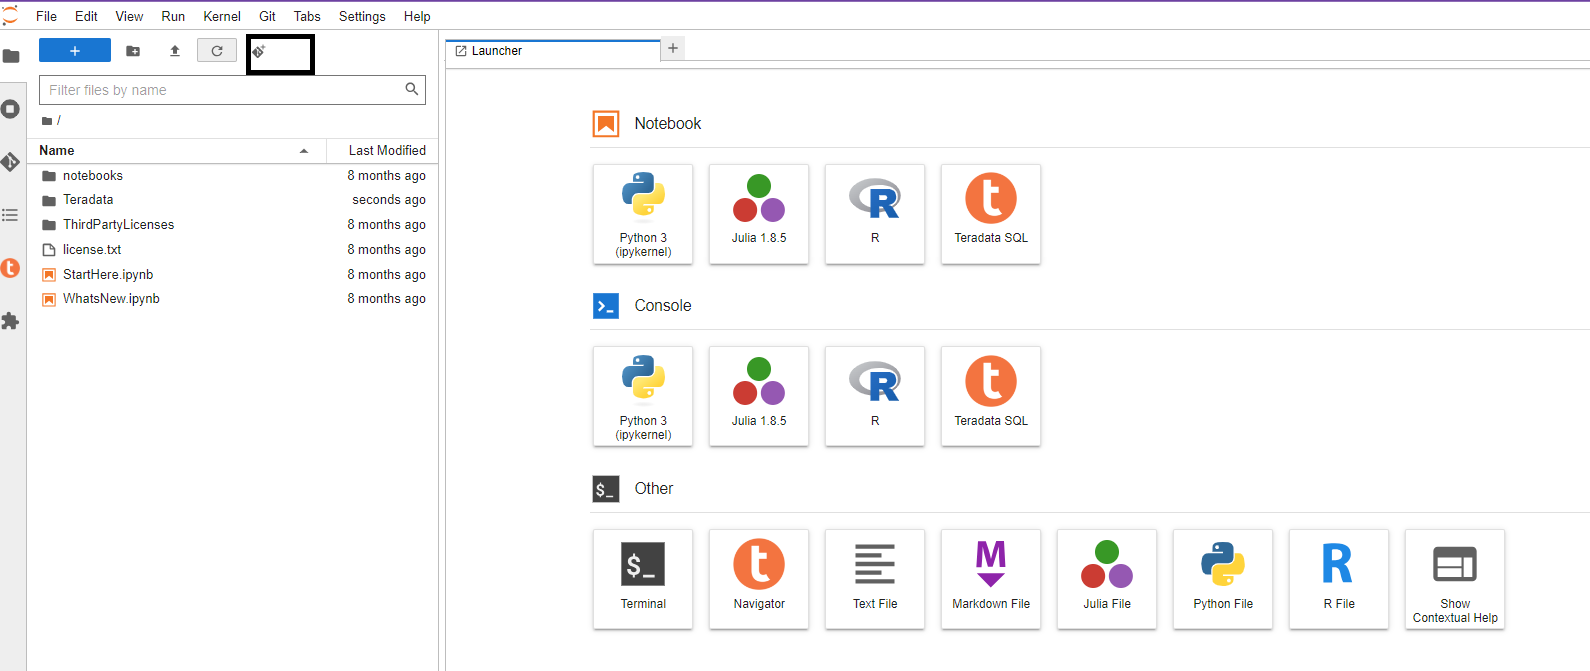
On the Jupyter Lab console click on the git icon
-
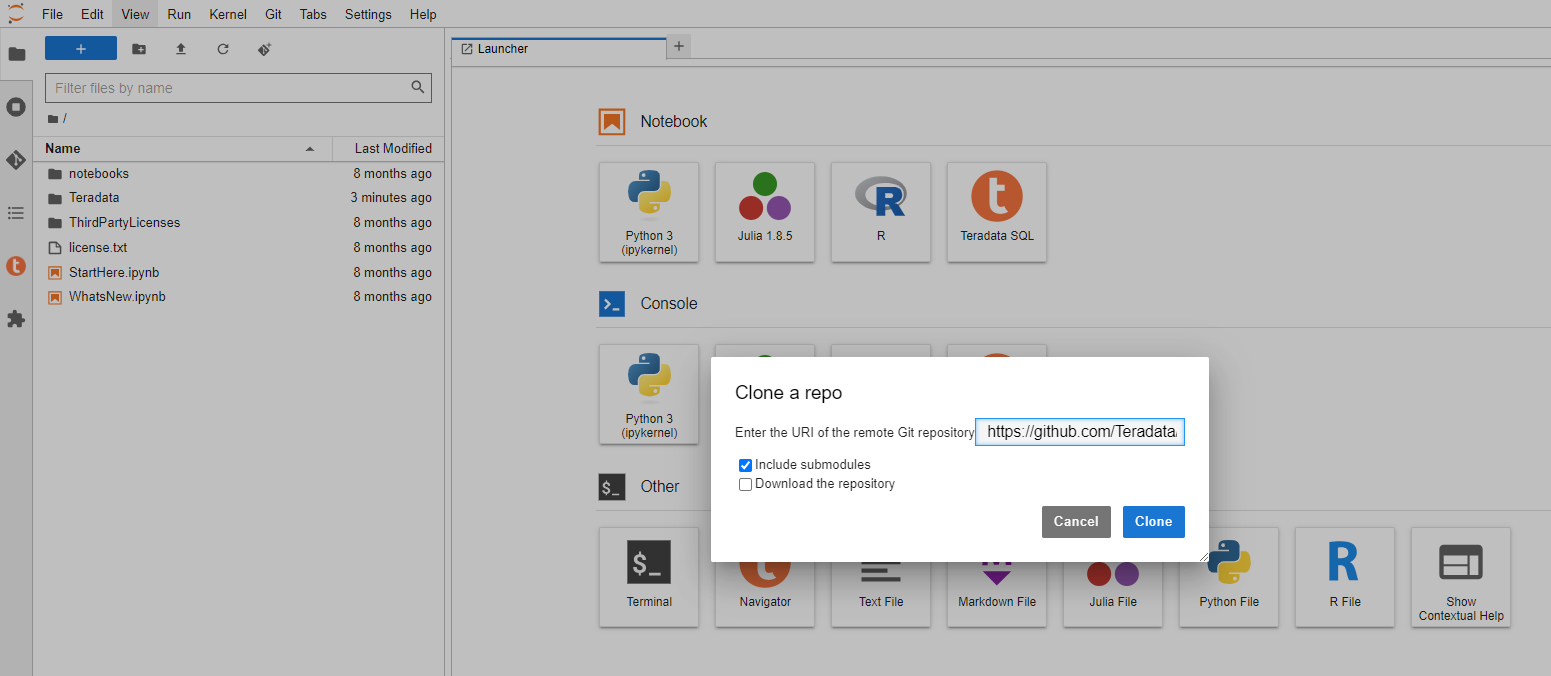
Copy the following URI in the corresponding field
https://github.com/Teradata/lake-demos.git
-
Click Clone
-
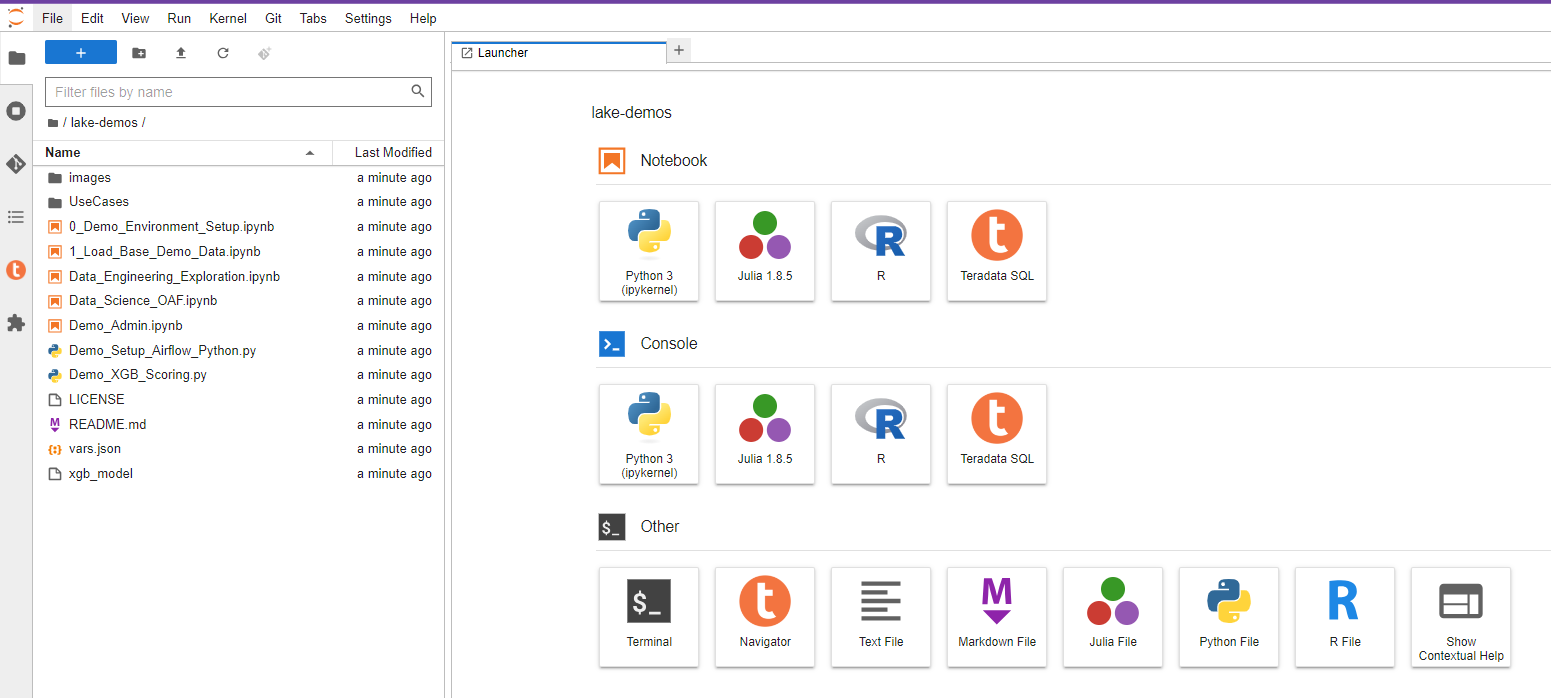
On the Jupyter Lab console click in the
lake-demosfolder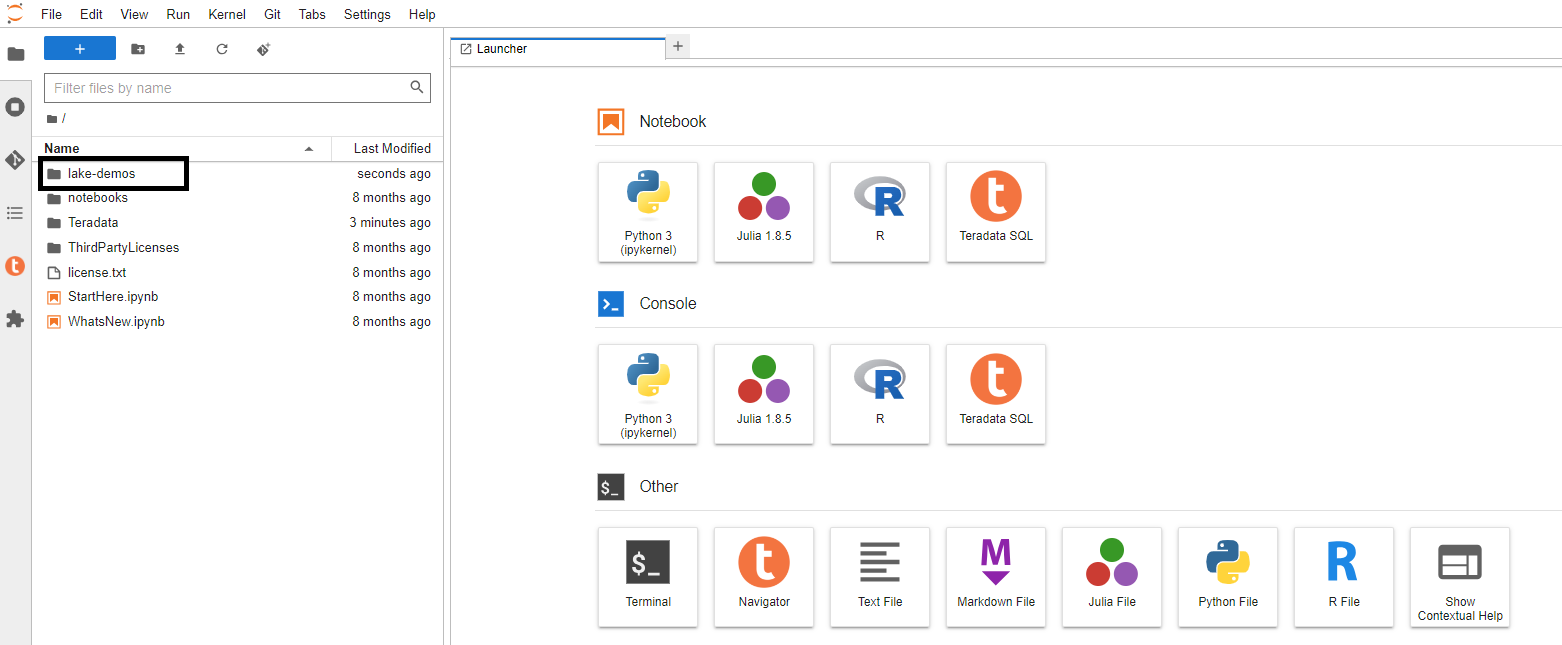
Find the IP of the Jupyter Lab extensions Azure Web App
-
In JupyterLab open a notebook with Teradata Python kernel and run the following command to find your notebook instance's IP address.
-
The next step is whitelist this IP in your VantageCloud Lake environment to allow the connection
-
This is for purposes of this guide and the notebook demos. For production environments, a more robust networking setting might be needed
-
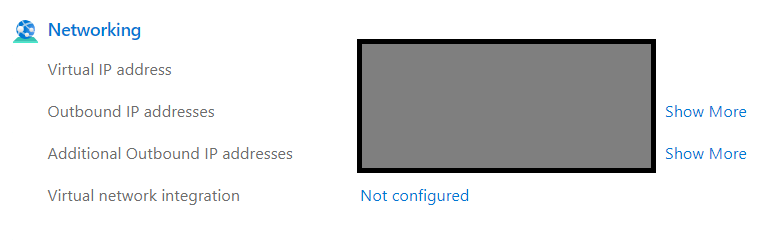
Azure App Service offers, as well, a list of all possible IP addresses that the service might expose. This is under the overview tab
VantageCloud Lake Configuration
-
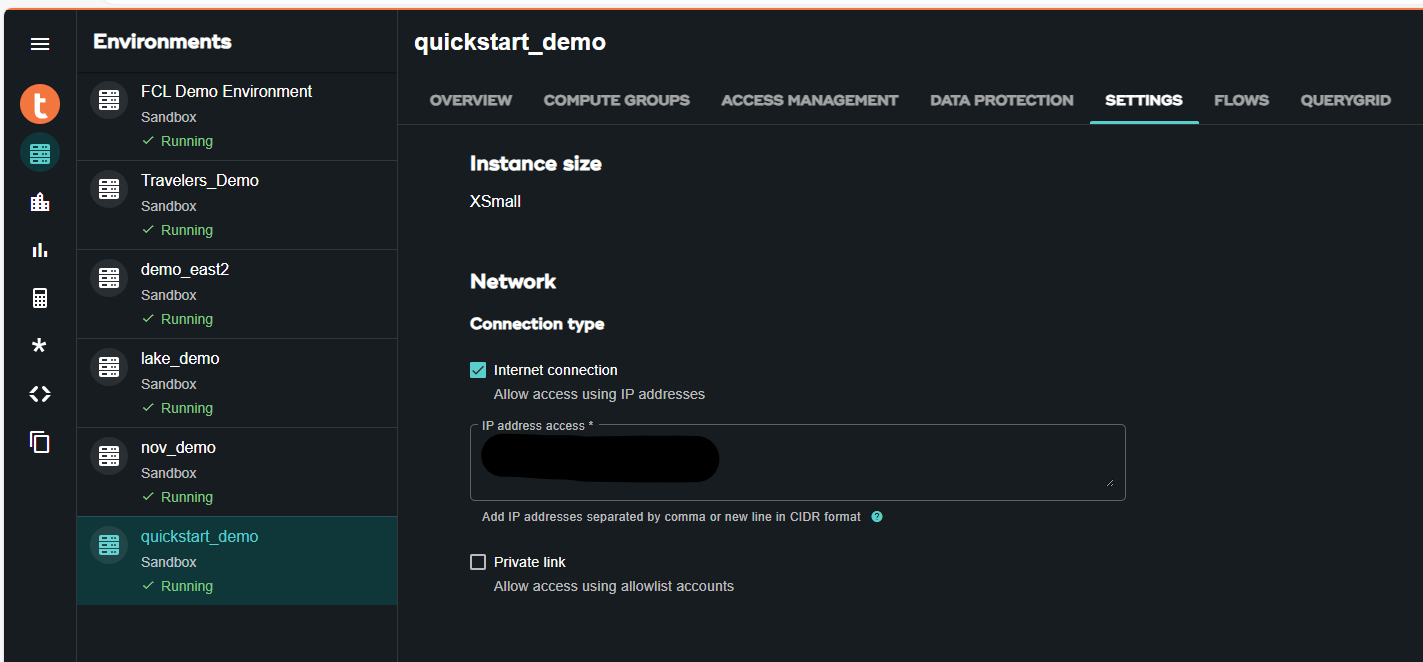
In the VantageCloud Lake environment, under settings, add the IP of your notebook instance
팁A lake environment supports multiple address whitelisting
Jupyter Notebook Demos for VantageCloud Lake
Configurations
-
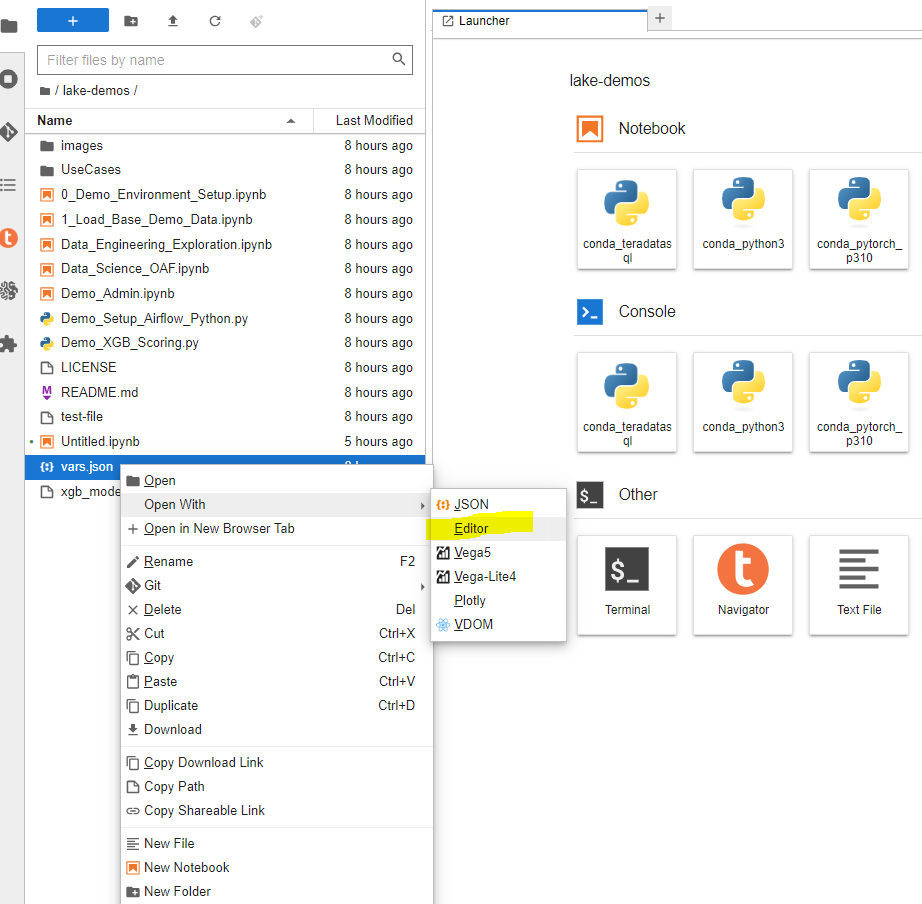
vars.json should be edited to match the configuration of your VantageCloud Lake environment
-
Especifically the following values should be added
Variable Value "host" Public IP value from your VantageCloud Lake environment "UES_URI" Open Analytics from your VantageCloud Lake environment "dbc" The master password of your VantageCloud Lake environment. -
You'll see that in the sample vars.json, the passwords of all users are defaulted to "password", this is just for illustration purposes, you should change all of these password fields to strong passwords, secure them as necessary, and follow other password management best practices.
정보Remember to change all passwords in the vars.json file.
Run demos
Open and execute all the cells in 0_Demo_Environment_Setup.ipynb to setup your environment. Followed by 1_Demo_Setup_Base_Data.ipynb to load the base data required for demo.
To learn more about the demo notebooks, go to Teradata Lake demos page on GitHub.
Summary
In this quick start we learned how to run Jupyter notebook demos for VantageCloud Lake in Microsoft Azure.