Automate Data Movement and Transformation with Airflow, Airbyte, and dbt in Teradata Vantage
Overview
This quickstart demonstrates how to leverage Apache Airflow as orchestration tool to automate the movement of data to Teradata using Airbyte. Once the data is in Teradata, trigger dbt to perform transformations, ensuring the data is clean, reliable and ready for analysis.
Prerequisites
-
Access to a Teradata Vantage instance.
注記If you need a test instance of Vantage, you can provision one for free at https://clearscape.teradata.com
-
Python 3.10 or later installed.
Demo project setup
- Clone the tutorial repository:
- Navigate to the directory:
Open the code in your preferred IDE.
Setting up Teradata instance
Follow the instructions from Getting started with ClearScape Analytics Experience and acquire following:
- Host
- Username
- Password
Jot it down, it will be needed in next step.
Airbyte setup
- After you install Airbyte OSS locally using
abctl, generate and copy the credentials:
At the moment of writing this quickstart, Airbyte installed with abctl performs unauthenticated pulls even if you pass in Docker credentials: https://github.com/airbytehq/airbyte/issues/46309. Since Docker limits unauthenticated pulls you may encounter 429 Too Many Requests error. If you run into this error, launch Airbyte using run-ab-platform.sh script as described in the Airbyte quickstart.

You can learn more about it from here
- Launch Airbyte UI by opening http://localhost:8000/ in your preferred browser and login with credentials from previous step.
-
Create a source
- Go to the Sources tab and click on
+ New source. - Search for “faker” using the search bar and select
Sample Data (Faker). - Adjust the Count and optional fields as needed for your use case. You can also leave as is.
- Click on
Set up source.
- Go to the Sources tab and click on
-
Create a destination
- Go to the Destinations tab and click on
+ New destination. - Search for “teradata” using the search bar and select
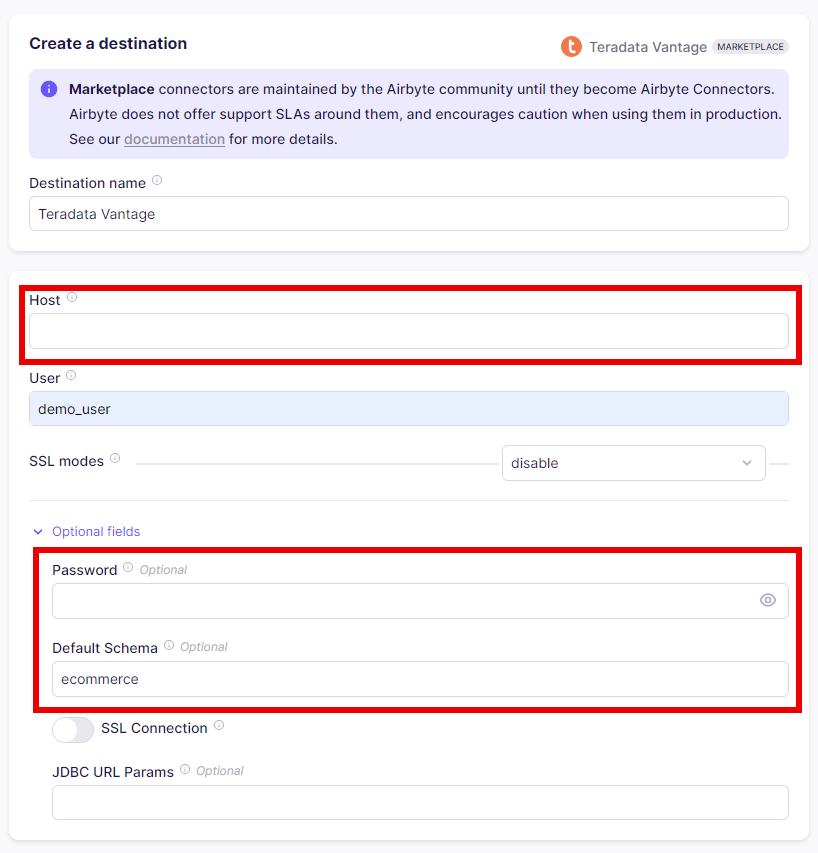
Teradata Vantage. - Enter the connection details as needed.
- Host (your Teradata instance hostname)
- Password (your Teradata instance password)
- Default Schema ('ecommerce')
- Click on
Set up destination.
- Go to the Destinations tab and click on
-
Create a connection
- Go to the Connections tab and click on
+ New connection. - Select the source and destination you just created.
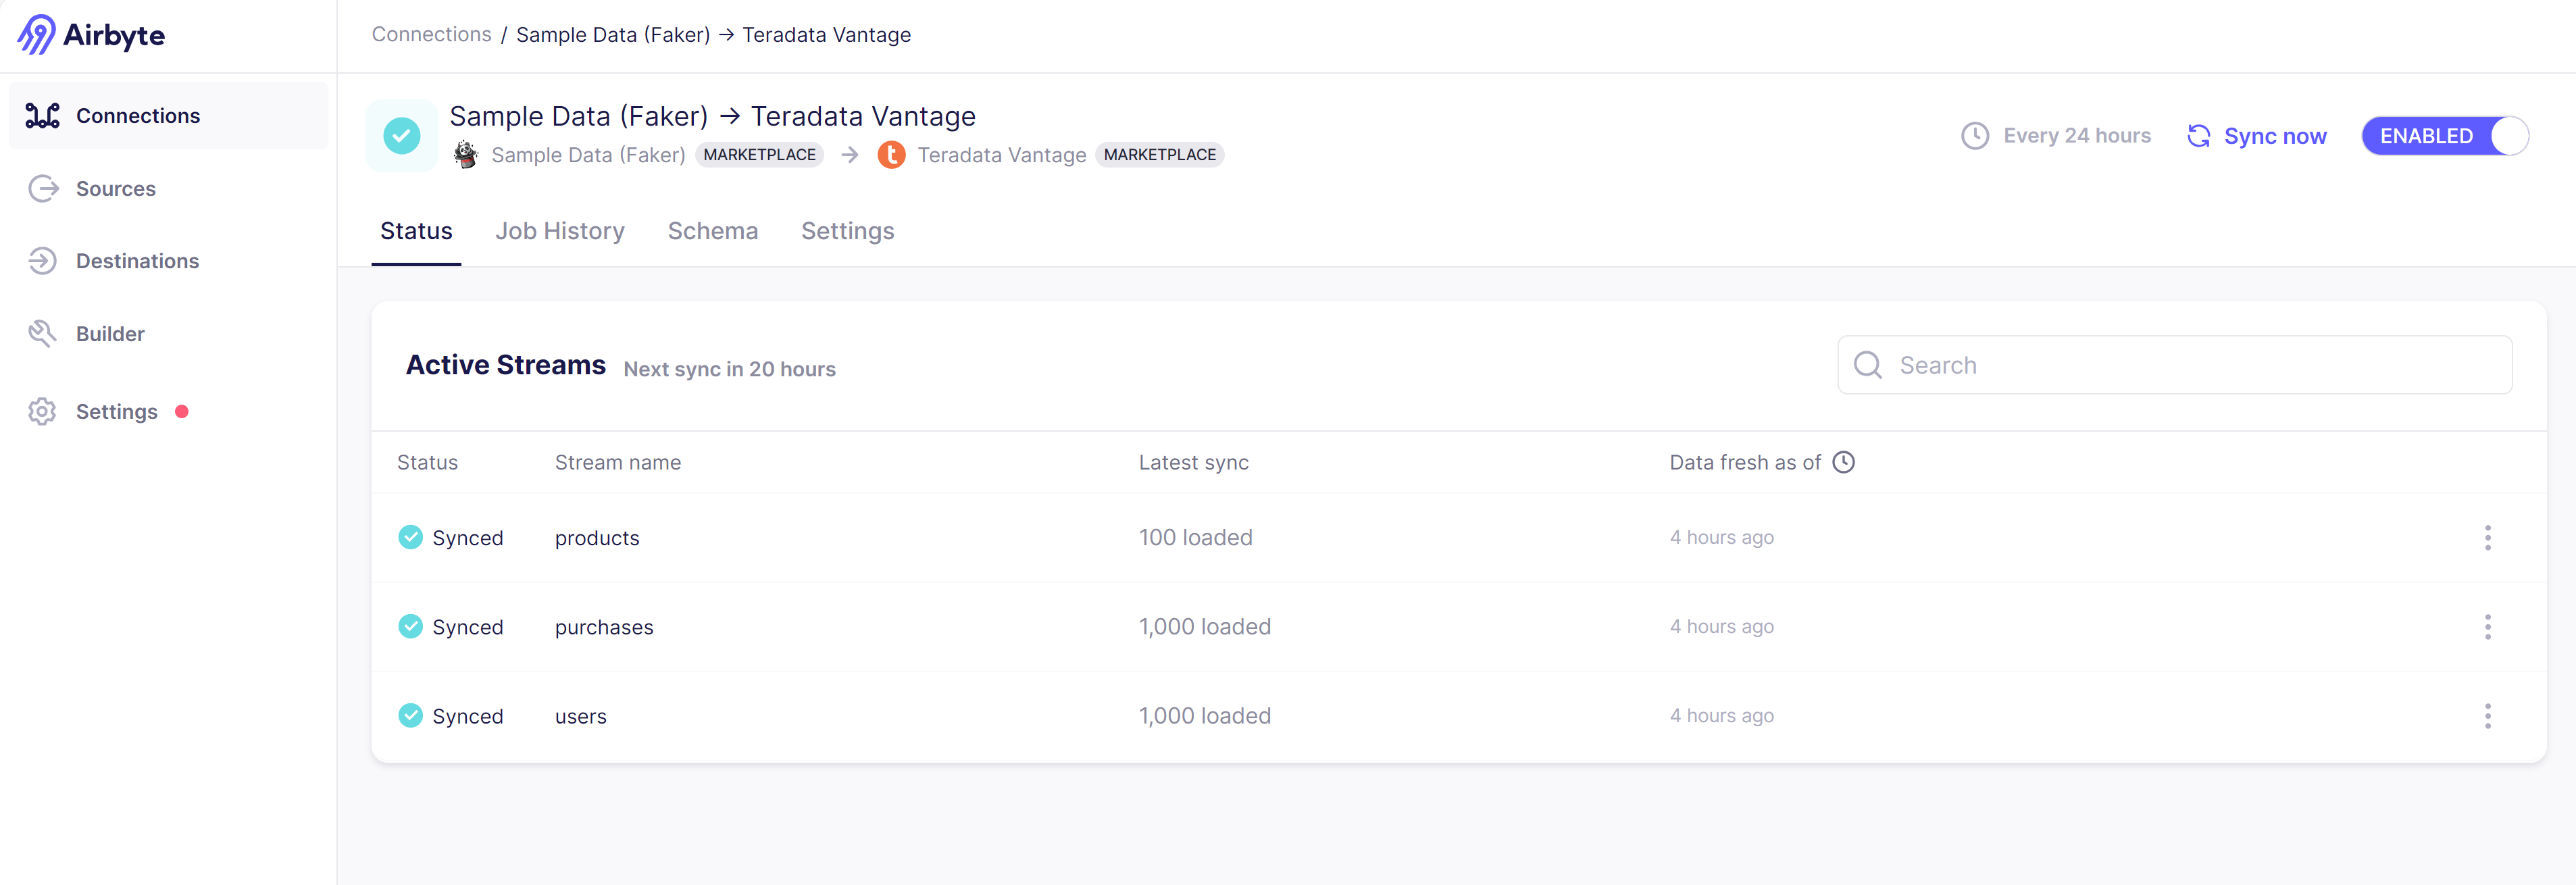
- Enter the connection details as needed.
- Click on
Set up connection.
- Go to the Connections tab and click on
Airflow setup
Airflow is at the center of the whole tutorial. It is responsible for making Airbyte move data to Teradata and trigger dbt to transform the data.
- Navigate to
orchestrationdirectory
-
Change the environment file name from
.env.exampleto.env. -
Link Airbyte connection to the Airflow DAG
- To execute the DAG in Airflow to trigger Airbyte,
connection_idneeds to be edited inelt_dag.pyfile - On the connection page, from the URL, copy the part between
connectionsandstatus. It is the value ofconnection_idvariable.

- Open
elt_dag.pyfile inside theairflow/dagsdirectory and add your Airbyte connection id online 28

- To execute the DAG in Airflow to trigger Airbyte,
-
Build custom Airflow image
- Launch Airflow container
This might take a few minutes initially as it sets up necessary databases and metadata.
-
Open Airflow UI
- Open Airflow UI by pasting
http://localhost:8080to browser of your choice. - Default username and password is
airflow(unless you changed it in.envfile)
- Open Airflow UI by pasting
-
Create Airflow connection with Airbyte
- Go to the
Admin>Connectionstab - Click on the + button to create a new connection
- Edit the page with following values
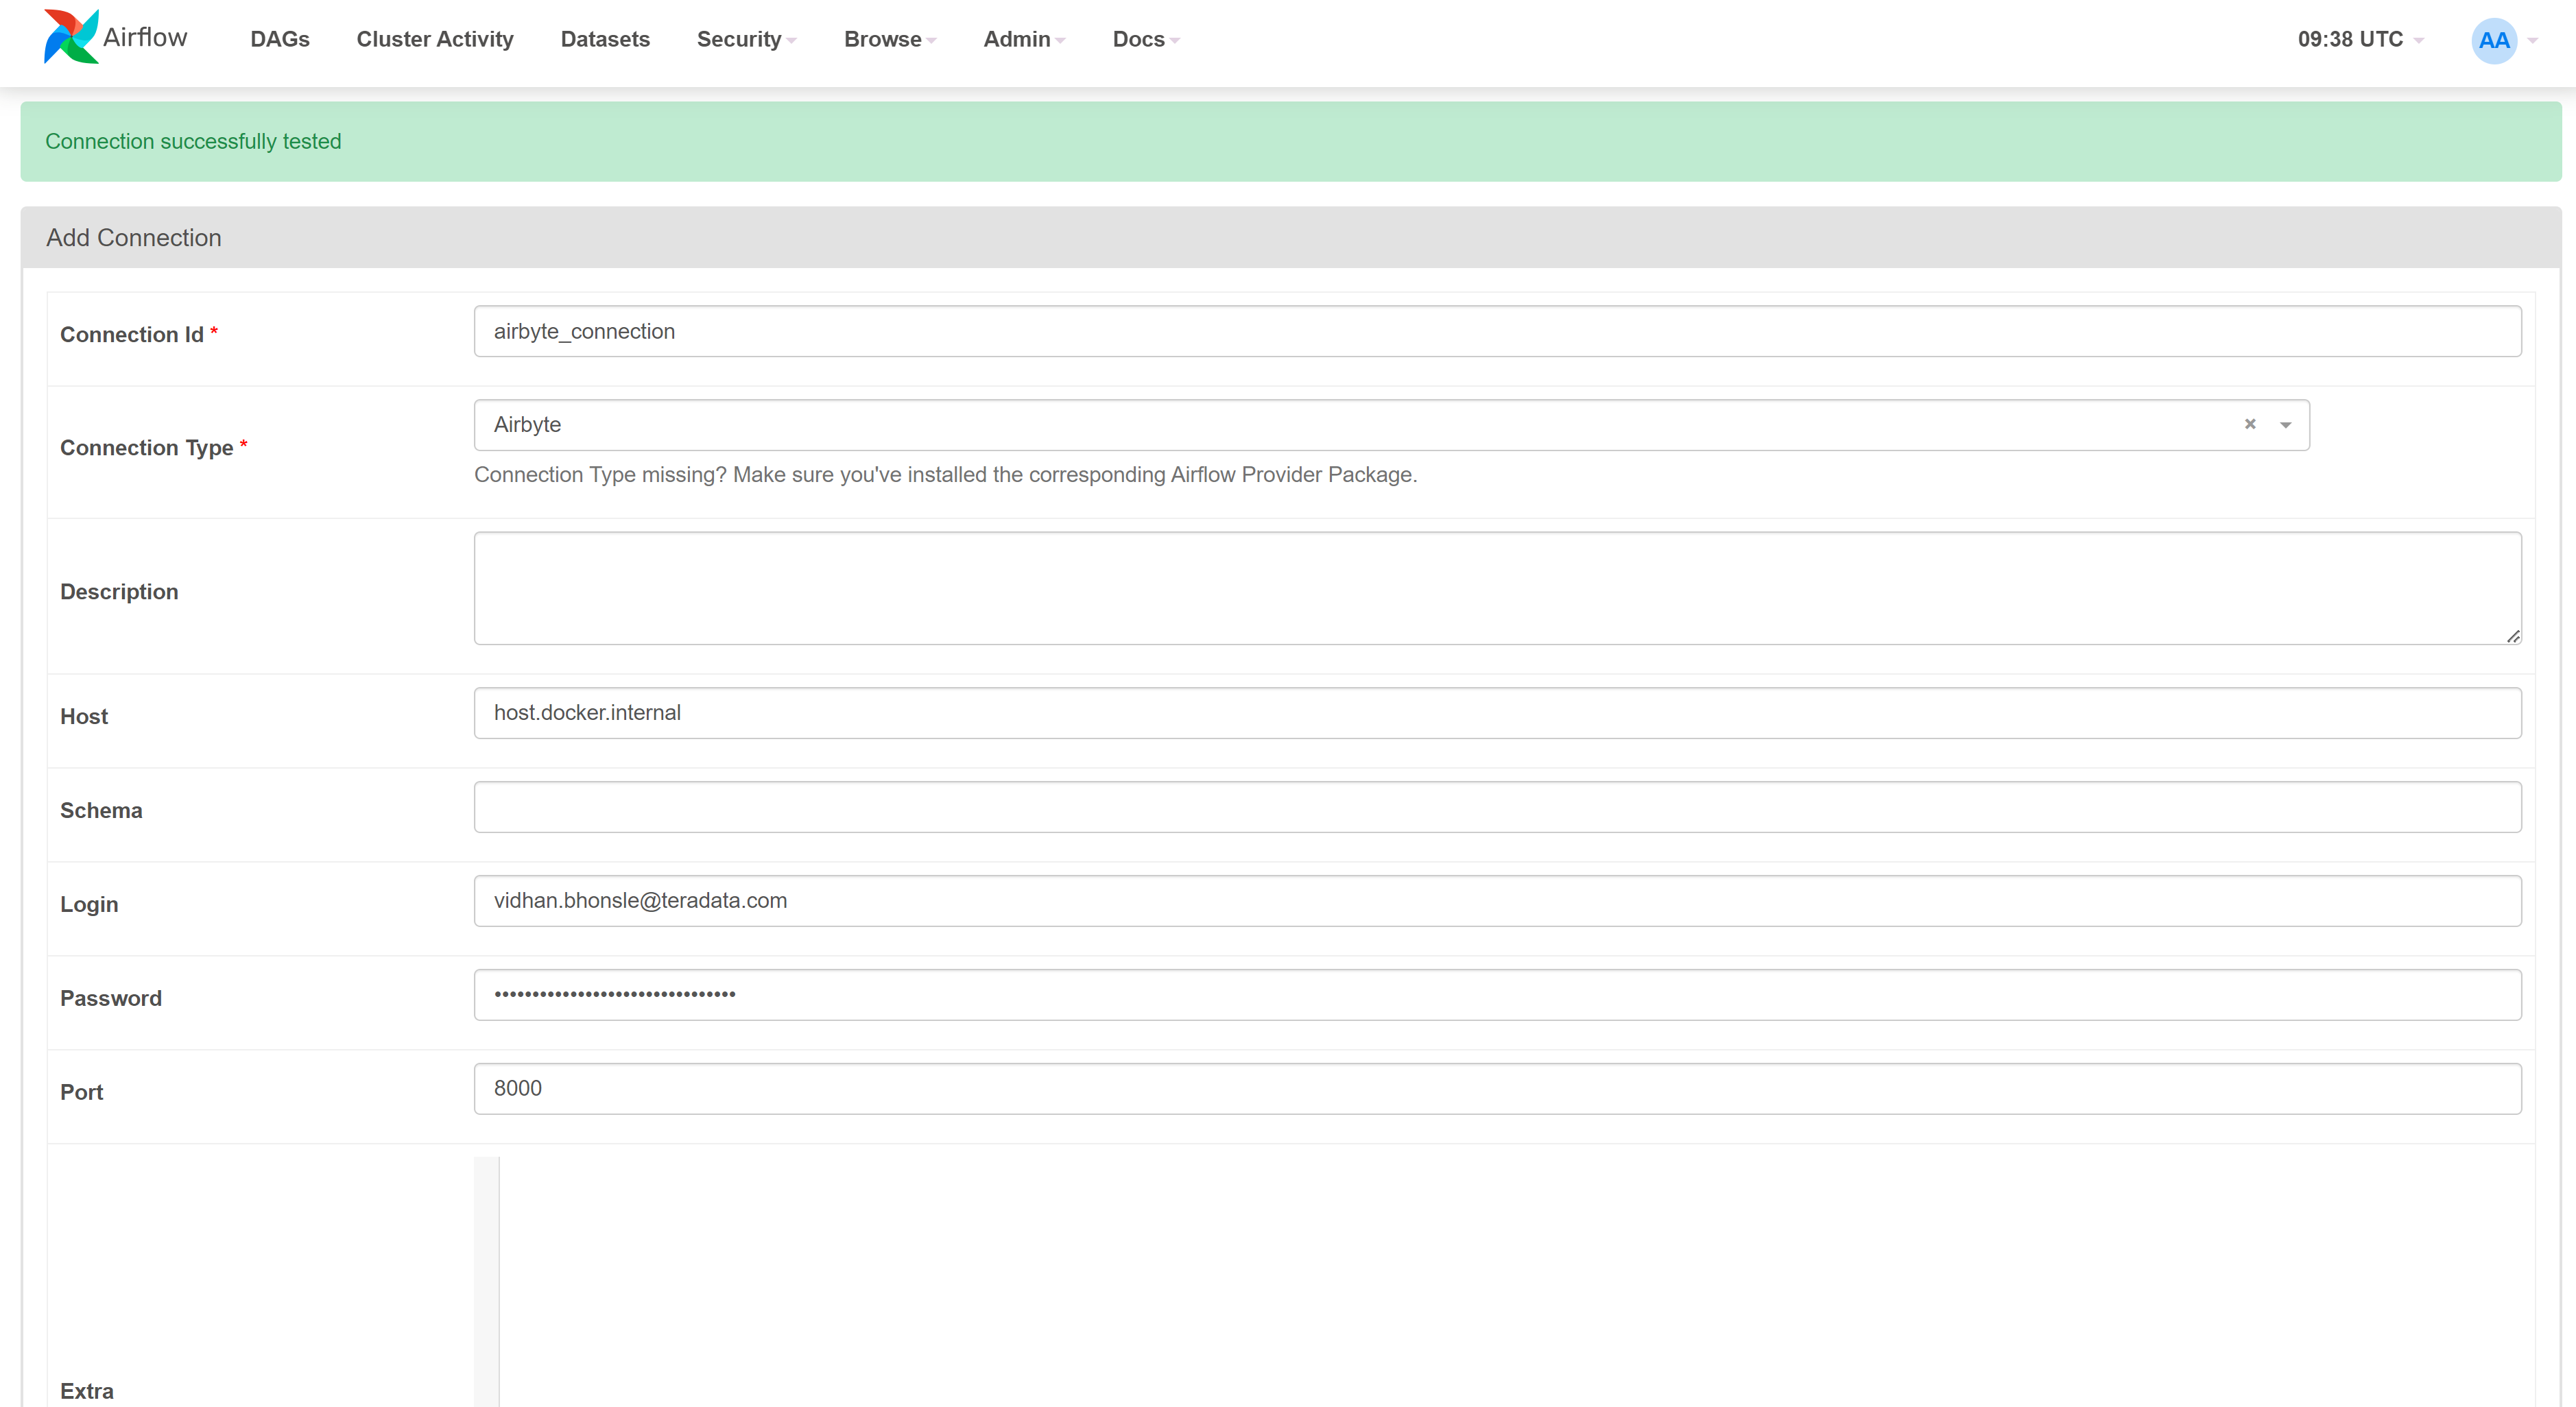
Connection id:airbyte_connectionConnection Type:AirbyteHost:host.docker.internalPort:8000Login:Your Airbyte usernamePassword:Your airbyte password (you can get it by runningabctl local credentialscommand in terminal)
- Click on the
Testbutton, and make sure you get aConnection successfully testedmessage at the top. Then, you canSavethe connection.
- Go to the
-
Create Airflow connection with Teradata
-
Go to the
Admin>Connectionstab- Click on the + button to create a new connection
- Edit the page with following values
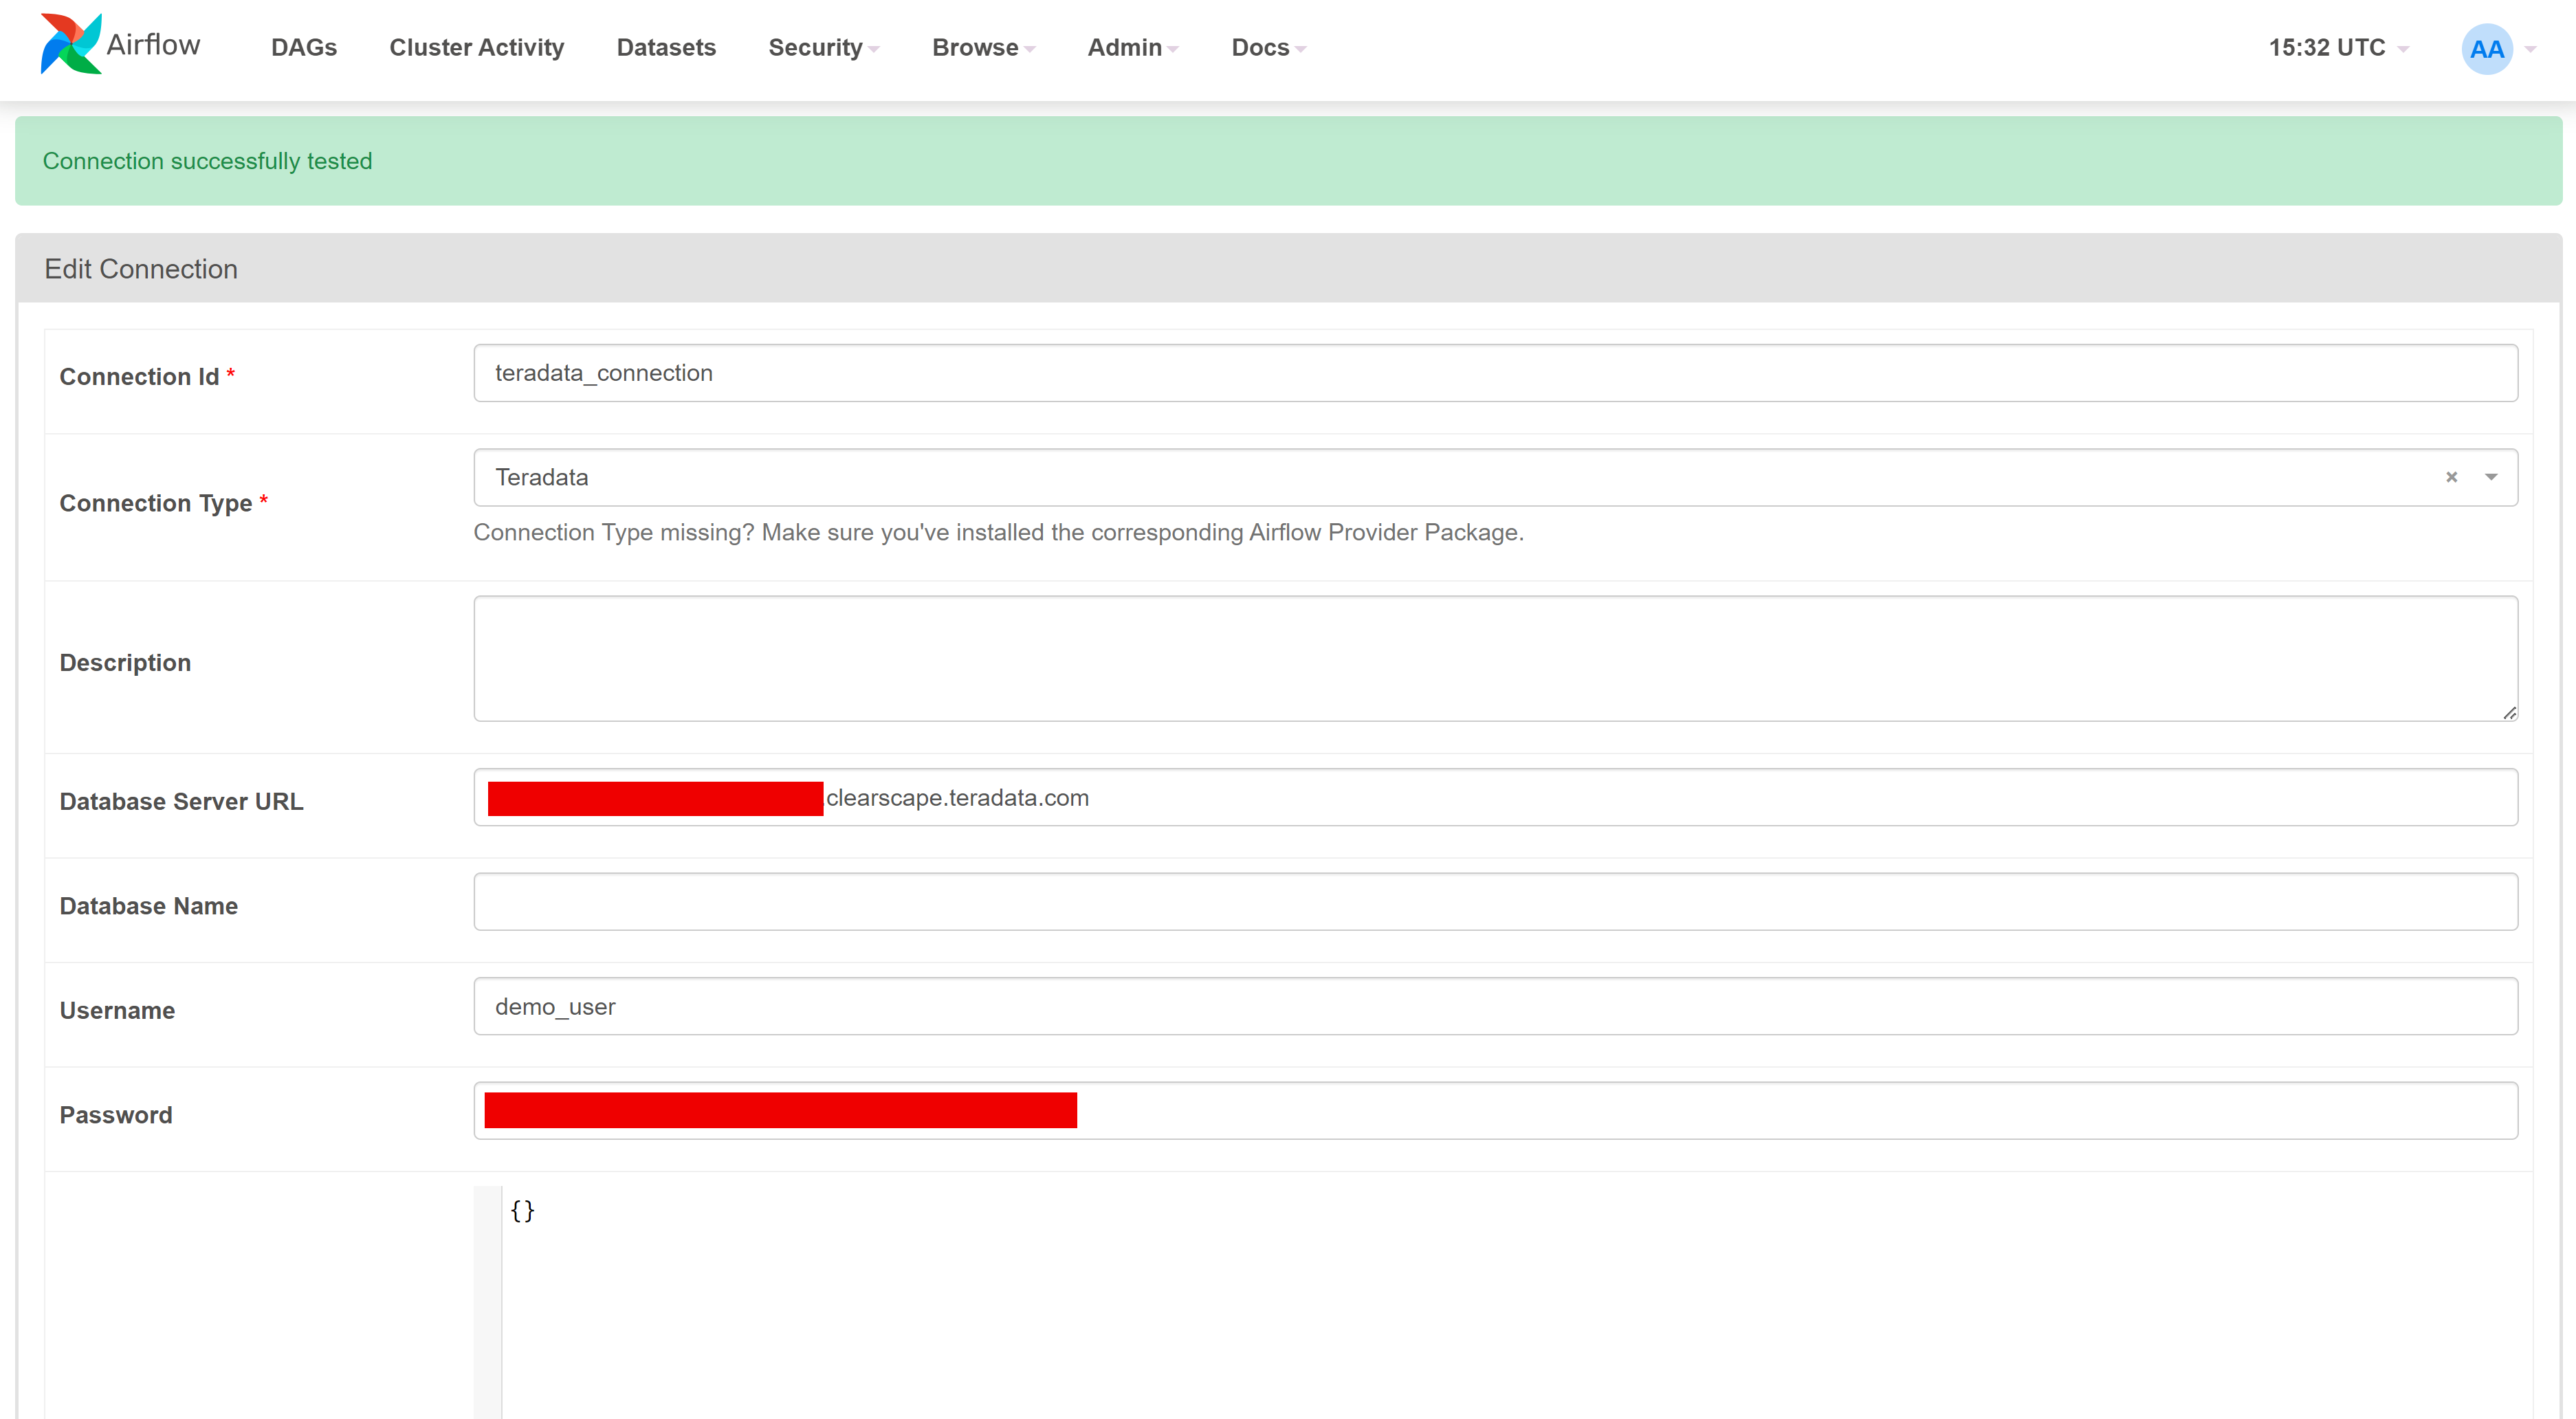
Connection id:teradata_connectionConnection Type:TeradataDatabase Server URL:Your Teradata instance hostnameUsername:demo_userPassword:Your Teradata instance password
- Click on the
Testbutton, and make sure you get aConnection successfully testedmessage at the top. Then, you canSavethe connection.
Orchestration with Airflow
After making sure all the steps till now is working fine, it is time to run your data pipeline.
- Make sure all the workflows are enabled.
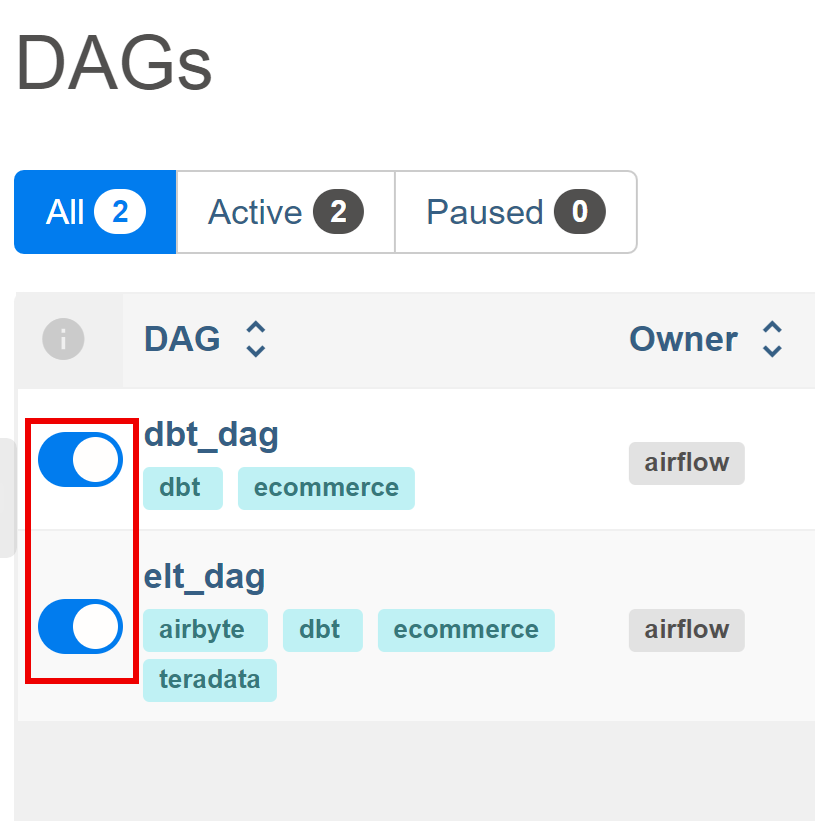
- In Airflow UI, go to
DAGssection, locateelt_dagand click on "Trigger DAG" under the "Action" column.- This will initiate the complete data pipeline, starting with the Airbyte sync from Faker to Teradata, followed by dbt transforming the raw data into
stagingandmartsmodels. - The status of
elt_dagcan be check by clicking onelt_dagand then onGraph.
- This will initiate the complete data pipeline, starting with the Airbyte sync from Faker to Teradata, followed by dbt transforming the raw data into


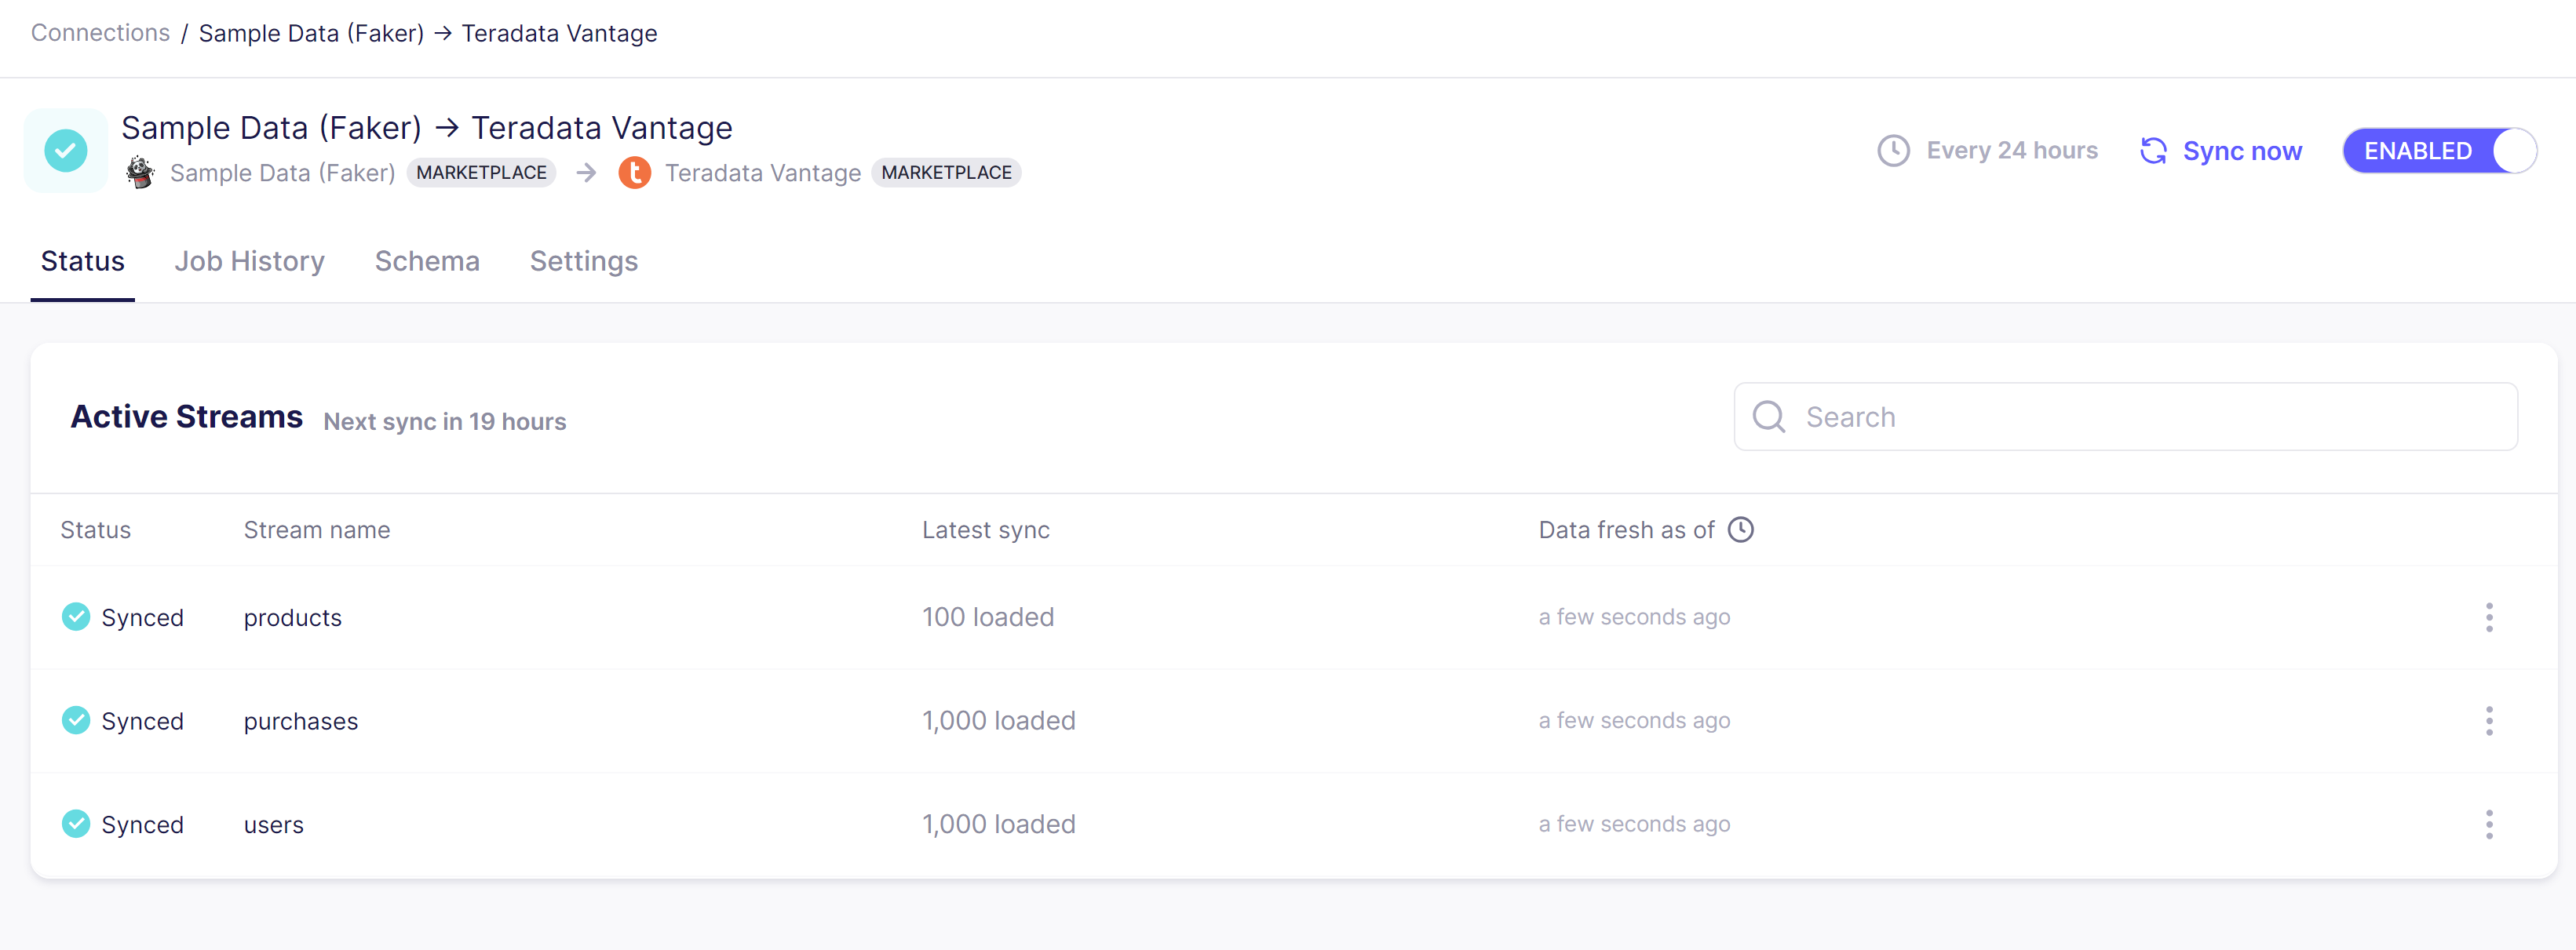
- Confirm the sync status in the Airbyte UI.
- After the completion of both the DAGs, check the
dbt_daggraph.

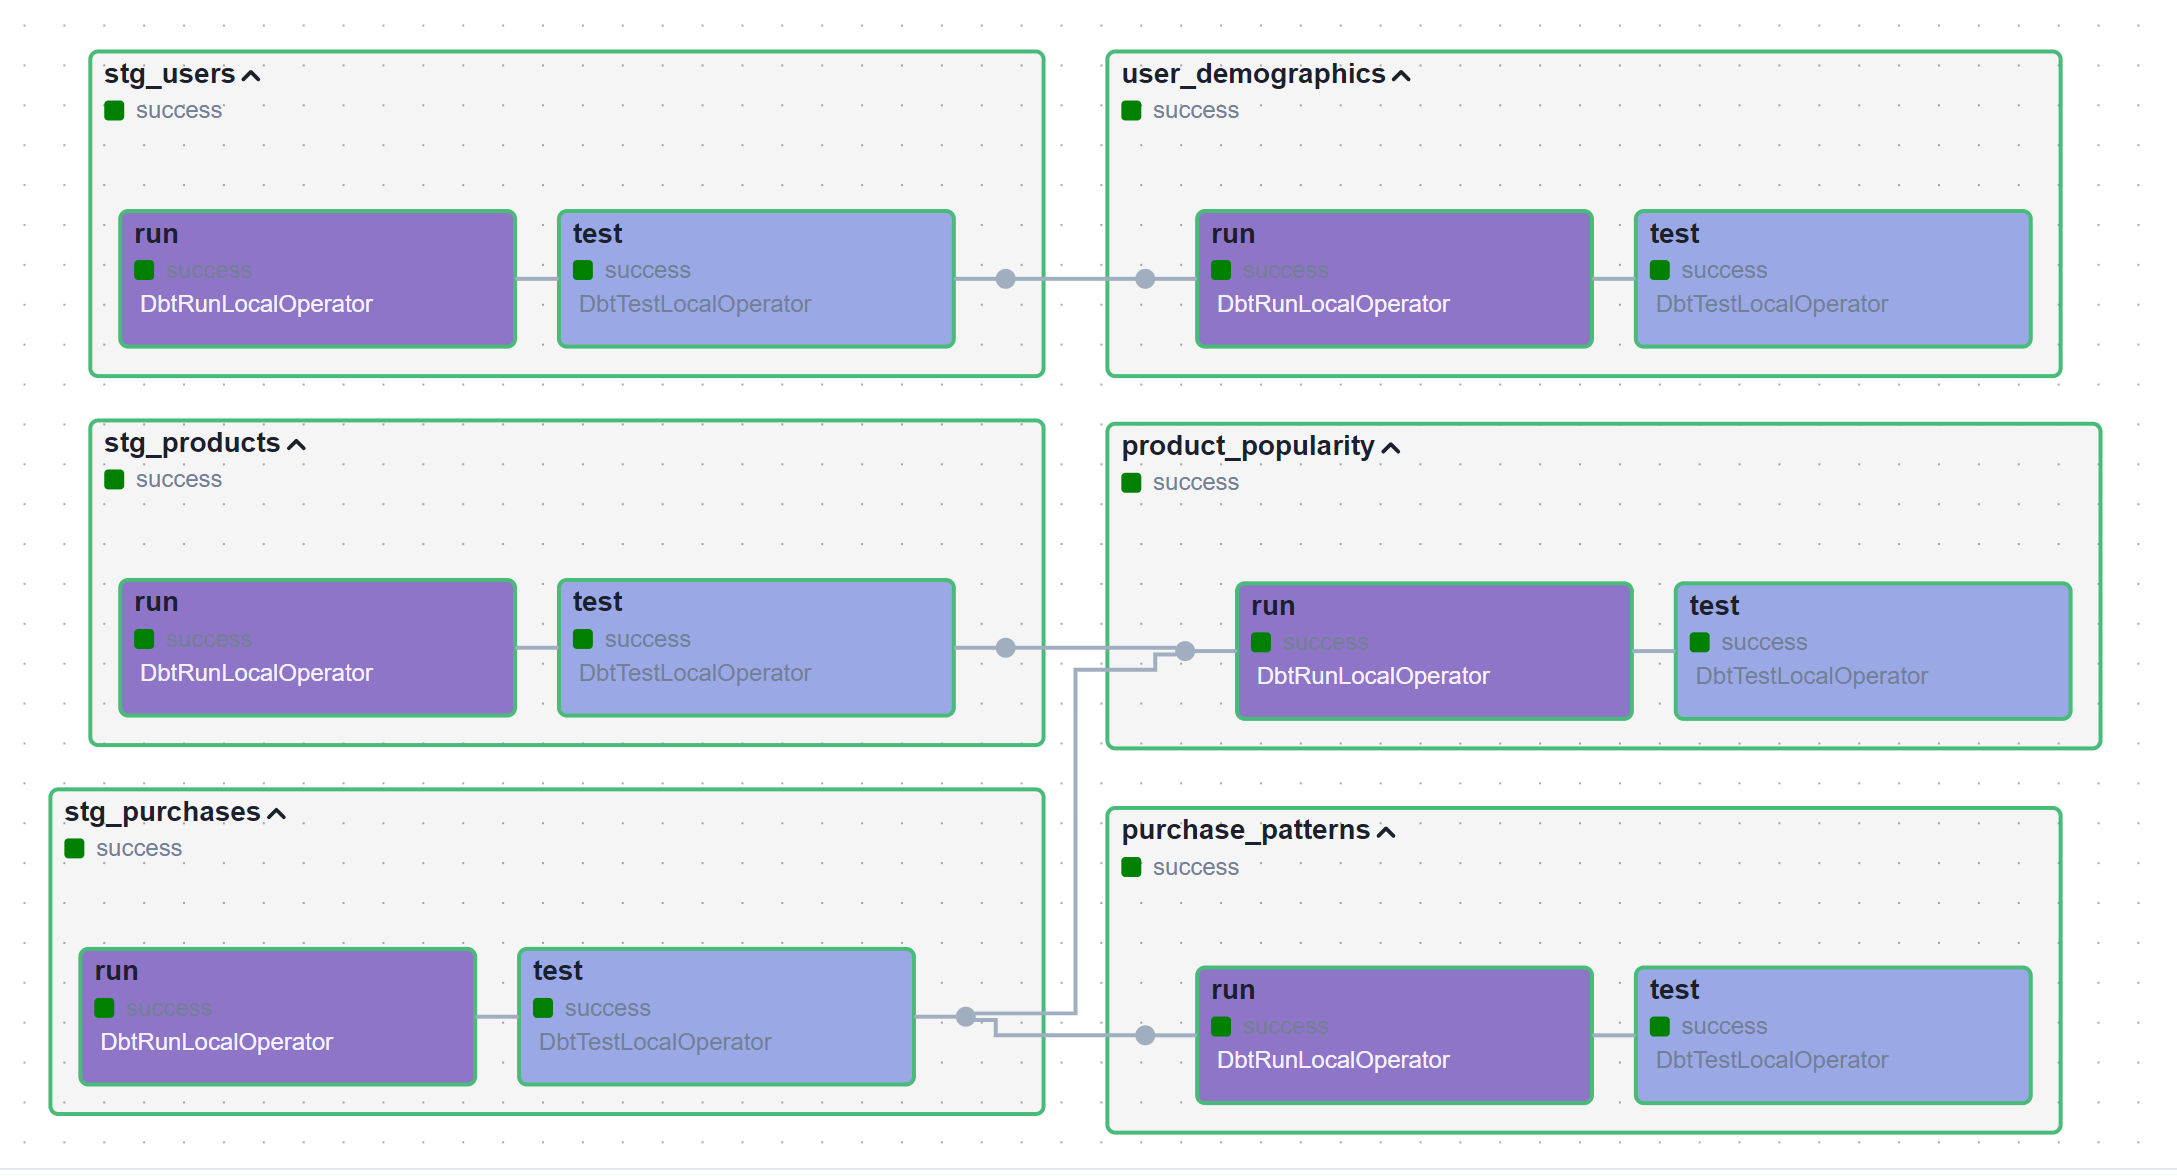
The dbt project is present in the dbt_project folder and is handled by Airflow with the help of Astronomer Cosmos
- You can check the newly created views in the
transformed_datadataset on Teradata Vantage. This can be done by using Teradata Studio or other database client UI tools like DBeaver.
Conclusion
After completing all the above steps, you should have a working stack of Airbyte, dbt and Airflow with Teradata. It can be used as starting point for your projects and can be adapted as per your scenario.