Run Vantage Express on UTM
You can now get a hosted instance of Vantage for free at https://www.teradata.com/try.
Overview
This how-to shows how to gain access to a Teradata database by running it on your local machine. Once you finish the steps you will have a working Teradata Vantage Express database on your computer.
Starting with version 17.20, Vantage Express includes the following analytics packages: Vantage Analytics Library, Bring Your Own Model (BYOM), API Integration with AWS SageMaker.
Prerequisites
- An Intel-based Mac computer.
Vantage Express runs on x86 architecture and is only supported on Intel-based Macs. Apple Silicon (M1/M2/M3) is not supported. If you have an Apple Silicon Mac, consider running Vantage Express in the cloud: AWS, Azure, Google Cloud.
- 30GB of disk space and enough CPU and RAM to be able to dedicate at least one core and 4GB RAM to the virtual machine.
- Admin rights to be able to install and run the software.
No admin rights on your local machine? Have a look at how to run Vantage Express in AWS, Azure, Google Cloud.
Installation
Download required software
- The latest version of Vantage Express. If you have not used the Teradata downloads website before, you will need to register.
- The latest version of UTM.
Run UTM installer
- Install UTM by running the installer and accepting the default values.
Run Vantage Express
-
Go to the directory where you downloaded Vantage Express and unzip the downloaded file.
-
Start UTM, click on the
+sign and selectCreate a New Virtual Machine. -
Select
Virtualize(Intel Macs). -
On
Operating Systemscreen selectOther. -
On
Hardwarescreen allocate at least 4GB of RAM and at least 1 CPU core. We recommend 10GB RAM and 2 CPUs. -
On the Other screen, set Boot Device to None and uncheck UEFI Boot, then click Continue.
-
On
Storagescreen accept the defaults by clickingNext. -
On
Shared Directoryscreen clickContinue. -
On
Summaryscreen checkOpen VM Settingsand clickSave. -
Go through the setup wizard. You only need to adjust the following tabs:
-
In the QEMU tab, verify that UEFI Boot is unchecked. No other changes are needed.
-
In the Network tab, set Network Mode to Emulated VLAN. Then click Port Forward in the left sidebar and click New to add the following port forwarding rules:
Protocol Guest Address Guest Port Host Address Host Port TCP 22 22 TCP 1025 1025
-
-
Map drives:
- Delete the default
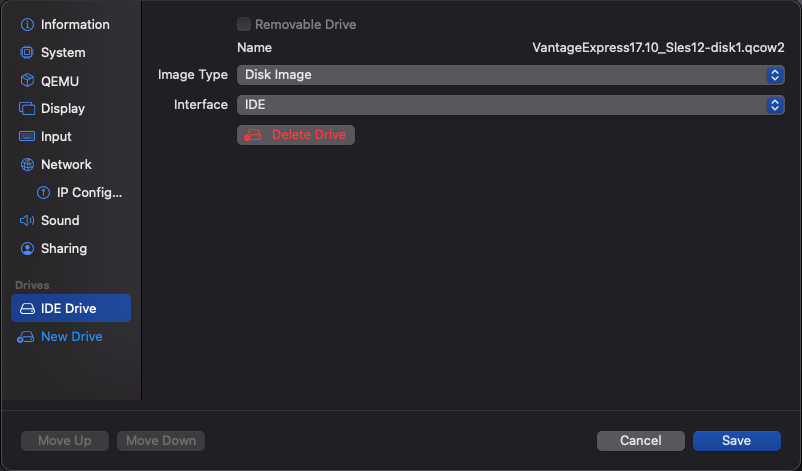
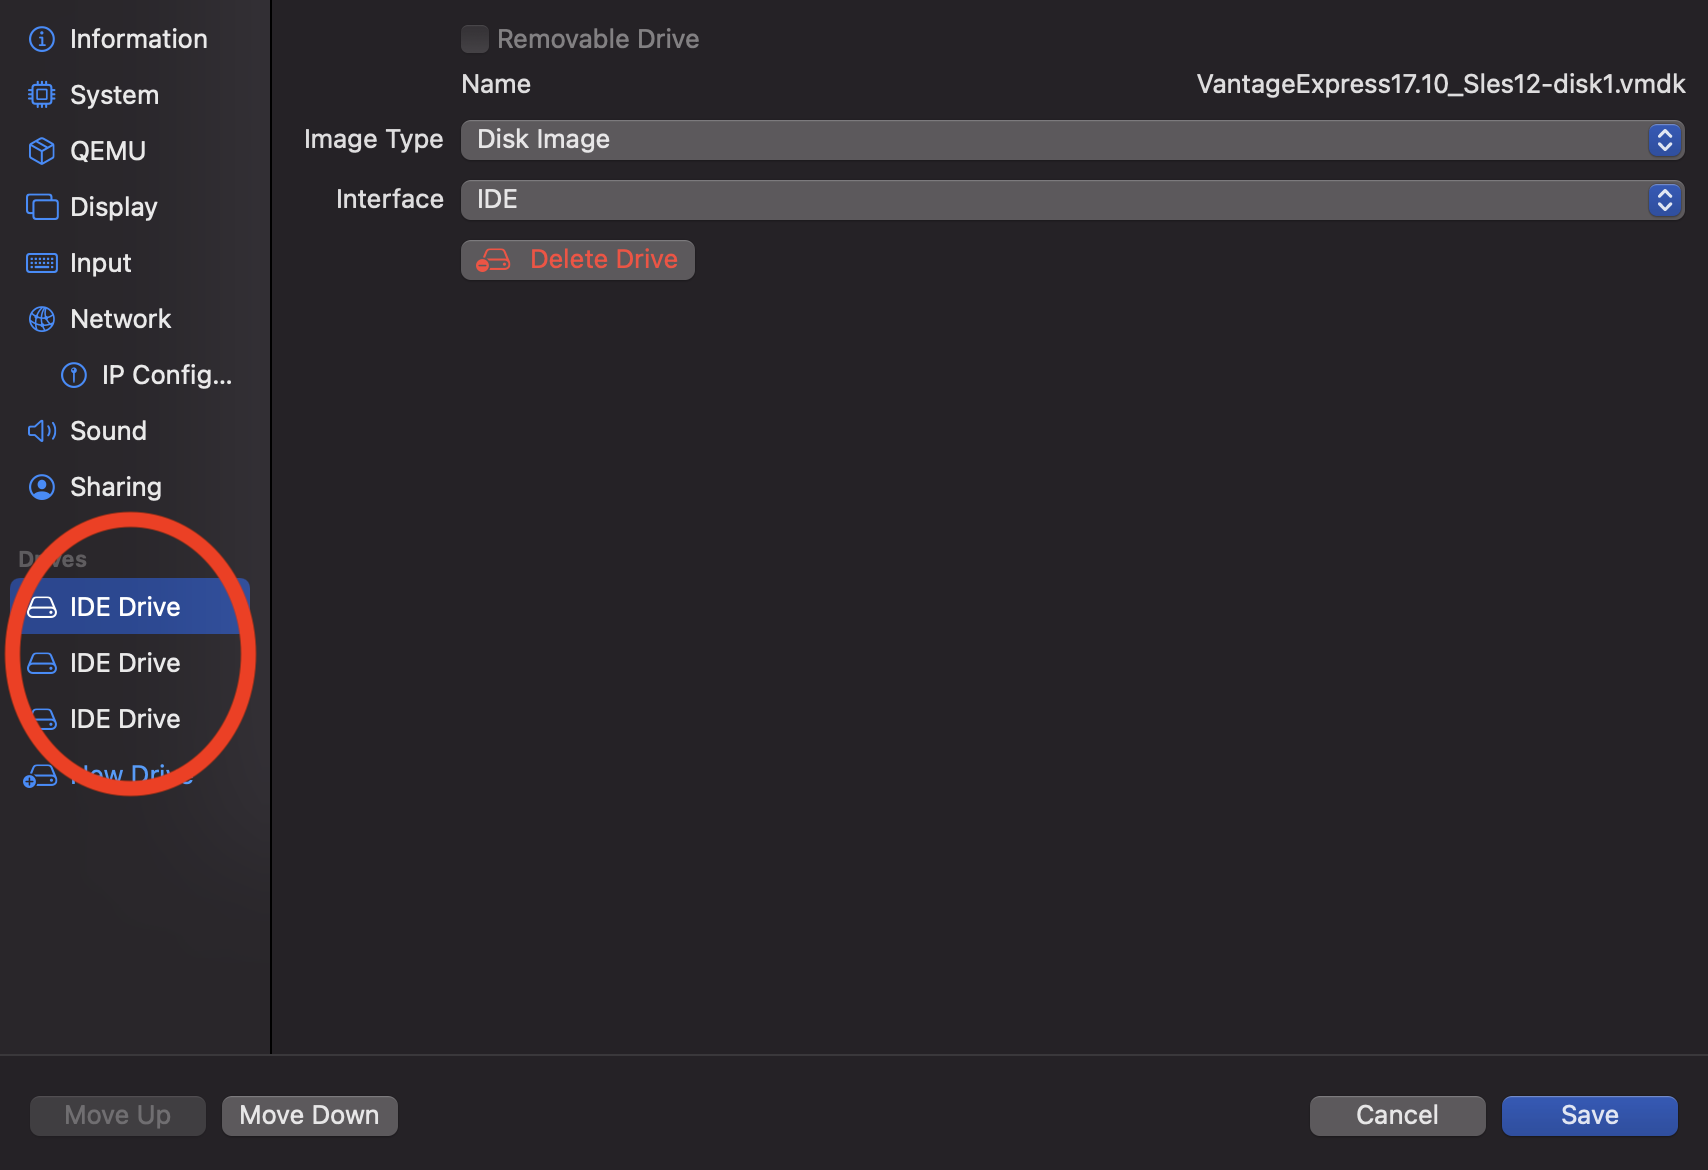
IDE Drive. - Map the 3 Vantage Express drives by importing the disk files from the downloaded VM zip file. Make sure you map them in the right order,
-disk1,-disk2,-disk3. The first disk is bootable and contains the database itself. Disks 2 and 3 are so calledpdisksand contain data. As you import the files UTM will automatically convert them fromvmdkintoqcow2format. Make sure that each disk is configured using theIDEinterface:
- Once you are done mapping all 3 drives, your configuration should look like this:
- Delete the default
-
Save the configuration and start the VM.
- Press [ENTER] to select the highlighted
LINUXboot partition.

- On the next screen, press ENTER again to select the default SUSE Linux kernel.

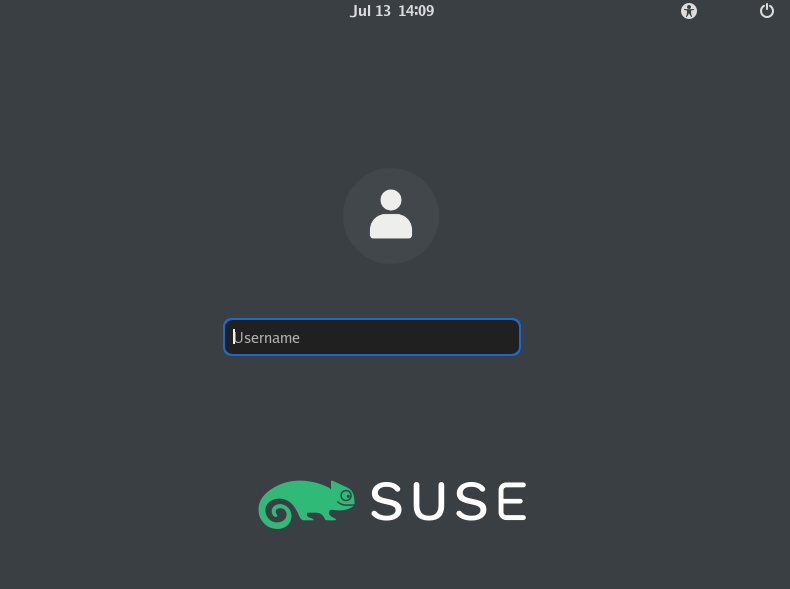
- Once the VM is up, you will see its desktop environment. When prompted for a username and password, enter
rootfor both.
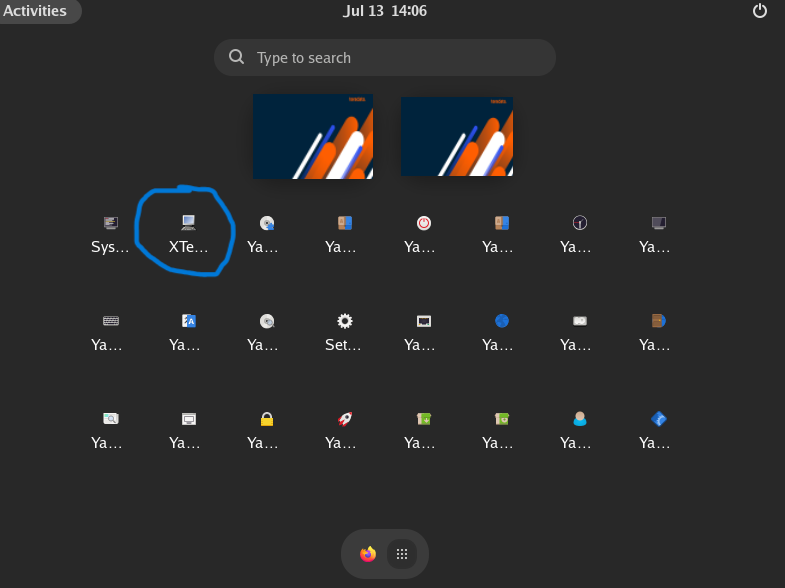
- The database is configured to autostart with the VM. To confirm that the database has started, go to the virtual desktop and start a terminal.
- In the terminal, execute the
pdestatecommand to check if Vantage has already started:
Wait until you see the following message:
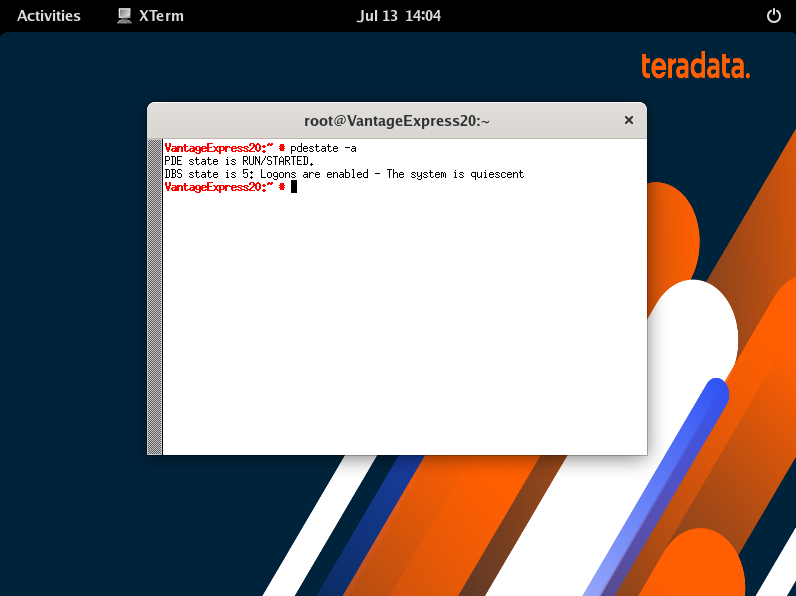
See examples of messages that pdestate returns when the database is still initializing:
PDE state is DOWN/HARDSTOP.
PDE state is START/NETCONFIG.
PDE state is START/GDOSYNC.
PDE state is START/TVSASTART.
PDE state is START/READY. PDE state is RUN/STARTED.
DBS state is 1/1: DBS Startup - Initializing DBS Vprocs PDE state is RUN/STARTED.
DBS state is 1/5: DBS Startup - Voting for Transaction Recovery PDE state is RUN/STARTED.
DBS state is 1/4: DBS Startup - Starting PE Partitions PDE state is RUN/STARTED.
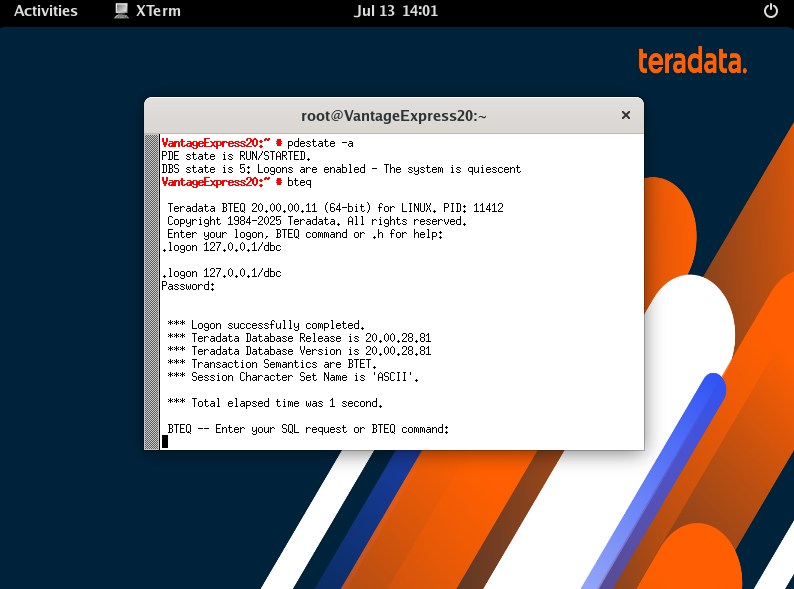
- Now that the database is up, you can log in to it:
- At the shell prompt, type
bteq. - At the logon prompt, type
.logon 127.0.0.1/dbc. - At the password prompt, type
dbc.- If successful, the Basic Teradata Query (BTEQ) session confirms that you are logged into BTEQ.
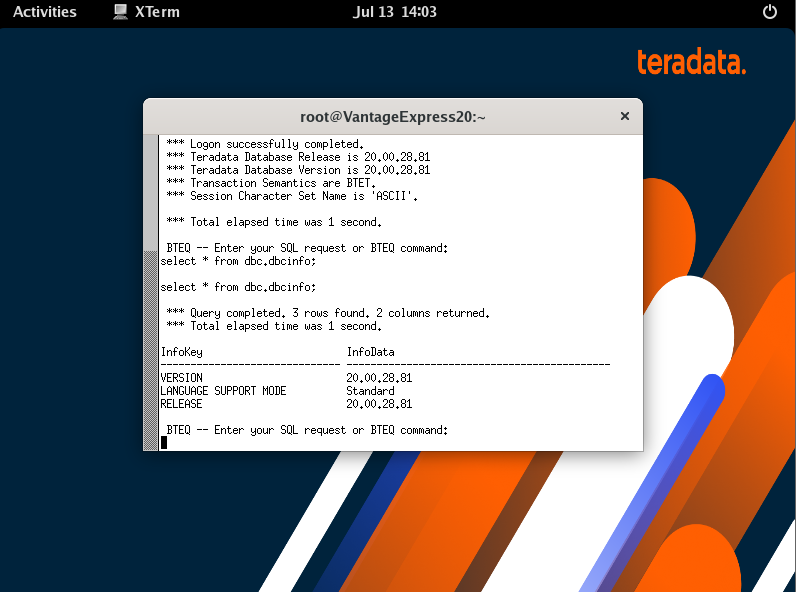
- Run the SQL test script by typing the following:
- A successful test returns:
*** Query completed.
In this guide we have covered how to quickly create a working Teradata Vantage environment on an Intel-based Mac. We used Teradata Vantage Express in a VM running on UTM. We installed all software locally and didn't have to pay for cloud resources.