Configure a Teradata connection in DBeaver
Overview
This how-to shows how to create a Teradata connection with DBeaver.
Prerequisites
- Access to a Teradata instance.
Note
If you need a test instance of Teradata, you can provision one for free at https://www.teradata.com/try
- DBeaver installed. You can use DBeaver Community or one of the DBeaver PRO editions.
Add a Teradata connection to DBeaver
-
Start the new connection wizard by clicking the plug icon (
 ) in the upper-left corner of the application window, or go to
 Database -> New Database Connection. -
On the
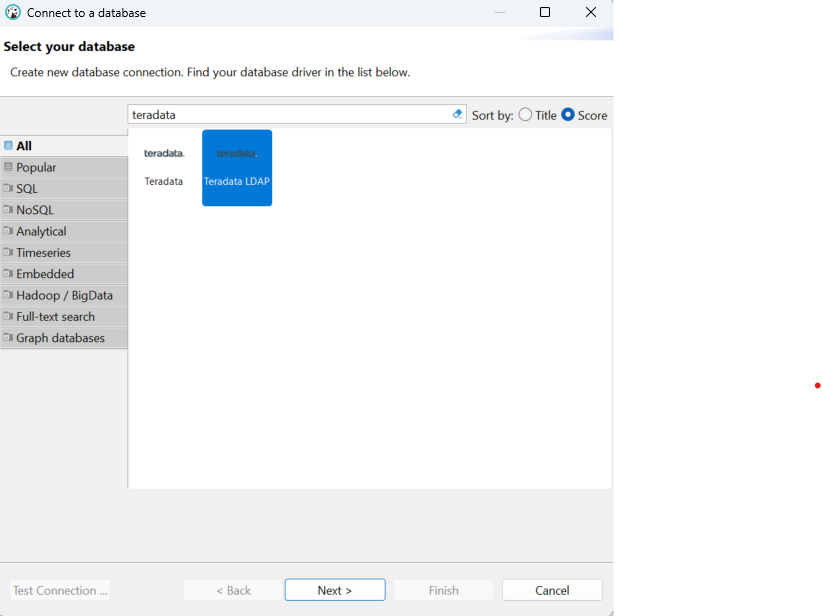
Select your databasescreen, start typingteradataand select the Teradata icon.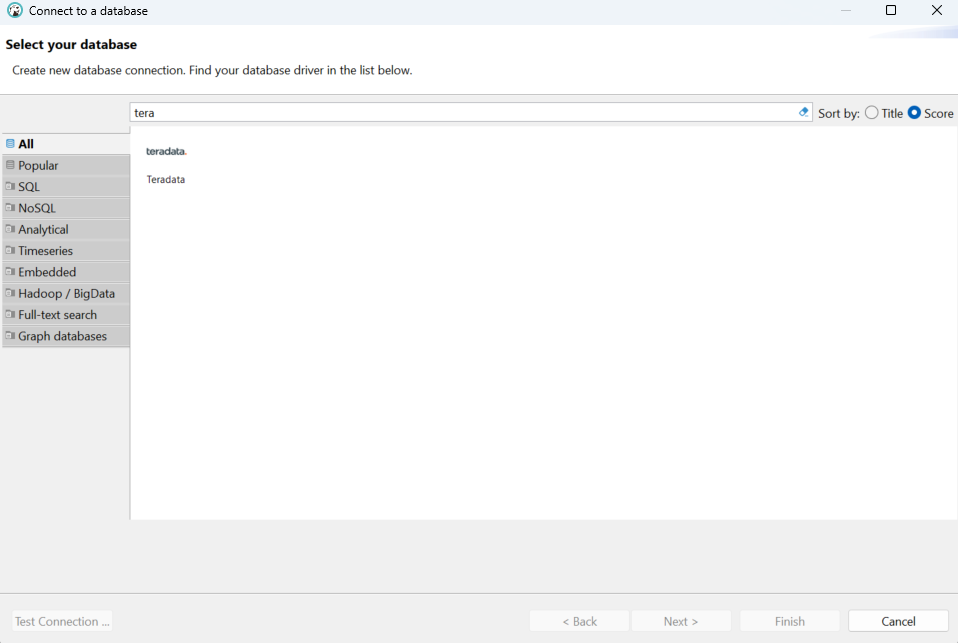
-
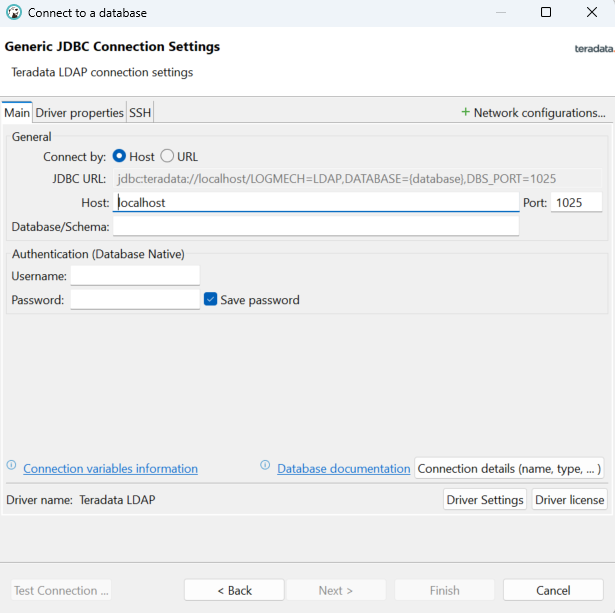
On the main tab, set the primary connection settings. The required settings are
Host,Port,Database/Schema,Username, andPassword.TipIn Teradata, when a user is created, a corresponding database with the same name is created as well. DBeaver requires you to enter a database or schema. If you do not know which database or schema to connect to, use your username in the
Database/Schemafield.TipWith DBeaver PRO editions, you can use the standard ordering of tables or hierarchically link tables to a specific database or user. Expanding and collapsing databases or users helps you navigate from one area to another without cluttering the Database Navigator window. Check the
Show databases and users hierarchicallybox to enable this setting.TipIn many environments, Teradata can only be accessed using the TLS protocol. In DBeaver PRO editions, check the
Use TLS protocoloption to enable TLS.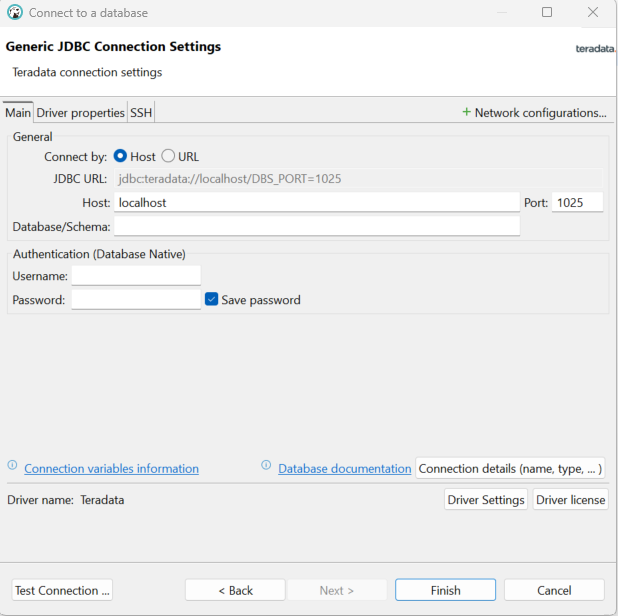
-
Click
Finish.
Optional: Logon Mechanisms
The default logon mechanism for a Teradata connection in DBeaver is TD2. To use a different logon mechanism, create a copy of the Teradata driver and update the URL template.
-
Go to
Database -> Driver Manager. -
From the list of driver names, select
Teradataand clickCopy.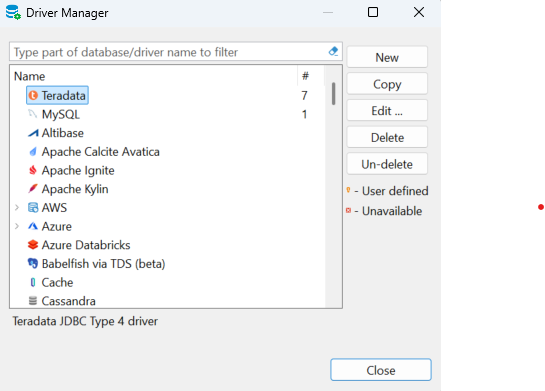
-
In the
URL Templatefield, define your selected logon mechanism. For example, to use LDAP, enter:
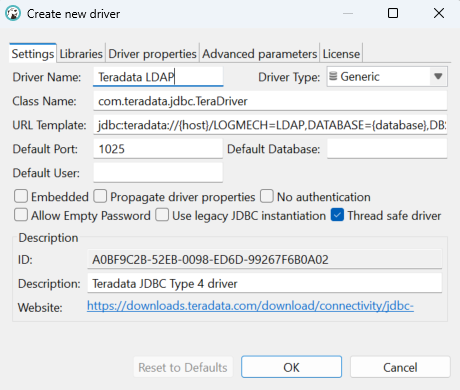
- Click "OK".
- The copied driver is now available for creating connections with the selected logon mechanism.
- The process for setting up a new connection with the alternative logon mechanism is the same as described above for adding a new connection.
Optional: SSH tunneling
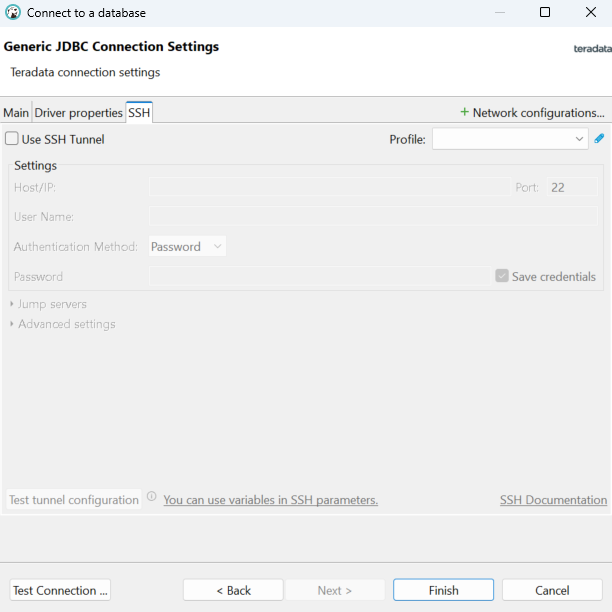
If your database cannot be accessed directly, you can use an SSH tunnel. All settings are available on the SSH tab. DBeaver supports the following authentication methods: user/password, public key, SSH agent authentication.
Summary
This how-to showed you how to create a Teradata connection in DBeaver.